Hey, hey! Have you heard of the craft "paper quilling?" I first encountered it in the pages of Oprah Magazine.
 |
| via Yulia Brodskaya |
Instead of the usual photo, the article had these letters/words rendered in paper quill resulting in a colorful and 3-dimesional effect. I was blown away! I was even more impressed with the artist behind it, Yulia Brodskaya.
Of late, I've seen a lot of paper quilling by different artists, I just had to try it out.
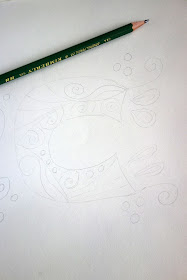
I sketched my initial -- a simple letter C. I drew some squiggles as a guide for the quills that I'd be adding.
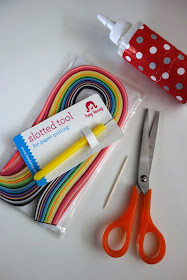
I bought this kit that included a slotted quilling tool and colorful paper strips from the craft store. All purpose glue, a toothpick, and a pair of scissors were the other tools I used.
The strips measured 5 cm (width) by 38 cm (length) and came in these attractive colors.
You can make your own strips using colorful paper cut with a pair of scissors or an X-acto knife and a self-healing mat. Extra points if you're using paper scraps!
After deciding which colors to use, I started with the outline of the letter C. I put a dab of glue on a smooth and stable surface (bottle cap), dipped my toothpick here, and using the toothpick, applied glue on the edge of the paper strip. I then used some pressure so that the paper strip attached to the sketch.
I just followed the same process, being tidy as I went along.
The slotted tool is useful to make the quills. It has a plastic handle and a needle-like tip that has a slotted opening in the middle.
This catches one edge of the paper strip in place as you twirl the rest of the stip to make circles and other flowy shapes. A pair of tweezers or needle-nose pliers might work as an alternative.
I just pried the quills with my fingers to make them bigger and used the slotted tool to coax the paper strip to follow my design.
With an eraser, I removed any visible pencil lines.
Here is my very first paper quill project...TADA!
Hopefully next time, my circles will have less edges, I'll try out more elaborate designs, and work faster.
Have you tried paper quilling? Any tips I should know of? Thanks!


Congrats on getting further than I ever did, Claire! I was also similarly blown away when I first saw paper quilling projects and even got myself a small starter kit of supplies. Alas, so far, I have only managed to make myself some sample shapes. I've heard that making the quills themselves require some practice to get them tightly coiled and smooth... and also to use the whole strip.
ReplyDeleteI haven't tried quilling since the art teacher taught us how in sixth grade. I need to give it a go again! Your C turned out well, a happy, colorful C!
ReplyDeleteWhat a fun and pretty craft! And how nice to make art that can be so personal. Now I want to try this next time someone I know has a baby...
ReplyDelete