08 January 2023

A New Use for Old Calendars

Do you still use paper calendars? 

I keep one in my office to track deadlines and reminders. I like that I can immediately see the whole month in a glance. Apart from its utilitarian purpose, I'm partial to calendars with dreamy photos (like a faraway beach or a majestic mountain range) and whimsical illustrations. 


calendar, Rifle Paper Co., Anna Rifle Bond, Cities calendar, blah to TADA, crafts made from old calendars, recycle old calendars

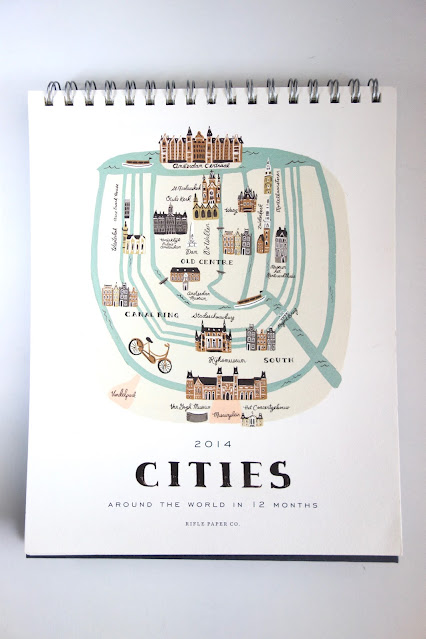
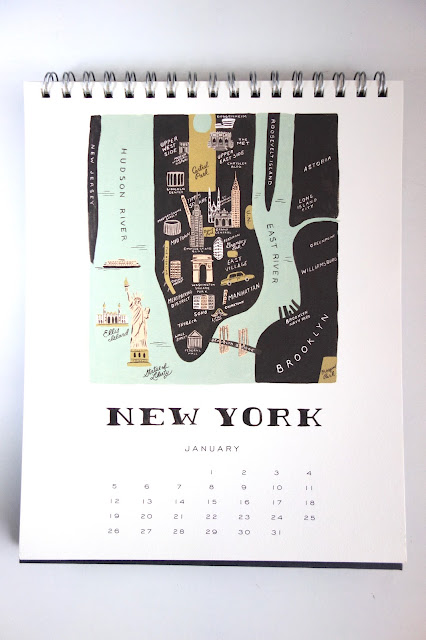
This is an old calendar by Rifle Paper Co. (they produce a new version every year). On each month, there's a playful map of a city. Some, I've been lucky enough to have visited:

calendar, Rifle Paper Co., Anna Rifle Bond, Cities calendar, blah to TADA, crafts made from old calendars, recycle old calendars, New York

calendar, Rifle Paper Co., Anna Rifle Bond, Cities calendar, blah to TADA, crafts made from old calendars, recycle old calendars, London

calendar, Rifle Paper Co., Anna Rifle Bond, Cities calendar, blah to TADA, crafts made from old calendars, recycle old calendars, Paris

And others that I still dream of crossing off my travel list:

calendar, Rifle Paper Co., Anna Rifle Bond, Cities calendar, blah to TADA, crafts made from old calendars, recycle old calendars, Sydney, Australia

calendar, Rifle Paper Co., Anna Rifle Bond, Cities calendar, blah to TADA, crafts made from old calendars, recycle old calendars, Moscow

I chose one city that holds a special place in my heart:

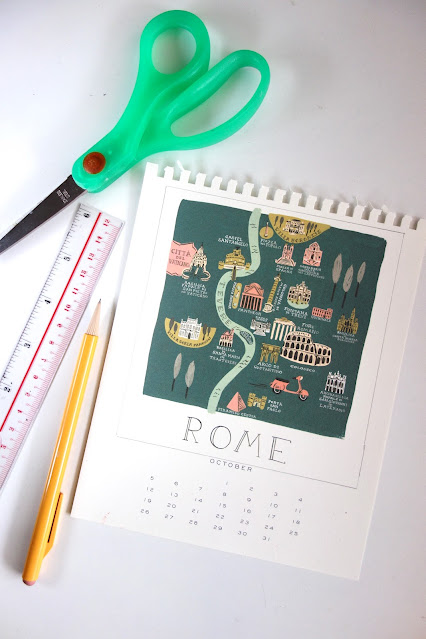
calendar, Rifle Paper Co., Anna Rifle Bond, Cities calendar, blah to TADA, crafts made from old calendars, recycle old calendars, Rome

What's not to love about Rome? The hearty food, the decadent gelato, the historic sites, breathtaking churches, and the stunning landscapes...okay, you caught me drooling there. But I do love Rome!

calendar, Rifle Paper Co., Anna Rifle Bond, Cities calendar, blah to TADA, crafts made from old calendars, recycle old calendars, Rome, scissors, pencil, ruler

So I chose this print and cut out the calendar part. 

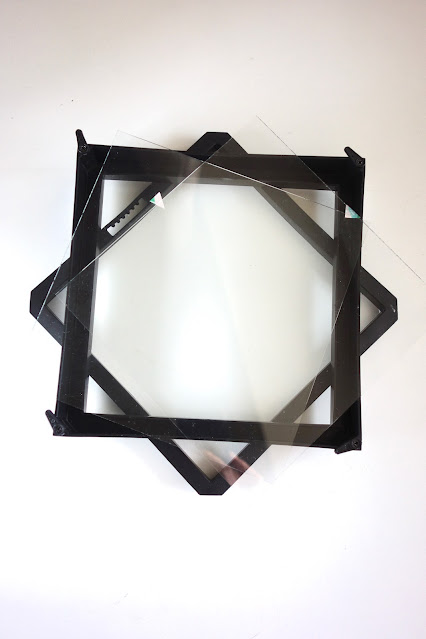
calendar, Rifle Paper Co., Anna Rifle Bond, Cities calendar, blah to TADA, crafts made from old calendars, recycle old calendars, picture frame

I got this picture frame at the dollar store. I like it for the price and it's made of two pieces of glass, not the typical glass and wood combination.

calendar, Rifle Paper Co., Anna Rifle Bond, Cities calendar, blah to TADA, crafts made from old calendars, recycle old calendars, picture frame

I removed the label and prepped the picture frame by spraying it with glass cleaner to remove fingerprints and dust. Allow the glass to dry.

calendar, Rifle Paper Co., Anna Rifle Bond, Cities calendar, blah to TADA, crafts made from old calendars, recycle old calendars, picture frame, tips when hanging pictures in a frame

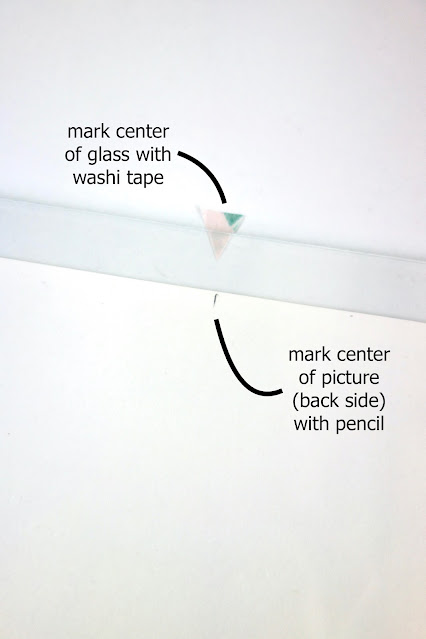
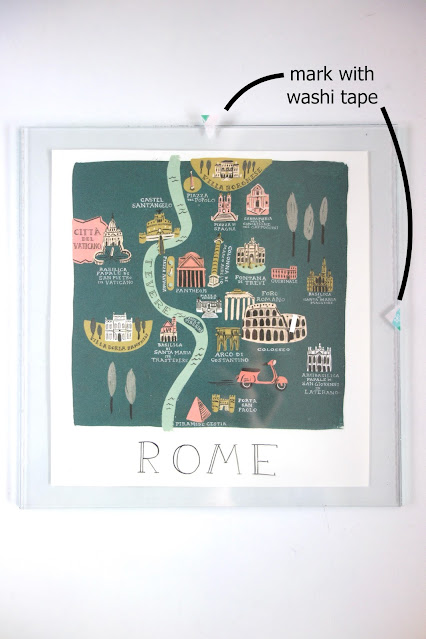
To center the print on the frame, here's a little trick: I use a ruler to find the midpoint of the glass and mark it with a piece of washi tape. I do the same with the print and mark the back side with a pencil. Line up the washi tape and the pencil mark to make sure the print is centered on the frame. 

calendar, Rifle Paper Co., Anna Rifle Bond, Cities calendar, blah to TADA, crafts made from old calendars, recycle old calendars, picture frame, tips when hanging pictures in a frame, Rome, washi tape

This tip is important if you plan to have bare borders around your print once it's in the picture frame. You can add some tape to keep the print in place. Sandwich the print in between the two pieces of glass and remove the washi tape markers.

calendar, Rifle Paper Co., Anna Rifle Bond, Cities calendar, blah to TADA, crafts made from old calendars, recycle old calendars, picture frame, tips when hanging pictures in a frame, framed calendars

Mount the glass on the frame and display it where you'll see it everyday. Put it up solo or assemble a gallery wall like these:

Framed illustrations from the 2016 Cities Calendar designed by Anna Bond for Rifle Paper Co.
via Pinterest

Travel the world calendar from Rifle Paper Co turned to art. Inspired by pinner and blogger at the creativity exchange.
via Pinterest

Turn calendars into beautiful gallery walls: a great DIY wall art idea from the Creativity Exchange.
via The Creativity Exchange

That is just one way we can turn old calendars from blah to TADA!

If you'd like more crafty ideas delivered to your inbox, please subscribe here

01 January 2023

The Joy of Journaling

Happy New Year and happy new journals!

journaling, Leuchtturm notebook, Leuchtturm Journal, Moleskine journal, Moleskine notebook, Pilot pens, notebooks, stationery, blah to TADA

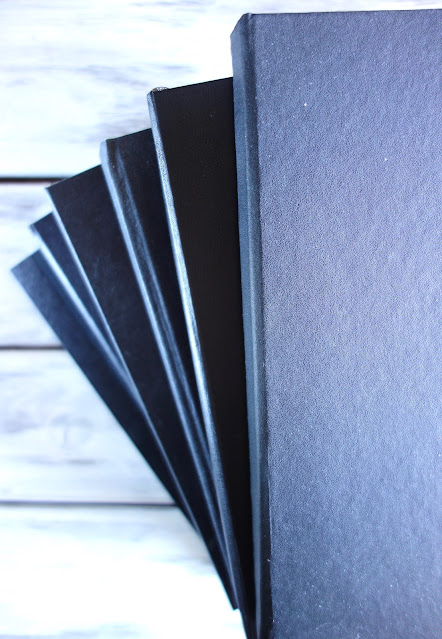
I know that I'm not the only one with a deep obsession with notebooks and journals. Many of you are, too. I welcome all kinds but these have been my favorite for the past few years: Moleskine, Shinola, and Leuchtturm (pronounced this way). They're a little pricier but it's a tiny luxury that I use daily and helps with my productivity as a Bullet Journal.

As you can see, I've amassed quite a number over the years:

Moleskine journal, Shinola journal, Leuchtturm1917 journal, black journals, notebooks, journal, journaling, journaling ideas, bullet journal, blah to TADA

Maybe you have notebooks, too, but are intimidated by the blank page.

MHN, how to fill a blank page, journaling, journaling ideas, bullet journal, self care rituals, blah to TADA

Not too long ago, I joined the wise writer and artist Morgan Harper Nichols on Instagram Live where she talked about this very subject.

Morgan Haper Nichols says journals symbolize that we are present in the moment. She recommends that we set an intention when starting one (ex. fill the pages). She also says, "Remember that this is not a place for perfection but a place where I can be for the moment."

Here are her suggestions on how to fill the page:


Write down your observations (ex. I am wearing a sweater, I can hear the cars outside, I can smell my coffee).

gratitude list, gratitude, attitude of gratitude, journal, journaling, journaling ideas, bullet journal, blah to TADA, markers, doodles, sketches

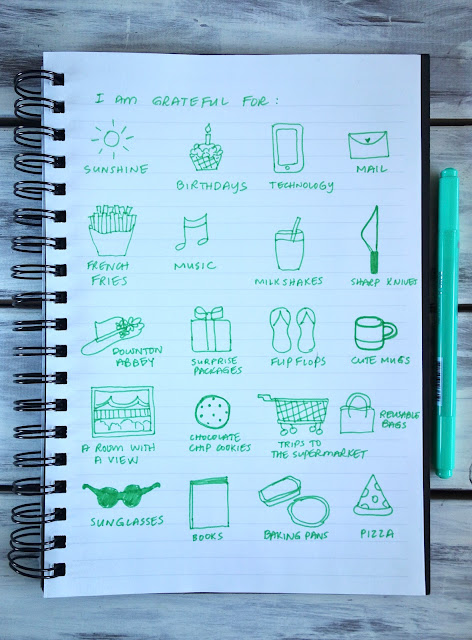
Start a gratitude list.

dream list, journal, journaling, journaling ideas, bullet journal, blah to TADA, Sharpie pen, Crayola markers

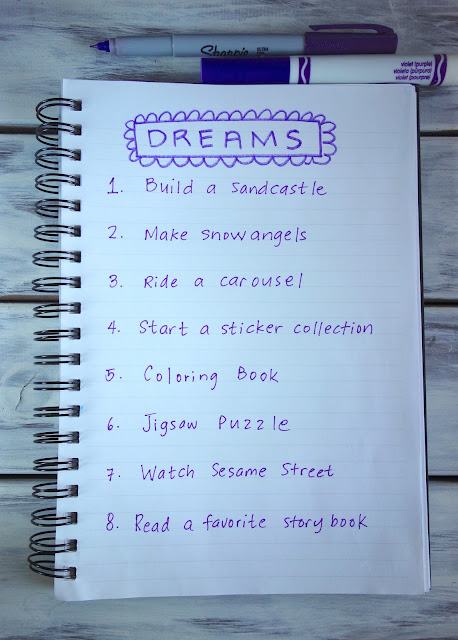
Make a dream list. These are not goals (goals are for grown-ups). This list is for the 6 year old you (ex. build a lego castle, make up your own board game, try out 40 different kinds of chocolate) to keep childhood wonder alive.

doodles, doodling, bullet journal, journal, journaling, journaling ideas, blah to TADA, Sharpie pens

Fill the page with doodles (ex. flowers, hearts, write in cursive or bubble letters). Break the rules and have fun in small ways. You don't always have to have the right words.

stamping, doodles, doodling, bullet journal, journal, journaling, journaling ideas, blah to TADA, rubber stamps, craft stamps, ink pad

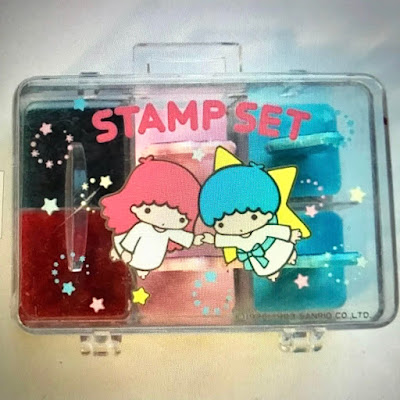
Here's another version of "doodling" this time using a bunch of rubber stamps and ink pads. My most cherished rubber stamps when I was a kid were these Little Twin Star stamps that I would decorate notebooks and stationery with:

Little Twin Stars, Kiki and Lala, stamps and ink pad, Sanrio, blah to TADA, nostalgia,
via e-bay

Sigh. I wish I took better care of this. But my love for rubber stamps has not diminished. I still love collecting them for various craft projects like Bible journaling, block printing, and gift wrapping...TADA!  

stamping, doodles, doodling, bullet journal, journal, journaling, journaling ideas, blah to TADA, rubber stamps, craft stamps, ink pad

I guarantee that filling a whole page is not only fun but also meditative.

Morgan Harper Nichols encourages us to journal to "Keep that sense of hope alive."

May you fill your notebooks with things that bring you joy -- today and when you look back years from now.

Thank you for stopping by and see you again next week!

30 December 2022

Bon Voyage 2022

Hi friends!

Once again, we have reached the end of another year.

journal, bullet journal, diary, sketchbook, quotes, intentions, lists, watercolor, water brush, Pentel pen, blah to TADA

I started the year by filling a blank page with intentions, an encouraging quote, and a short list.

All throughout 2022, I did my best to fill my days (or my blank page) with shapes, colors, textures, wisdom, feelings, gratitude, small achievements, small failures, and lots of good memories.

Thank you 2022 for all your blessings!


journal, bullet journal, diary, sketchbook, quotes, intentions, lists, watercolor, water brush, Pentel pen, blah to TADA

Let's keep adding life to all the blank pages of the New Year. Let's continue to turn "blah to TADA!"
 

24 December 2022

A Handmade Christmas Star

Merry Christmas friends!

In the Philippines, we decorate our homes with this star-shaped lantern: 


It's called a "parol" and it represents the star that led the Wise Men to Bethlehem when Jesus was born. 

These parol are placed on windows, on trees, inside shopping malls, and street lamps on main thoroughfares. Filipinos all over the world even decorate their home away from home with a parol. We may be living far away but we want to keep the Filipino Christmas spirit alive.   

salt dough, salt dough ornaments, tassels, paint, Philippine parol, Parol, star, Christmas decorations in the Philippines, handmade, blah to TADA, Christmas decorations, star-shaped lantern, Christmas lantern

Early this month I made this parol ornament.

salt dough, salt dough ornaments, tassels, paint, Philippine parol, Parol, star, Christmas decorations in the Philippines, handmade, blah to TADA, Christmas decorations, star-shaped lantern, Christmas lantern

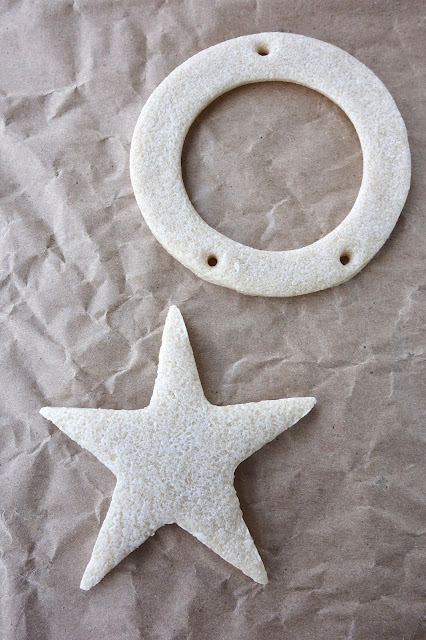
It's made of salt dough (you can find the recipe here). I used round cookie cutters and a star-shaped cookie cutter, as well as a toothpick to make the holes. This is what it looks like after baking in a 200 degree Fahrenheit oven for 2 1/2 hours. 

salt dough, salt dough ornaments, tassels, paint, Philippine parol, Parol, star, Christmas decorations in the Philippines, handmade, blah to TADA, Christmas decorations, star-shaped lantern, Christmas lantern

Once cool, I used acrylic paint and a medium-sized paintbrush to add color.

salt dough, salt dough ornaments, tassels, paint, Philippine parol, Parol, star, Christmas decorations in the Philippines, handmade, blah to TADA, Christmas decorations, star-shaped lantern, Christmas lantern

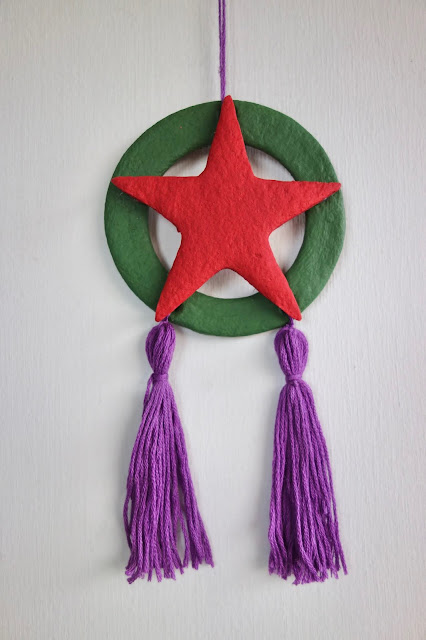
I made tassels out of embroidery thread for the tails. I also added a hanging string.

salt dough, salt dough ornaments, tassels, paint, Philippine parol, Parol, star, Christmas decorations in the Philippines, handmade, blah to TADA, Christmas decorations, star-shaped lantern, Christmas lantern

I used a glue gun to attach the star to the "halo."

salt dough, salt dough ornaments, tassels, paint, Philippine parol, Parol, star, Christmas decorations in the Philippines, handmade, blah to TADA, Christmas decorations, star-shaped lantern, Christmas lantern

Here is my version of the parol that I can hang on my Christmas Tree or to give away as a token...TADA!

salt dough, salt dough ornaments, tassels, paint, Philippine parol, Parol, star, Christmas decorations in the Philippines, handmade, blah to TADA, Christmas decorations, star-shaped lantern, Christmas lantern

I also made a tiny version for tabletop Christmas trees or to embellish a gift...TADA!

That is how I turned some salt dough from "blah to TADA!"

May you all have a heartwarming holiday!

18 December 2022

A Snack and a Craft : Christmas Trees

Hello guys!

'Tis the season for Christmas trees and this is the cookie cutter I chose when I made shortbread cookies:

ROSEMARY SHORTBREAD
Makes 12 to 15 cookies

Ingredients:
1 cup (2 sticks/228 grams) unsalted butter, at room temperature
1/2 cup (110 grams) packed light brown sugar
1 egg yolk
1 teaspoon finely chopped fresh rosemary (I used thyme + zest of one lemon)
1 1/2 cups (210 grams) unbleached all-purpose flour
1/2 cup (65 grams) cornstarch
3/4 teaspoon kosher salt
1/2 teaspoon baking powder

Procedure:
1. Using a stand mixer fitted with the paddle attachment (or handheld 
mixer or a wooden spoon), cream the butter on medium speed for 
about 2 minutes, or until light and pale. (This step will take 3 to 4 
minutes if using a handheld mixer and about 5 minutes if using a spoon.)
Add the sugar and beat on medium speed for 3 to 4 minutes, or until 
light and fluffy. Stop the mixer a few times and use the rubber spatula to
scrape the sides and bottom of the bowl and the paddle to release any 
clinging butter or sugar. On low speed, add the egg yolk and rosemary (in 
my case: thyme and lemon zest) and beat for about 1 minute, or until
thoroughly combined.

2. In a small bowl, sift together the flour, cornstarch, salt, and baking 
powder. On low speed, slowly add the flour mixture to the butter-sugar
mixture and then mix just until the flour mixture is totally incorporated
and the dough is evenly mixed. Stop the mixer several times to scrape the
bowl and the paddle to free any trapped flour mixture.

3. Scrape the dough onto a piece of plastic wrap, and wrap the dough in
the plastic wrap, pressing down to form a disk about 8 inches in diameter
and 1 inch thick. Refrigerate the dough for about 20 minutes, or until it is 
firm enough to roll out.

4. Position the rack in the center of the oven, and heat the oven to 
325 degrees F.

5. On a floured work surface, roll out the dough into a rectangle about
12 inches by 10 inches and 1/4 inch thick. Using a sharp knife, cut the 
dough into 12 to 15 uniform pieces -- rectangles, triangles, or cookie-
cutter shapes -- and arrange them on a baking sheet, spacing them about
2 inches apart. (At this point, the cookies can be tightly wrapped and
frozen for up to 2 weeks. Bake as directed directly from the freezer. You
may need to add a few minutes to the baking time.)

6. Bake for 18 to 20 minute, or until the cookies are medium to golden
brown all the way through. Let cool on the baking sheet on a wire rack
for 15 to 20 minutes, then transfer to a wire rack to cool completely.

7. The cookies can be stored in an airtight container at room temperature
for up to 4 days.


When making cookies, I usually spread out the work in two days. On Day 1, I make the dough and I let it chill overnight (this also helps develop the flavor) and on Day 2, I cut and bake.


Here's what the shortbread looks like after baking. I packaged them in tins containing other treats for my Food52 Holiday Food Swap a few years back...TADA!

*****

Now that we have a snack ready, what about a craft idea?


Sometimes I like to go out to the shops to search for inspiration. I love these cute tabletop trees made from chunky yarn and wooden stars!


Here's another version that look like forest trees. We can make something similar using cardboard shaped into a cone. Twirl yarn to cover the cone and attach in place with hot glue. Then you can leave it as is or decorate with beads, bells, and battery-operated lights...TADA! 

As you can see, the Christmas trees in your home don't have to be tall or look like pine. Think outside the box and turn "blah to TADA!"
  

11 December 2022

Salt Dough Ornaments: A Peace Dove

It's so nice of you to drop by today!

I love to create with salt dough. It's crafting clay made with all purpose flour, salt, and water. When the dough is made, transform it into your desired shapes and bake it in the oven so it hardens. Once cool, you can paint the shapes and add embellishments.

salt dough ornaments, handmade ornaments, clay ornaments, oven-baked ornaments, blah to tada, easy crafts, clay crafts, baking crafts

This photo shows the basic proportions. I've used salt dough many times to make earringsa floral froggift pendantsmonogram bowls, and even decorations for my wreath.

The holidays are right around the corner, I thought it fitting to make a salt dough Christmas tree ornament. Let me show you how. 

salt dough, handmade ornaments, Christmas tree ornaments DIY, blah to TADA, crafting with salt dough, Silpat, cookie cutter, fondant rolling pin

I roll out a handful of salt dough to about 1/4 inch thickness.

salt dough, handmade ornaments, Christmas tree ornaments DIY, blah to TADA, crafting with salt dough, Silpat, cookie cutter, paint brush

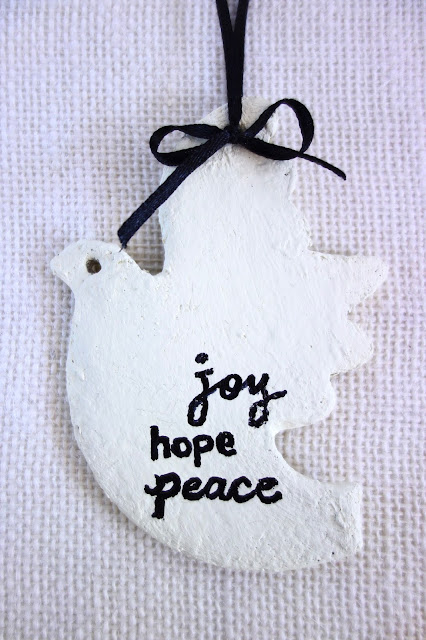
I used a cookie cutter shaped like a dove for some "peace" vibes. But you can use whatever cookie cutter you like. Use the end of a paint brush to add an eye and another to insert twine later on. 

Notice that I used a silicone baking liner (you can use parchment paper) on top of an inverted baking tray (so the rims don't get in the way when using the rolling pin).  This is where I rolled and gently cut the shapes. Salt dough is soft and malleable so moving it from one surface to another can alter the shape. Best to do everything on a single surface. The silicone baking liner or parchment paper also keeps the salt dough from sticking to the baking tray.

Once you've cut the shapes, space them out a few inches apart. Bake them in a preheated 200 degree Fahrenheit oven for two to three hours. The bigger the shape, the longer it will take to dry in the oven.

dove-shaped ornament,salt dough, handmade ornaments, Christmas tree ornaments DIY, blah to TADA, crafting with salt dough, Silpat, cookie cutter,

It will look like a hard cookie after baking. Let it cool for about an hour.


Then we're ready to paint! I'm trying out this technique of mixing acrylic paint and a little bit of baking powder to get a terra cotta finish.  

dove-shaped ornament,salt dough, handmade ornaments, Christmas tree ornaments DIY, blah to TADA, crafting with salt dough, Silpat, cookie cutter,

Paint this mixture on the salt dough ornament. I did about three coats, allowing it to dry in between each new layer. It does end up with a matte finish and a bit of grainy texture. Maybe I'll add more baking powder to the paint next time.

dove-shaped ornament,salt dough, handmade ornaments, Christmas tree ornaments DIY, blah to TADA, crafting with salt dough, Silpat, cookie cutter, paint

Just add some twine through one hole and make a knot. This will be our hanging device. And just like that, we have a simple ornament...TADA!

dove-shaped ornament,salt dough, handmade ornaments, Christmas tree ornaments DIY, blah to TADA, crafting with salt dough, Silpat, cookie cutter, ribbon, brush lettering, hand letting on salt dough

Give it another look by adding a bolder ribbon and some brush lettering.

dove-shaped ornament,salt dough, handmade ornaments, Christmas tree ornaments DIY, blah to TADA, crafting with salt dough, Silpat, cookie cutter, ribbon, brush lettering, hand letting on salt dough

Write down some wishes for the holidays or the names of the members of the family (pets included).

And that is how I turned some salt dough from blah to TADA!

What kinds of crafts do you like making for the holidays? Let me know!


04 December 2022

A Wreath with Pine Cones

It's finally December!

A wreath on the front door is always a welcome sight at Christmas time.


Over the years, I've turned a plain, store-bought wreath from blah to TADA!


This one had a candy theme made with salt-dough ornaments


And this one looks a little more grown-up.

But the more I looked at the wreath, the more I thought, "This needs something more."


I found these pine cones on the side walk. I just love how nature gives me crafting materials for free!


Have you ever picked up a pine cone? It smells of glorious pine trees but is sticky with sap.


So I cleaned the pine cones by soaking them in a basin of warm water and a cup of distilled vinegar for a few hours.  Then I removed any remaining sap by scrubbing them off with an old toothbrush. I left the pine cones to dry overnight on a bed of scrap paper.  


There was still some sap residue that I couldn't get rid of. As long as the pine cones were no longer sticky and they were free of dirt and possible bugs, I was okay with that. 

pine cones, how to clean pine cones, pine cones for decorating, pine cones for crafts, blah to TADA!, DIY Christmas ornaments

I used wire to attach the pine cones to my wreath.


pine cones, how to clean pine cones, pine cones for decorating, pine cones for crafts, blah to TADA!, DIY Christmas ornaments

I worked in odd numbers. 


pine cones, how to clean pine cones, pine cones for decorating, pine cones for crafts, blah to TADA!, DIY Christmas ornaments

And tucked them all around the wreath.


pine cones, how to clean pine cones, pine cones for decorating, pine cones for crafts, blah to TADA!, DIY Christmas ornaments

And here is the new and improved holiday wreath. TADA!


pine cones, how to clean pine cones, pine cones for decorating, pine cones for crafts, blah to TADA!, DIY Christmas ornaments

I hope this has gotten you in the mood to decorate for this festive season. Before you go out and buy, why not try D.I.Y? Use what you have and turn them from "blah to TADA!"