Pages:

30 December 2022

Bon Voyage 2022

Hi friends!

Once again, we have reached the end of another year.

journal, bullet journal, diary, sketchbook, quotes, intentions, lists, watercolor, water brush, Pentel pen, blah to TADA

I started the year by filling a blank page with intentions, an encouraging quote, and a short list.

All throughout 2022, I did my best to fill my days (or my blank page) with shapes, colors, textures, wisdom, feelings, gratitude, small achievements, small failures, and lots of good memories.

Thank you 2022 for all your blessings!


journal, bullet journal, diary, sketchbook, quotes, intentions, lists, watercolor, water brush, Pentel pen, blah to TADA

Let's keep adding life to all the blank pages of the New Year. Let's continue to turn "blah to TADA!"
 

24 December 2022

A Handmade Christmas Star

Merry Christmas friends!

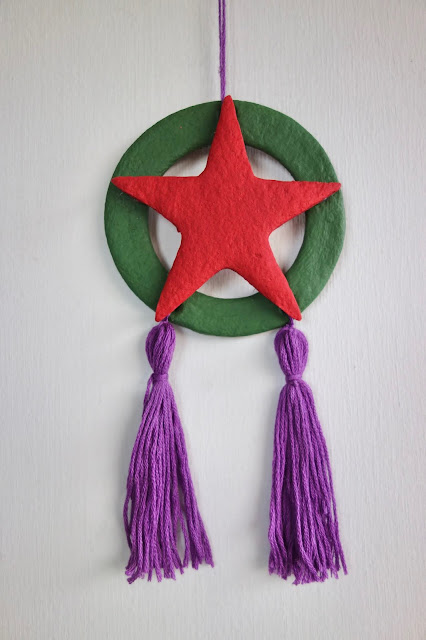
In the Philippines, we decorate our homes with this star-shaped lantern: 


It's called a "parol" and it represents the star that led the Wise Men to Bethlehem when Jesus was born. 

These parol are placed on windows, on trees, inside shopping malls, and street lamps on main thoroughfares. Filipinos all over the world even decorate their home away from home with a parol. We may be living far away but we want to keep the Filipino Christmas spirit alive.   

salt dough, salt dough ornaments, tassels, paint, Philippine parol, Parol, star, Christmas decorations in the Philippines, handmade, blah to TADA, Christmas decorations, star-shaped lantern, Christmas lantern

Early this month I made this parol ornament.

salt dough, salt dough ornaments, tassels, paint, Philippine parol, Parol, star, Christmas decorations in the Philippines, handmade, blah to TADA, Christmas decorations, star-shaped lantern, Christmas lantern

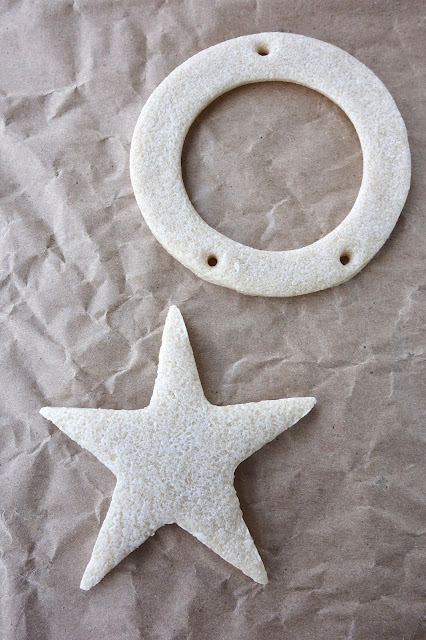
It's made of salt dough (you can find the recipe here). I used round cookie cutters and a star-shaped cookie cutter, as well as a toothpick to make the holes. This is what it looks like after baking in a 200 degree Fahrenheit oven for 2 1/2 hours. 

salt dough, salt dough ornaments, tassels, paint, Philippine parol, Parol, star, Christmas decorations in the Philippines, handmade, blah to TADA, Christmas decorations, star-shaped lantern, Christmas lantern

Once cool, I used acrylic paint and a medium-sized paintbrush to add color.

salt dough, salt dough ornaments, tassels, paint, Philippine parol, Parol, star, Christmas decorations in the Philippines, handmade, blah to TADA, Christmas decorations, star-shaped lantern, Christmas lantern

I made tassels out of embroidery thread for the tails. I also added a hanging string.

salt dough, salt dough ornaments, tassels, paint, Philippine parol, Parol, star, Christmas decorations in the Philippines, handmade, blah to TADA, Christmas decorations, star-shaped lantern, Christmas lantern

I used a glue gun to attach the star to the "halo."

salt dough, salt dough ornaments, tassels, paint, Philippine parol, Parol, star, Christmas decorations in the Philippines, handmade, blah to TADA, Christmas decorations, star-shaped lantern, Christmas lantern

Here is my version of the parol that I can hang on my Christmas Tree or to give away as a token...TADA!

salt dough, salt dough ornaments, tassels, paint, Philippine parol, Parol, star, Christmas decorations in the Philippines, handmade, blah to TADA, Christmas decorations, star-shaped lantern, Christmas lantern

I also made a tiny version for tabletop Christmas trees or to embellish a gift...TADA!

That is how I turned some salt dough from "blah to TADA!"

May you all have a heartwarming holiday!

18 December 2022

A Snack and a Craft : Christmas Trees

Hello guys!

'Tis the season for Christmas trees and this is the cookie cutter I chose when I made shortbread cookies:

ROSEMARY SHORTBREAD
Makes 12 to 15 cookies

Ingredients:
1 cup (2 sticks/228 grams) unsalted butter, at room temperature
1/2 cup (110 grams) packed light brown sugar
1 egg yolk
1 teaspoon finely chopped fresh rosemary (I used thyme + zest of one lemon)
1 1/2 cups (210 grams) unbleached all-purpose flour
1/2 cup (65 grams) cornstarch
3/4 teaspoon kosher salt
1/2 teaspoon baking powder

Procedure:
1. Using a stand mixer fitted with the paddle attachment (or handheld 
mixer or a wooden spoon), cream the butter on medium speed for 
about 2 minutes, or until light and pale. (This step will take 3 to 4 
minutes if using a handheld mixer and about 5 minutes if using a spoon.)
Add the sugar and beat on medium speed for 3 to 4 minutes, or until 
light and fluffy. Stop the mixer a few times and use the rubber spatula to
scrape the sides and bottom of the bowl and the paddle to release any 
clinging butter or sugar. On low speed, add the egg yolk and rosemary (in 
my case: thyme and lemon zest) and beat for about 1 minute, or until
thoroughly combined.

2. In a small bowl, sift together the flour, cornstarch, salt, and baking 
powder. On low speed, slowly add the flour mixture to the butter-sugar
mixture and then mix just until the flour mixture is totally incorporated
and the dough is evenly mixed. Stop the mixer several times to scrape the
bowl and the paddle to free any trapped flour mixture.

3. Scrape the dough onto a piece of plastic wrap, and wrap the dough in
the plastic wrap, pressing down to form a disk about 8 inches in diameter
and 1 inch thick. Refrigerate the dough for about 20 minutes, or until it is 
firm enough to roll out.

4. Position the rack in the center of the oven, and heat the oven to 
325 degrees F.

5. On a floured work surface, roll out the dough into a rectangle about
12 inches by 10 inches and 1/4 inch thick. Using a sharp knife, cut the 
dough into 12 to 15 uniform pieces -- rectangles, triangles, or cookie-
cutter shapes -- and arrange them on a baking sheet, spacing them about
2 inches apart. (At this point, the cookies can be tightly wrapped and
frozen for up to 2 weeks. Bake as directed directly from the freezer. You
may need to add a few minutes to the baking time.)

6. Bake for 18 to 20 minute, or until the cookies are medium to golden
brown all the way through. Let cool on the baking sheet on a wire rack
for 15 to 20 minutes, then transfer to a wire rack to cool completely.

7. The cookies can be stored in an airtight container at room temperature
for up to 4 days.


When making cookies, I usually spread out the work in two days. On Day 1, I make the dough and I let it chill overnight (this also helps develop the flavor) and on Day 2, I cut and bake.

Here's what the shortbread looks like after baking. I packaged them in tins containing other treats for my Food52 Holiday Food Swap a few years back...TADA!

*****

Now that we have a snack ready, what about a craft idea?


Sometimes I like to go out to the shops to search for inspiration. I love these cute tabletop trees made from chunky yarn and wooden stars!


Here's another version that look like forest trees. We can make something similar using cardboard shaped into a cone. Twirl yarn to cover the cone and attach in place with hot glue. Then you can leave it as is or decorate with beads, bells, and battery-operated lights...TADA! 

As you can see, the Christmas trees in your home don't have to be tall or look like pine. Think outside the box and turn "blah to TADA!"
  

11 December 2022

Salt Dough Ornaments: A Peace Dove

It's so nice of you to drop by today!

I love to create with salt dough. It's crafting clay made with all purpose flour, salt, and water. When the dough is made, transform it into your desired shapes and bake it in the oven so it hardens. Once cool, you can paint the shapes and add embellishments.

salt dough ornaments, handmade ornaments, clay ornaments, oven-baked ornaments, blah to tada, easy crafts, clay crafts, baking crafts

This photo shows the basic proportions. I've used salt dough many times to make earringsa floral froggift pendantsmonogram bowls, and even decorations for my wreath.

The holidays are right around the corner, I thought it fitting to make a salt dough Christmas tree ornament. Let me show you how. 

salt dough, handmade ornaments, Christmas tree ornaments DIY, blah to TADA, crafting with salt dough, Silpat, cookie cutter, fondant rolling pin

I roll out a handful of salt dough to about 1/4 inch thickness.

salt dough, handmade ornaments, Christmas tree ornaments DIY, blah to TADA, crafting with salt dough, Silpat, cookie cutter, paint brush

I used a cookie cutter shaped like a dove for some "peace" vibes. But you can use whatever cookie cutter you like. Use the end of a paint brush to add an eye and another to insert twine later on. 

Notice that I used a silicone baking liner (you can use parchment paper) on top of an inverted baking tray (so the rims don't get in the way when using the rolling pin).  This is where I rolled and gently cut the shapes. Salt dough is soft and malleable so moving it from one surface to another can alter the shape. Best to do everything on a single surface. The silicone baking liner or parchment paper also keeps the salt dough from sticking to the baking tray.

Once you've cut the shapes, space them out a few inches apart. Bake them in a preheated 200 degree Fahrenheit oven for two to three hours. The bigger the shape, the longer it will take to dry in the oven.

dove-shaped ornament,salt dough, handmade ornaments, Christmas tree ornaments DIY, blah to TADA, crafting with salt dough, Silpat, cookie cutter,

It will look like a hard cookie after baking. Let it cool for about an hour.


Then we're ready to paint! I'm trying out this technique of mixing acrylic paint and a little bit of baking powder to get a terra cotta finish.  

dove-shaped ornament,salt dough, handmade ornaments, Christmas tree ornaments DIY, blah to TADA, crafting with salt dough, Silpat, cookie cutter,

Paint this mixture on the salt dough ornament. I did about three coats, allowing it to dry in between each new layer. It does end up with a matte finish and a bit of grainy texture. Maybe I'll add more baking powder to the paint next time.

dove-shaped ornament,salt dough, handmade ornaments, Christmas tree ornaments DIY, blah to TADA, crafting with salt dough, Silpat, cookie cutter, paint

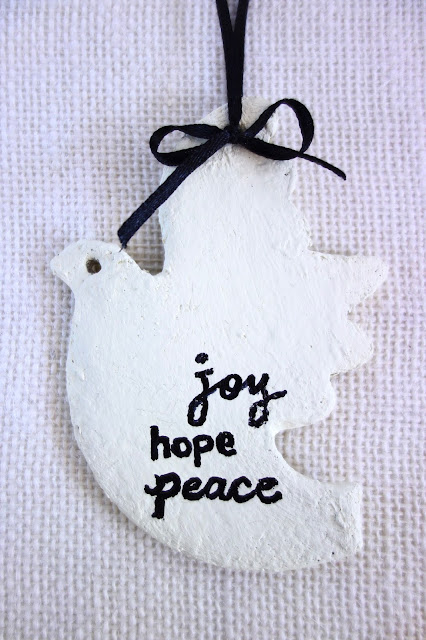
Just add some twine through one hole and make a knot. This will be our hanging device. And just like that, we have a simple ornament...TADA!

dove-shaped ornament,salt dough, handmade ornaments, Christmas tree ornaments DIY, blah to TADA, crafting with salt dough, Silpat, cookie cutter, ribbon, brush lettering, hand letting on salt dough

Give it another look by adding a bolder ribbon and some brush lettering.

dove-shaped ornament,salt dough, handmade ornaments, Christmas tree ornaments DIY, blah to TADA, crafting with salt dough, Silpat, cookie cutter, ribbon, brush lettering, hand letting on salt dough

Write down some wishes for the holidays or the names of the members of the family (pets included).

And that is how I turned some salt dough from blah to TADA!

What kinds of crafts do you like making for the holidays? Let me know!


04 December 2022

A Wreath with Pine Cones

It's finally December!

A wreath on the front door is always a welcome sight at Christmas time.


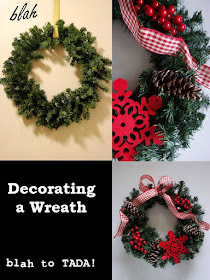
Over the years, I've turned a plain, store-bought wreath from blah to TADA!


This one had a candy theme made with salt-dough ornaments


And this one looks a little more grown-up.

But the more I looked at the wreath, the more I thought, "This needs something more."


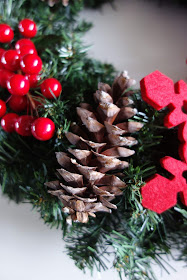
I found these pine cones on the side walk. I just love how nature gives me crafting materials for free!


Have you ever picked up a pine cone? It smells of glorious pine trees but is sticky with sap.


So I cleaned the pine cones by soaking them in a basin of warm water and a cup of distilled vinegar for a few hours.  Then I removed any remaining sap by scrubbing them off with an old toothbrush. I left the pine cones to dry overnight on a bed of scrap paper.  


There was still some sap residue that I couldn't get rid of. As long as the pine cones were no longer sticky and they were free of dirt and possible bugs, I was okay with that. 

pine cones, how to clean pine cones, pine cones for decorating, pine cones for crafts, blah to TADA!, DIY Christmas ornaments

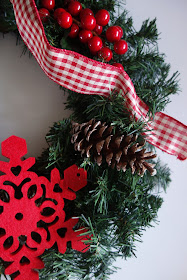
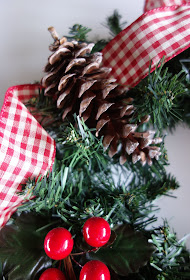
I used wire to attach the pine cones to my wreath.


pine cones, how to clean pine cones, pine cones for decorating, pine cones for crafts, blah to TADA!, DIY Christmas ornaments

I worked in odd numbers. 


pine cones, how to clean pine cones, pine cones for decorating, pine cones for crafts, blah to TADA!, DIY Christmas ornaments

And tucked them all around the wreath.


pine cones, how to clean pine cones, pine cones for decorating, pine cones for crafts, blah to TADA!, DIY Christmas ornaments

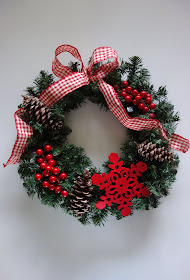
And here is the new and improved holiday wreath. TADA!


pine cones, how to clean pine cones, pine cones for decorating, pine cones for crafts, blah to TADA!, DIY Christmas ornaments

I hope this has gotten you in the mood to decorate for this festive season. Before you go out and buy, why not try D.I.Y? Use what you have and turn them from "blah to TADA!"


27 November 2022

French Silk Pie and a Pie Server

Hey! Hey! 

Today, we're making something to eat and something to give as a hostess gift. 

Magnolia Table cookbook, Joanna Gaines, baking, cooking, recipe, French Silk Pie, dessert, blah to TADA

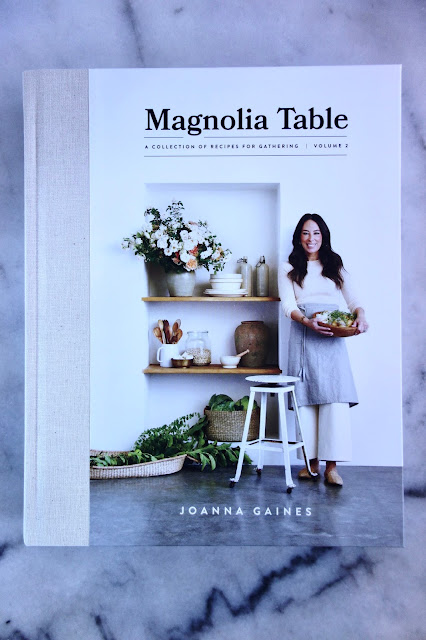
The recipe is from the book "Magnolia Table" Volume 2 by Joanna Gaines of the "Fixer Upper" TV series and Magnolia brand. I first made it during the pandemic and I've included it my repertoire of desserts. It's this delectable and easy to make French Silk Pie: 

chocolate pie, Joanna Gaines recipe, baking, crafty in the kitchen, blah to TADA, French Silk Pie, pie, tart pan
French Silk Pie
from the book Magnolia Table Volume 2 by Joanna Gaines
Makes one 9-inch pie or tart

Ingredients:
2/3 cup granulated sugar
2 large eggs
2 ounces unsweetened chocolate, chopped
1 teaspoon pure vanilla extract
1/3 cup (2/3 stick) unsalted butter, at room temperature
2/3 cup heavy cream
1/4 cup powdered sugar
1 prebaked 9-inch pie crust (Chocolate Cookie Crust; recipe follows)
Whipped cream and shaved dark chocolate (optional), for garnish

Procedure:
1. In a small saucepan, whisk together the granulated sugar and eggs
    until well blended. Cook over low heat, whisking constantly, until
    the mixture reaches 160 degrees F and coats the back of a metal spoon.
    Remove from the heat. Add the chocolate and vanilla and stir until
    smooth. Set aside to cool for approximately 5 minutes.
2. In a stand mixer fitted with the paddle attachment, cream the butter on
    medium-high speed until light and fluffy. Add the cooled chocolate
    mixture and beat on high speed until light and fluffy, about 5 minutes.
3. In another large bowl, beat the cream on medium-high speed until it
    begins to thicken, 3 to 4 minutes. Add the powdered sugar and beat on
    low speed, then gradually return to medium-high until stiff peaks form.
    Fold into the chocolate mixture.
4. Pour into the prebaked pie crust. Refrigerate until well chilled, at least
    4 hours or up to overnight.
5. Garnish with whipped cream and shaved chocolate, if desired.
6. Store, covered, in the refrigerator for 4 to 5 days.
Chocolate Cookie Crust
5 ounces chocolate wafers
1/4 cup sugar
8 tablespoons (1 stick) butter, melted

1. Preheat the oven to 350 degrees F.
2. Pulse the wafers on low in a food processor until they are the
    consistency of sand. Add the sugar and melted butter and mix well.
3. Press the mixture into the bottom and up the sides of a 9-inch pie pan.
    Bake 8 minutes.
4. Let cool 20 minutes before filling.


This French Silk Pie is not too sweet yet it's a satisfying dessert. Sometimes I serve it topped with granola, chopped walnuts, or chocolate chips for added crunch.

cake server, serving utensils, silverware, hostess gift ideas, blah to tada, fabric pouch, gift wrapping

When there are desserts like pie and cake for sharing, this serving utensil should likewise be invited to the party. It's too bad that not everyone owns one. So I thought, this pie server makes a nice hostess gift or thank you token. Most kitchen stores carry them and they're not expensive at all. This one didn't come with a box. Not to worry, I'll make my own packaging.

hand-dyed fabric, cake server, serving utensils, silverware, hostess gift ideas, blah to tada, fabric pouch, gift wrapping

I'm using some tea-stained fabric. If you're interested, you can find a tea-staining tutorial here. The fabric comes out with a faint antique look after it dries.

hand-dyed fabric, cake server, serving utensils, silverware, hostess gift ideas, blah to tada, fabric pouch, gift wrapping

I folded the fabric in thirds and connected the two edges together on the sewing machine. I left the top open.

hand-dyed fabric, cake server, serving utensils, silverware, hostess gift ideas, blah to tada, fabric pouch, gift wrapping

The pie server should fit inside this fabric pouch. 

hand-dyed fabric, cake server, serving utensils, silverware, hostess gift ideas, blah to tada, fabric pouch, gift wrapping, printing on fabric

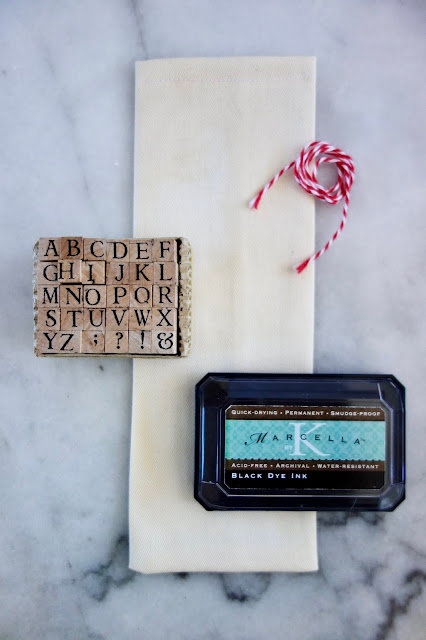
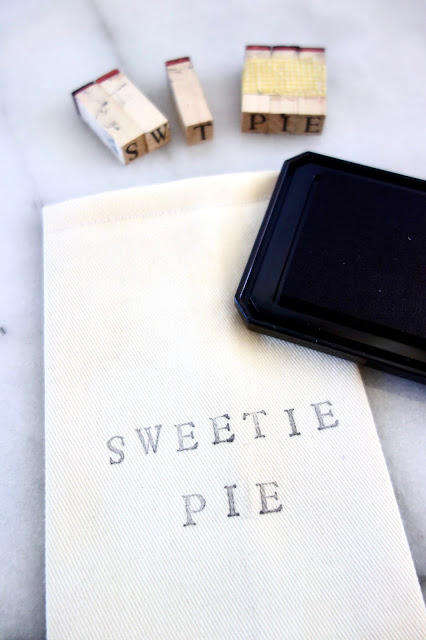
I'm using an ink pad and stamps to decorate the fabric pouch. Fabric markers are also another option. 

sweetie pie, hand-dyed fabric, cake server, serving utensils, silverware, hostess gift ideas, blah to tada, fabric pouch, gift wrapping, printing on fabric

I spelled out "sweetie pie" as a hint of what's inside. And of course the person getting this is a sweetie pie, too.

sweetie pie, hand-dyed fabric, cake server, serving utensils, silverware, hostess gift ideas, blah to tada, fabric pouch, gift wrapping, printing on fabric

Here is my handmade fabric pouch all dressed up.

hand-dyed fabric, cake server, serving utensils, silverware, hostess gift ideas, blah to tada, fabric pouch, gift wrapping, printing on fabric

Put in the pie server.

hand-dyed fabric, cake server, serving utensils, silverware, hostess gift ideas, blah to tada, fabric pouch, gift wrapping, printing on fabric

Then decorate with some twine or ribbon. That is how I turned some fabric from "blah to TADA!"

hand-dyed fabric, cake server, serving utensils, silverware, hostess gift ideas, blah to tada, fabric pouch, gift wrapping, printing on fabric, baker's twine

This is ready to be presented to the host of your next party. Why not make him or her a pie together with this gift. That would be extra TADA! 

I wish you all a sweet week ahead and please subscribe here if you'd like my future blog posts right in your inbox.


20 November 2022

Terrariums for Thanksgiving

Hello there!

Let's begin today's post with a few inspiring photos:

terrarium, autumn terrarium, dried leaves, acorns, pine cones, dried flowers, arrangement for autumn, centerpiece, blah to TADA, uses for old jars, crafts using bottles, handmade

terrarium, autumn terrarium, dried leaves, acorns, pine cones, dried flowers, arrangement for autumn, centerpiece, blah to TADA, uses for old jars, crafts using bottles, handmade


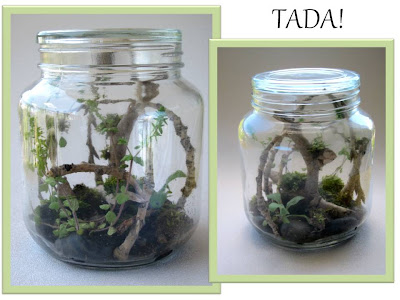
I saw these at a shop and I was so inspired how these jars were transformed from "blah to TADA!" They are terrariums made from dried objects like flowers, leaves, and moss.

terrarium, used for old jars, crafty uses for old bottles, plants, centerpiece, blah to TADA, jungalow


In the past, I've made terrariums made from living plants. How encouraging that we can make other kinds of terrariums even if the summer turns into fall.    

And this is how my scavenger hunt began.

terrarium, autumn terrarium, dried leaves, acorns, pine cones, dried flowers, arrangement for autumn, centerpiece, blah to TADA, uses for old jars, crafts using bottles, handmade

I chose an old vase. 

terrarium, autumn terrarium, dried leaves, acorns, pine cones, dried flowers, arrangement for autumn, centerpiece, blah to TADA, uses for old jars, crafts using bottles, handmade

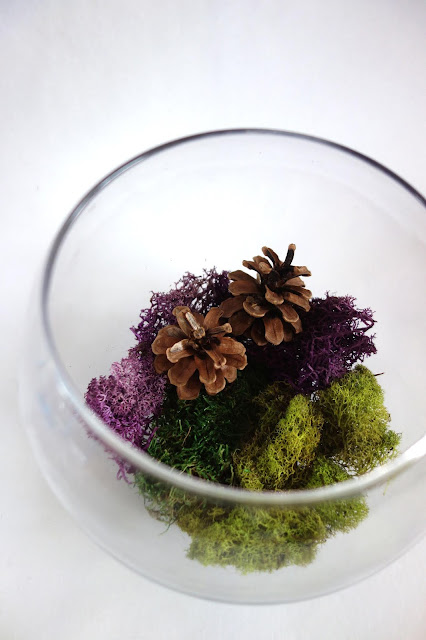
Then I went on walks in the park to collect nature's free bounty: pine cones, dried flowers and acorns. Sticks and leaves are good options, too.

moss, terrarium, autumn terrarium, dried leaves, acorns, pine cones, dried flowers, arrangement for autumn, centerpiece, blah to TADA, uses for old jars, crafts using bottles, handmade

I lined the bottom of the vase with some artificial moss.


moss, terrarium, autumn terrarium, dried leaves, acorns, pine cones, dried flowers, arrangement for autumn, centerpiece, blah to TADA, uses for old jars, crafts using bottles, handmade

I added the tiny pine cones.


moss, terrarium, autumn terrarium, dried leaves, acorns, pine cones, dried flowers, arrangement for autumn, centerpiece, blah to TADA, uses for old jars, crafts using bottles, handmade
 
And then some of the dried flowers for height.

moss, terrarium, autumn terrarium, dried leaves, acorns, pine cones, dried flowers, arrangement for autumn, centerpiece, blah to TADA, uses for old jars, crafts using bottles, handmade

And a few acorns to round out the arrangement. I can use this as a centerpiece for a coffee table...TADA!

moss, terrarium, autumn terrarium, dried leaves, acorns, pine cones, dried flowers, arrangement for autumn, centerpiece, blah to TADA, uses for old jars, crafts using bottles, handmade, lavender, eucalyptus, jam jar, gratitude

Here is another version using a jam jar that I filled with dried flowers like lavender and dried leaves like eucalyptus making this a scented arrangement...TADA!

moss, terrarium, autumn terrarium, dried leaves, acorns, pine cones, dried flowers, arrangement for autumn, centerpiece, blah to TADA, uses for old jars, crafts using bottles, handmade, lavender, eucalyptus, jam jar, grateful, craft stamps and ink pad

I added the word "grateful" that I made from card stock, crafts stamps, and an ink pad. I'll position this to each place setting at the Thanksgiving table. That way guests have a tiny table decor that they can take home as a souvenir...TADA!

moss, terrarium, autumn terrarium, dried leaves, acorns, pine cones, dried flowers, arrangement for autumn, centerpiece, blah to TADA, uses for old jars, crafts using bottles, handmade, lavender, eucalyptus, jam jar, gratitude

Thanksgiving is this Thursday and I want to personally thank you, dear readers, for being here with me all these years. For that, I am truly grateful! Your presence has turned my life from "blah to TADA!"

Happy Thanksgiving!

Please subscribe here if you want more "blah to TADA!" ideas.