09 March 2020

Earrings Made from Cord

Howdy! I'm on a mission to save these strips of cording:

These were the handles of a paper bag.

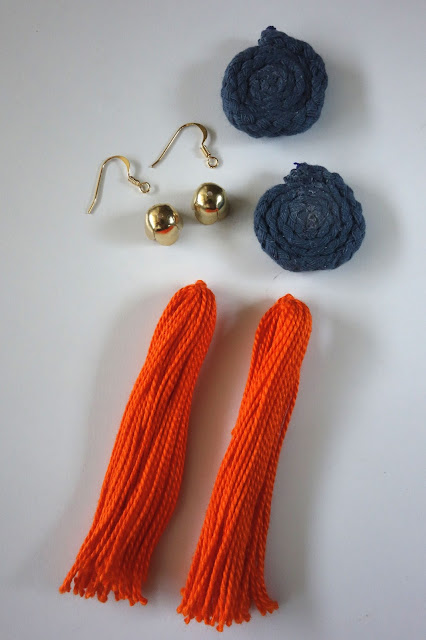
Roll them into a coil and sew them with a needle and matching thread to keep the coil from unraveling.

Add some bright handmade tassels and gold jewelry findings.

Attach them together with hand stitching and we have these fun and flirty tassel earrings...TADA!

Here's another version:

This is navy cord, also taken from a paper bag.

Wind it into itself and sew the rows to each other with needle and thread.

I looked through my collection to find some complimentary beads.

Then I sewed them on the cord coil.

Here's what my new pair of earrings looks like...TADA!

I also rescued some gold cord.

Here are the materials I used to turn blah to...

TADA! Another pair of dangling earrings that were created from materials I already had at home.

Earrings made from paper bag handles
I hope this has inspired you to do some crafty recycling yourself. Thanks for your visit!

02 March 2020

Hot Glue Alphabet

Hello and happy start of a new month!

Did you know that March is "National Craft Month"? Woohoo! But to anyone who loves to craft, every month is craft month!

As a crafter, I have a tendency to hoard materials. And sometimes I forget that I have them.

Take this silicone mold for example.  I bought it many years ago and haven't used it. Eeep!

Use it to shape clay, salt dough, and even fondant. But the instructions suggest using hot glue sticks. Yes, the ones we use for a glue gun!

Plaid Alphabet Silicone Mold, crafting materials, glue gun crafts, blah to TADA!
I found these glitter glue sticks at the dollar store. I thought they would be perfect to try out the silicone mold. 

Plaid Alphabet Silicone Mold, crafting materials, glue gun crafts, blah to TADA!
I used the glue gun that I already had.

glitter glue sticks, glue gun, glue sticks
Once the glue stick was melted, I generously filled in the letters and let the glue harden for a few minutes. 

glue gun, glue sticks, glitter glue sticks
Because the mold is made of silicone, it's heat-resistant and the letters are easy to pop out. 

Here are some of the words I spelled:

glitter glue sticks, glue gun, glue sticks, letters made from a glue gun and silicone mold
LOVE

glitter glue sticks, glue gun, glue sticks, letters made from a glue gun and silicone mold
 HI

glitter glue sticks, glue gun, glue sticks, letters made from a glue gun and silicone mold
YAY

And here are some of the crafty applications:

I'm using the letters to dress up an envelope crafted from an old map.

The letters and the twine embellish the envelope.

Instant gift wrapping...TADA!

This time, I'm making my own stationery using scrapbooking supplies.

Here's what the card looks like.

A darling little card that's ready to cross the oceans to cheer up a friend...TADA! 

We can also attach the letters to toothpicks using hot glue (apply the glue to the toothpick, then carefully place the letter on the glue and allow to dry). 

Use it to top cakes and cupcakes. Spell out names or greetings, too.

It instantly dresses up a homemade dessert...TADA!


I hope you enjoyed these ideas. Have a great day!

24 February 2020

Crafty Tip: How to Revive an Ink Pad

Howdy everyone! I like crafting with rubber stamps and even block prints that I made myself. 

My problem is when the ink pads dry up. Sure, it's easy to buy a new one but imagine all the collected ink pads that will end up in the trash!  

When I was at the office supply store, I stumbled upon this product. It's ink in a bottle with a roll-on application. 

Instructions are easy to follow.

recycle ink pad; re-purpose an ink pad
It's not messy at all! 

And I'm confident that I can use my existing ink pads for years to come. TADA!

17 February 2020

Treasures from the Trash: A Rolling Cart

Well, hello everyone!

If you've visited my blog in the past, I have a recurring section called, "Treasures from the Trash". It's all about furniture that I see on the sidewalk, the ones that are still in great shape but the owners no longer have use for. So there they are, waiting for the dump truck to come and collect them. 

Such was the fate of this lonely rolling cart:

It has an industrial vibe.  

Made of wood, metal, and casters.

Using some photos from the web, here's how I would transform it from blah to TADA!:

I would add a table top using plywood and stain it to match the bottom shelf. Then I can use this cart for extra storage in the kitchen or dining room:

Bring an industrial-chic feel to your kitchen or home bar with this stylish bar cart, made of rustic metal and mango wood. >> #WorldMarket Urban Industrial
via World Market

A bar cart from Brooklyn Flea stacked with a variety of dishes and kitchen tools. | Lonny.com
via Pinterest

The home of Karine Kong - via cocolapinedesign.com
via Coco Lapine Design

Another idea is to add hardware to make it into a bar cart.

Jasper Laine I Love Living Wood Bar Cart (Chestnut (Brown) Finish), Jasper Laine Studio
via Overstock

APARTMENT REVEAL « HOUSE of HARPER
via House of Harper

The Mid-Cnetury Bar Cart from west elm at the  Flo and Frank Office
via Emily Henderson

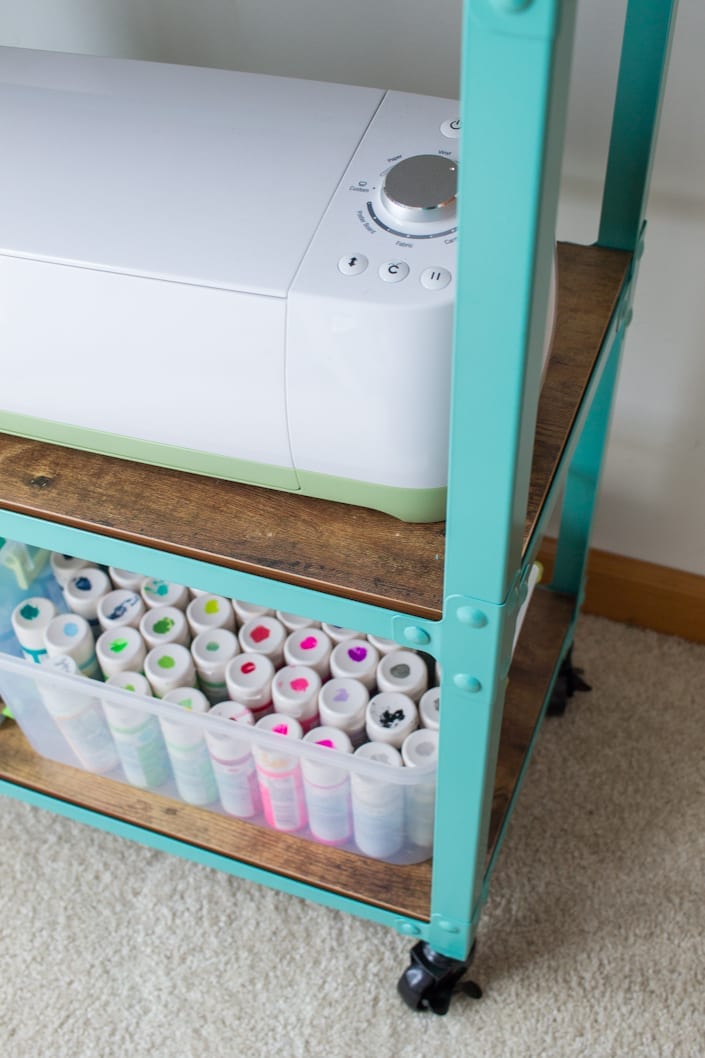
I could also add extra shelves to keep essentials tidy in the craft room or home office:

Fort Oglethorpe Kitchen Cart with Wood Top
via Wayfair

Industrial Rolling Storage, Simply Designing Porch
via simplydesigningporch.com

via thecottagemarket.com

cricut and paint storage, turquoise cart, whitehouseblackshutters.com
via whitehouseblackshutters.com
Or maybe even paint it in a bright color...TADA!

What about you? How would you update the look of this rolling cart?