26 February 2019

In the Kitchen: Canele de Bordeaux

Yesterday, I wrote about this book I've had for several years now:

My Little French Kitchen is written by Rachel Khoo where she travels all over France while sharing recipes along the way.

She's your girl next door, always up for trying something new. She likes to paint and she has a cute collection of vintage dresses.  

The book showcases beautiful shapshots of food and France.

How lucky was she to make Christmas cookies with a French grandmother. 

She even went to a flea market in Bordeaux and shopped for plates.

Of all the recipes, the Canele was the first one I wanted to try. Whenever I see these at a patisserie, it has to come home with me. A Canele is a small cake that's soft and custardy on the inside, crisp with the taste of caramel on the outside.

It's traditionally made with copper molds that need to be lined with beeswax. Copper molds and beeswax are way beyond my budget, and this entire process was too tedious and intimidating for me.

But Rachel encourages the use of silicone molds (I got this for about $10).

The batter has to sit for 48 hours or up to 5 days, resulting in tender cakes (it can be spelled "Canele" or "Cannele"...I checked! Regardless of how you spell it, the pronounciation is "ca-neh-lay").

Ladle the batter in the silicone mold, four-fifths full. Bake these in an oven pre-heated to 475 degrees Fahrenheit for 15 minutes. Then lower the temperature to 375 degrees Fahrenheit and continue to bake for 1 hour. 

After an hour, I flipped the mold and removed the caneles.

And here they are. TADA! 

Light inside with a nice sugar crust formed on outside. Not bad for my first try!

Thank you Rachel for this! You'll find the recipe here.

I also can't wait to dive into her more recent cookbook, The Little Swedish Kitchen

25 February 2019

Rachel Khoo's Little French Kitchen

Hey, hey, I'm writing about a cookbook today. It's an old one that I found on my book shelf.

In a previous post, I featured Rachel Khoo, a British cook, author and TV personality. She's a trained chef but she has this no fuss, unpretentious approach to cooking and eating.

I'm feeling the urge to travel but can't at the moment. Which could be the reason why I've been looking through this book.

In My Little French Kitchen, Rachel travels all over France to celebrate cuisine and culture. I'm pretending to be her travel buddy. Here's what she discovered:

Brittany is known for its galettes, crepes, caramel, fleur de sel and dairy products like butter and yogurt.

Bordeaux is known for its wines (here, you'll find the most expensive red wines in the world). It's also here where the Canele de Bordeaux was born. Caneles are small cakes that have a custardy interior and a burnt sugar exterior. It's one of my favorite desserts!

The Pays Basque has a lot of Spanish influences like the use of Espelette peppers (similar to paprika) and the popularity of pintxos (small snacks served in bars).

Rachels says, "The flavors of Provence sum up the taste of summer for me." She tasted her way through this region visiting Nice (olive products like oil and tapenades), Menton (citrus goods like spreads), and Marseille, abundant with sardines. 

Lyon is the capital of French gastronomy and the home cooked meals are the highlight. Also, I'm making a mental note to visit Les Halles de Lyon Paul Bocuse (a food hall named after the father of modern French cuisine).

Alsace has German influences in its food (such as sauerkraut with smoked sausage, kugelhopf and beer). It's also known for its wine (like Riesling and Muscat). She even went to a Christmas Market (a dream of mine!).

The recipes inside the book are based on the cooking in these regions and some have her unique twist.

And of course, the photos are stunning! It makes me want to book a trip immediately.

If you can, please stop by tomorrow for a recipe that I tried from the book.

18 February 2019

My Black Bag

Hi guys! I have this black canvas bag that's over-used and abused. It's light, matches my outfits, and is easy to travel with.

Maybe a little blah to TADA! is in order?

Some felt brooches.

A cluster of pins.

And even more buttons.

Or perhaps a pompom and tassel keychain?

And add a handmade bag charm. TADA!

11 February 2019

Stenciled and Stitched

Today I'm trying out a new craft. Want to join me?

I bought this embroidery stencil kit at discount a few years back and I finally decided to use it.   

I thought decorating a plain notebook would be a good place to start. 

The cover is blank and the inside pages are lined.

The kit includes alphabet and numerical stencils, and a few borders, too. 

They're made of firm plastic with holes to define the points of each letter or number. 

It also came with a self-healing mat, a punch tool, embroidery thread, and needles.

I put the notebook on top of the self-healing mat to protect my surface.  I used washi tape to help me make my letters straight and secure the notebook from moving around.

I also taped down the stencil as I worked.

Using the stencil as my guide, I made holes through the notebook cover using the sharp punch tool.

Then I continued with the next letters.

This is what the punched notebook cover looks like. I know it doesn't make any sense yet.

Wait until we add thread! Instead of the ones in the kit, I used thread that I already have. 

I connected the dots with thread.

Then I switched color for every new letter. 

Can you figure out what I'm spelling?

LOVE! Yes, love!

And this is how I turned a plain notebook from blah to TADA!

04 February 2019

Oil Burners and Sealing Wax Spoons

Thank you for your company today!

I found this at the back of my closet. It was a gift that I used a lot when it was new and then had forgotten about. It's an oil burner. Fragrance oil is poured in the bowl on top and the scent disperses with the heat of the candle.

Scent diffusers have become popular in the past few years to help create a calm, relaxing environment. Instead of buying one, I should just use this again. My favorite scents are lavender and rosemary. Plus I'll get to use the bag of tealights that's also hiding at the back of the closet.

But I found a new use for my oil burner...something to use in tandem with my sealing wax spoon.

"Sealing wax what?", you ask?

This spoon is a tool for sealing envelopes with wax. 

The wax seal is reminiscent of the Middle Ages -- as  a way to close a letter, a decorative touch, and the seal that was pressed on was a signature, indicating who the letter was from.  

The sealing wax spoon has a pouring spout for the melted wax and a wooden handle to keep the handle cool.

I bought this at a gift shop but they are easy to find on-line. You can also try using an inexpensive measuring spoon; just wrap the handle with clay or well-padded cloth to keep your fingers from burning when the metal becomes hot. 

Put small pieces of sealing wax in the bowl of the spoon.

sealing wax spoons, how to use wax seals, wax sealed envelopes, snail mail, letter writing, blah to TADA!
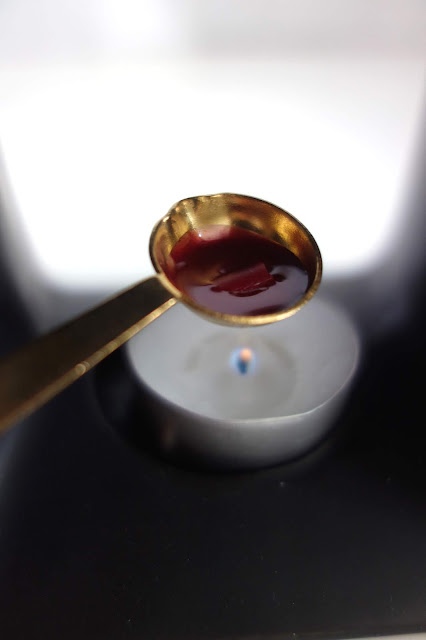
Put the spoon over the flame. 

sealing wax spoons, how to use wax seals, wax sealed envelopes, snail mail, letter writing, blah to TADA!
The sealing wax melts in a matter of minutes.

Pour the melted wax on the envelope flap.

Firmly press your wax seal stamp and let it stand for a few minutes to get a good impression.

This is my "C" seal...TADA!

I use the tea light candle of this oil burner to melt the wax. I use the top part of the oil burner to park my spoon while it cools. It also makes the process mess-free (no wax dripping on my desk). 

I was able to repurpose my oil burner and with my wax seal kit, I turned some plain envelopes from blah to TADA!