31 May 2013

A Tape Collection

It's finally Friday...hooray!

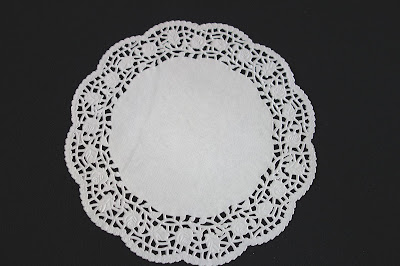
Yesterday, we made an envelope out of a doily and sealed the edges with decorative tape. 

Here's my humble collection of Washi tape. I think Washi tape is TADA! The blah -- I just stuff them in this sad plastic zipper bag.  

Then I saw this at the Michael's craft store. It's a desktop Washi tape dispenser!

 It's made of wood and has a removable dowel where the tape will rest.

Grommets are supplied if you want to attach more "shelves". 

Stackable shelves are sold separately. With this, it'll be easy to keep up with a growing collection.

It even has "teeth" to make cutting the tape easy. 

 Colorful tape all in a row, waiting to be used 
{or admiring them is just fine}.

Add some favorite writing instruments to the party.

Now that we're all organized, writing notes and 
wrapping presents will be much more fun.

Have a spectacular weekend dear friends!


30 May 2013

A Lacey Envelope

Hello There!

Yesterday, we made some thank you postcards. Let's say the message written on the back is a little too personal -- maybe put the card inside an envelope instead?

Not just an ordinary envelope, but one made from a doily!

Choose one big enough to cover the entire postcard. 

Position the postcard in the center and fold in the 
edges of the doily.

It's almost like wrapping a gift. 

It looks like an envelope already! 

Write names and addresses at the back and affix a stamp.

Seal the front with glue or decorative tape.
Isn't that blah to TADA!?

29 May 2013

Handmade Thanks

Boxed thank you cards are TADA! Sometimes, however, I have the urge to make my own.

Especially if I find cool things like this booklet of plain white post cards. 

One side is completely blank -- ready for sketches and a wild imagination. The other side tells you it's a post card with spaces for a handwritten note, an address and a place for postage.

Inspired by spring, I'm decorating it with flowers. 

Add layers of watercolor and here's what happens: 


 Unique postcards that deliver an all important message. TADA!


28 May 2013

A Correspondence Station

When I saw this in Southern Living Magazine, I was totally on board with the idea!

via Southern Living
Writing a thank you card can honestly be a daunting task most of the time: hunting for the stationery, figuring out what to write, taking it to the post office. This is one of the reasons people forego writing one. Such a blah.

But turn it into a TADA! by putting together a "thank you card" station! Stock it well with note cards {even personalized or monogrammed ones}, fancy pens and postage stamps.

Here's the version I made:

I used a mail caddy that we've had for ages. You can get one at an office supply or home store. Or you can also make your own.

The upper compartment contains cards for different occasions {ex. birthday, get well, wedding} and the lower section has blank cards and thank you cards.  

This occupies very little space on my desk and every time I see it, I get in the mood to write a card!

27 May 2013

How To Write a Thank You Note

I love receiving thank you cards. I think it's one of the highest forms of gratitude. That's why I also try to give them away generously.

Here's a bunch of adorable thank you cards I've come across:

Thank You Card Round-Up

1/2/3/4/5

Once we've picked the card, how exactly do we write on it? 

In her book Cupcakes and Cashmere, Emily provides a guide to craft the proper thank you card:
  •  Address the person
  •  Express thanks for the special gift. {If you were given money, thank the person for the "generous gift". If you were given a gift certificate, make sure to mention the actual store. If someone hosted you for a weekend or for a lovely meal, simply thank them for their hospitality.}
  •   Describe how you intend to use the item
  •   Mention time spent together and the next time you'll see each other
  •   Thank them again
  •   Sign off 

Not too difficult, right? Write the card as soon as you can and mail it without delay. Because gratitude and acknowledging kindness is always TADA!


24 May 2013

Yard Sale Tips

via Country Living
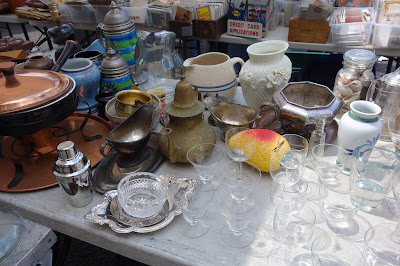
A lucrative way to spring cleaning is having a garage or yard sale. Get rid of unwanted things and earn some cash at the same time...that's double TADA! 

Considering putting one together? Here are a few links:


Here are some more ideas:

Display items on tables and garment racks.
Make sure there's a collective price tag {ex. all shirts $5.00},
or better yet, put a price tag on each piece. 

 Group similar things together.

Make use of boxes... 

 ...bins or baskets.

You can use old suitcases or bags, too. 

Display jewelry like they would in a 
boutique and have some mirrors handy
{including a full length one if there are 
lot of clothes on sale}. 

Have old newspaper and scrap paper to wrap breakables. 

Have bags in different sizes {opt to reuse paper/plastic 
shopping bags} for customer purchases.  

If you're feeling extra generous, offer free treats
like drinks and snacks for all who participated.

Good luck and may you all enjoy the weekend!

23 May 2013

Especially for Drawers

If you come over to my place and decide to snoop around, here's something you'll definitely find in the drawers: 

Especially for Drawers

1/2/3

Yes, I admit, I like to maximize every inch of sacred space by using dividers. The good thing about these interlocking boxes is that they can be configured to fit any drawer size. If you're feeling a little bit crafty, you can easily make these with empty cartons and tape/hot glue. Being organized...that's blah to TADA!

22 May 2013

Especially for Doors

It's all about spring cleaning on the blog this week. One space that has lots of storage potential is the back of a door -- a bedroom door or a closet door.

Turn that under-used area from blah to TADA! with this:

Especially for Doors

1/2/3

It's really meant for storing shoes but think of all its possibilities! It can be a home for all your accessories like scarves, jewelry and belts. This can also be used for toiletries if there's limited counter space in the bathroom. The compartments can also keep baby's essentials like diapers, ointments, teething toys and rattles in a nursery. And for the guestroom -- a place to keep extra toothbrushes, bars of soap, bottles of shampoo or mouthwash, and some reading material like city guides and maps.

Blah to TADA! indeed.

21 May 2013

Especially for Stuff

I think you'll agree with me that clutter is blah. It's something most, if not all, of us battle with. To curb this frustration, here are some TADA! suggestions:

Especially for Stuff

1/2/3


Hide or file them away in boxes and bins! I have covered boxes (1) where I keep old photos, collectible DVDs and correspondence. As an alternative, reuse gift boxes or shoe boxes.

I have similar bins (2) that work as a holding area for mail. One is labeled "File" and the other "Shred". The documents hang-out here until I'm ready for the daunting task of filing and shredding.  

These collapsible boxes (3) can be used anywhere. The small ones can store books and journals; the medium ones for toys and art materials that can then be placed on a shelf. Use the bigger ones to segregate recycling or organize sports equipment or stuff in the car.

Hooray for boxes!

20 May 2013

Especially for Boots

I have spring cleaning fever! I find it so satisfying to de-clutter and clean, especially now that the warmer months are on their way. This means sandal season...woohoo!

Time to put away my boots that have gotten so much mileage during the winter. Some pairs will be stored in their boxes, while one or two still have room in the closet. But droopy boots are blah.

I found this solution at the store -- boot shapers that look like thin bolster pillows. But why buy, when we can D-I-Y?!

via Real Simple
Our first option is to use empty and clean wine bottles to keep the body of the boot upright.

Another option is to make our own boot shaper: 

I'm using these complimentary airline socks. Because one size fits all, there's no heel and it's shaped like a tube.

Stuff it with fiber fill, add a long ribbon to join both shapers and hem each open end.  

 Then put them in your boots!

The ribbon will make it easier to remove the shapers with just one pull, and you'll be sure they're always a pair.

No more droopy boots ever again. 

For regular shoes, I have a shoe shaper 
right here.