23 August 2013

Peek-a-Boo

Today we conclude "Project: recycling paper bags".

 These handles were elevated from blah to...

TADA!: a rope and chain arm accessory!

 Instead of just tossing the bag away, let's make 
one that's more present-able. 

Cut out the labels on the bag to create windows.

We'll cover the windows of the bag with plastic rescued 
from a cleaned-out food container.

 Cut the plastic to size 
{a little bigger than the windows}.

 Attach the plastic to cover the windows 
using clear tape in the inside of the bag.

 Fashion new handles with ribbon or fabric. I'm using wire 
I saved from a Chinese take-out box dressed up
with colorful wooden beads.

 Tuck in a little gift {the windows give the recipient a
hint of what's inside}.

Or wrap the gift in tissue for an air of mystery. TADA!

Have a lovely weekend everyone!


22 August 2013

Gray to YAY!

I'm happy you could stop by today.

 At the start of the week, we turned this paper bag 
from blah to...

TADA! -- the paper bag's handle
transformed into a bag charm. 

 TADA! -- the other handle jazzed up
for its new life as a necklace.

With both handles put to good use, maybe we could do the same for the bag. 

I gave it new handles -- these are wire handles rescued from a Chinese take-away box {TADA!}.

For embellishments, I'm using foam glitter stickers, ribbon and punched-out scrapbook paper {notice the polka-do theme going on?}.

The ribbon disguises any brand name printed on the bag and layering the paper {use mounting tape for a raised effect} makes it more party-ready.

 Here's what the "new" bag looks like.

TADA!

21 August 2013

Tying a Knot

Maybe you like to shop and you've accumulated a bunch of paper bags.

 Before throwing them away, please consider giving them a second life.

 Let's rescue the handles and turn them from blah to...

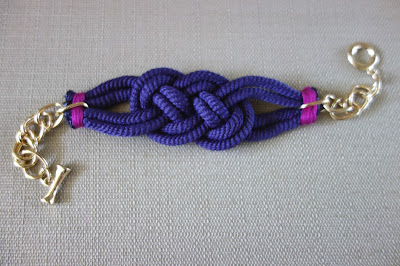
TADA! -- it's a cute little bracelet I made myself.

etsy-howto-sailorsknot-bracelet-11
via Etsy
To make it, I followed this genius tutorial on Etsy.

I ended up with this knot because the bag handles I used were not long enough. But it's still pretty, right {wink}? I sewed the ends with a needle and embroidery thread. It seals all the edges together and provides a pop of color.

 I also recycled this bracelet I hardly wore.
{Double TADA!}

 With the aid of a pair of pliers, my paper bag handles 
have officially become a bracelet!

I hope this has inspired you to make your own and, 
if you get a carried away, make a few more
to give to your besties.

20 August 2013

A Summer Necklace

It's very nice to see you today.

My current project: I'm turning paper bags from blah to TADA!

Right now, let's focus on the handles. Yesterday, I made a bag charm out of one and today, what about a necklace?

I'm using a few beads. These ones, however, are looking a little blah.

A few coats of paint was all they needed. I chose the color pool blue...the name itself relaxes me already! 

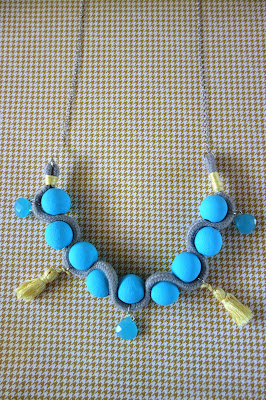
Let's make a loop at one end of the rope/bag handle. Secure in place with a few stitches. I used embroidery thread in yellow as an accent color.

With a needle and thread, attach the beads to the rope/bag handle in an alternating pattern.

Use as many beads as the rope/bag handle can accommodate. Doesn't this look like peas in a pod? Then finish with a few knots and a second loop on the open end.

Add a simple chain and...

 ...TADA! -- instant summery necklace.

For a little more detail:

 ...add some teardrop beads and tassels.

Sea and sunshine as an accessory...yes, please!

19 August 2013

A Makeover: Paper Bag Handles

Hello and Happy Monday!

So I have this habit of keeping shopping bags and gift pouches -- to be reused for the same purpose or for something totally unrelated. 

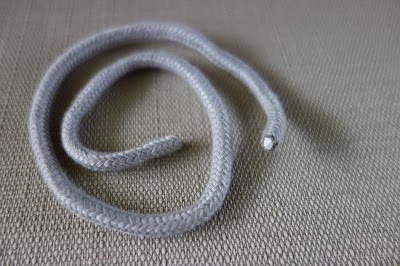
The gray handles of this bag has caught my fancy. Gray handles. I know. I'm bizarre like that.

I've detached it from the bag by undoing the knots. Now that that's done, let me show you the inspiration for today's blah to TADA!:

via JADETRIBE
I'm making the pompom embellishment {featured in this post}.

Of course we'll need some pompoms {I chose bright neon shades}.

Attach the pompoms to the ends of the 
rope/bag handle with hot glue.

If you have some yarn lying around, you can use that, too.

Just wind it around the rope/bag handle and secure with more hot glue.

Added some more yarn and TADA! -- my own pompom embellishment!

Tie it onto a bag handle...

...and my bag has instantly turned from blah to TADA!

16 August 2013

The Edible Garden

Hey, hey, happy Friday!

I've listed a few ideas on how to turn this wooden crate from blah to TADA! 

From the many options, this is what I've committed myself to:

I turned it into an herb garden! As I've mentioned before, mini container gardening is an annual summer project of mine.

If you're interested, here's how I made it:

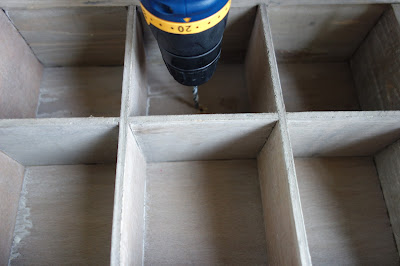
Drill holes at the bottom of each square.

These will serve as drainage holes {you can make them bigger}.

Add a layer of packing peanuts {recycled from the mail}.
Using pebbles or rocks is another option.

Put in a generous amount of potting soil.

Add in the herbs.

My herbs came from the farmer's market and the garden store.
These include thyme, mint, basil and rosemary.

All you need to do is remove the plant from the pot
it came in and loosen the roots before re-potting 
them in the new container.

Then water the plants. Each herb has different watering
needs {ex. daily; when the soil feels dry, etc.} that's why
I like that they're separated into compartments.

These herb labels add a little more TADA! {a good teaching
tool for kids who are learning to write, read and garden}.

When it's time to water, I like to make a roll call, "Hello, Rosemary!",
"How are you, Thyme?" {Talking to plants never hurt anyone, right?}

I've also included some cherry tomatoes and jalapeno peppers.
I'm now waiting for a happy harvest!

Have a delicious weekend, folks!