19 September 2017

Sartorial Snoopy

I stumbled upon something so adorable, I just have to share it with you!

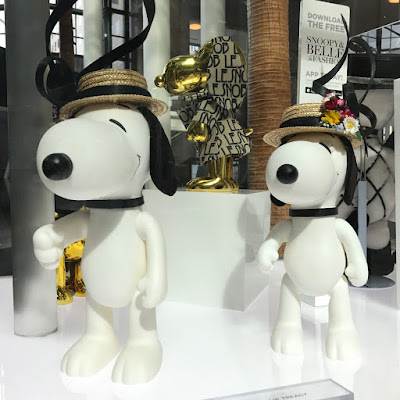
The star is Snoopy and his sister Belle in an exhibit called "Snoopy and Belle in Fashion", just in time for New York Fashion Week.

They're dressed by 50 big name fashion designers/celebrities. Here are some of my favorite looks:  

 Babesta

Paul Tazewell (Snoopy as Alexander Hamilton, 
Belle as Eliza Schuyler Hamilton) 

Oscar dela Renta 

Oscar dela Renta 

 Monse

 Swarovski

Hermes (those leather accessories!) 

 Diane Von Furstenberg (Belle in the iconic wrap dress!)

 Isabel Marant

Jenna Dewan Tatum x Danskin 

 Chanel

 Philip Treacy's gorgeous hats

Gucci 

 Rachel Zoe

 Betsy Johnson

Karl Lagerfeld 

Ocean Pacific 

Zac Posen 

Tokidoki

Snoopy was a beloved part of my childhood. I've got a soft spot for Snoopy and Peanuts Gang! If you'd like to check out this exhibit, it's in New York City's Brookfield Place until October 1, 2017.

18 September 2017

Framed Fabric

Hi guys! Thanks for your visit today.

Four years ago, I made this project to add life to our balcony at home. It's basically a piece of fabric that I framed.  

Because it was hung outdoors, the colors eventually faded and my inexpensive art piece started to look blah

And that means only one thing. Time to go shopping!

Did you know that Ikea has a line of fabrics? There's a wide assortment for any home improvement venture.

I chose this one in black and white with a culinary theme (even the husband approves). 

As with most things associated with Ikea, you do it yourself. And that includes measuring, cutting, and preparing a label for the register.

When I got home, I cut the fabric to fit the frame (with extra inches to allow it to fold over the wood backing). I pulled tightly and secured the fabric to the backing with lots of packaging tape. Then I added the frame.

Here is my new art piece. TADA!

It's nifty for dorm rooms or kid's rooms. Low commitment and budget-friendly! 

If you can, please stop by tomorrow -- I went to a fun exhibit and I have pictures to share.

11 September 2017

You Are A Badass

There are times when I feel a bout of insecurity or a slump of self-doubt. When this happens, I look for affirmations or what I call "power words" to help me get my act together.

I also read a lot of books. 

One of my favorites is "You A Badass" by Jen Sincero. The title alone brings back the self-confidence that levitates outside of my body every now and then.

One of the phrases that the author uses repeatedly is this:

I know, it's so basic. But sometimes we forget.

She repeats it before the end of every chapter and reminds you why:


Reading these words always turns my day from blah to TADA!

05 September 2017

Crafting from the Book: How To Make It

One of the books I thoroughly enjoyed reading this summer is "How To Make It".

Written and photographed by Erin Austen Abbott, it gives a lot of helpful information if you are considering turning your creative hobby into a business.

There are studio tours, interviews, and lists of "inspiring songs from the studio" from 25 different creative entrepreneurs.

Plus, there are also different DIY projects like this one:

It's by Lauren Bradshaw, doll maker and owner of Walnut Animal Society.

I decided to make my own lavender sachet because I had the materials on hand, and it's something I've never made.

It's a clever way to use fabric remnants and easy enough to do even if you don't have a sewing machine.

I cut two identical squares out of my fabric.

Then pinned them together (with the printed side facing each other). I also measured a half-inch margin from the edges.

I sewed along the margin, all around the fabric, but left a two-inch hole on one end.

I turned my sachet inside out, using a pencil to push out the stubborn corners.

These are dried lavender stems I took home from a trip to a lavender farm. Surprisingly, they are still very fragrant!

I filled the sachet with lavender buds (use a funnel and pour these through the hole in the sachet) and I used whole stems, too (which is less cumbersome and adds shape to make it look more pillow-like).

Stitch up the open hole.

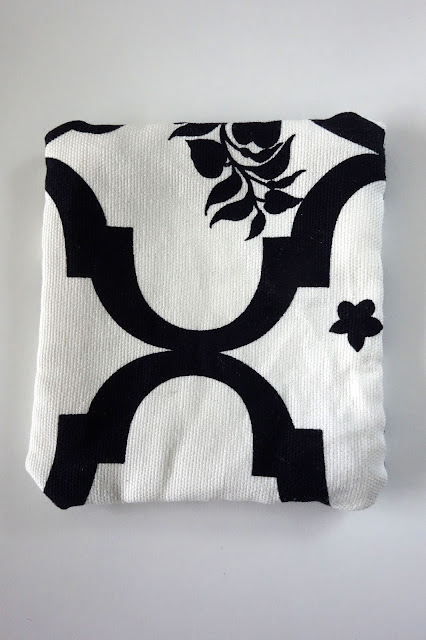
And here is my lavender sachet...TADA!

It adds a fresh and relaxing fragrance to a drawer or glove compartment. When the scent dissappears, simply replace with new buds.

04 September 2017

How To Make It

I have a new discovery that I just need to share! 

It's this beautiful book called "How To Make it" written by Erin Austen Abbott


In the book, Erin interviews 25 creative entrepreneurs from all over the United States and Canada. They include stationery designers, leather crafters, painters, a party goods designer, and print makers, and they all dish out advice on "how to make it" from maker to business owner.

It's an easy read (I read it from cover to cover) with lots of pictures. Here are my favorite parts of the book:

A section featuring "A Day in The Life" because, hey, owning a business is a 24/7 job! It shows how they layout their day and how they achieve a work-life balance. 

They also recommend a playlist...I'm all for new music suggestions!

And there are generous pages filled with easy how-to craft projects if you're still at the "maker" part of the spectrum.

In the dedication page, Erin says, "This book is for all the makers, crafters, artists, and working creatives who get up every day and pour their hearts into their work because they simply love what they do. You are Making It."

Awwww.💕

Please stop by tomorrow...I'm making a craft from the book!

28 August 2017

A Jewelry Dish

Hi and thanks for stopping by! A few weeks ago, I experimented with polymer clay. I had some clay left over to make a new craft.

I first kneaded the polymer clay and rolled it out. Some kitchen tools I used were a flexible cutting mat, a rolling pin, a round biscuit cutter, an offset spatula, and a sharp-edged tool (this triangle one is for fondant work) for detail.

 I cut out a circle with the biscuit cutter.

Then I embossed some ferns using a rubber stamp.

I let the clay sit on a cup of a muffin tin so that it bakes like a bowl instead of a flat plate.

I baked it for 25 minutes in a 275 degree Fahrenheit oven. The baking time varies depending on the clay's thickness. The clay has to be hard (not dough-like) when you take it out of the oven.

Here's what it looks like after baking. I like that the edges have a slight ruffle.

I painted on some blue watercolor with a brush but dabbed the clay with a paper towel which resulted to this marbled effect.

Then I added a layer of green paint in the center using the same technique.

And a final layer of yellow paint. Let the paint dry for an hour. 

And here it is, my adorable little jewelry dish. TADA!