27 July 2020

The Basics of Shrinky Dinks

Howdy friends! It's nice to see you today!

Shrinky Dinks tutorial, crafting with Shrinky Dinks, blah to TADA, handmade pins, DIY pins, Sharpie crafts, shrinking plastic crafts, toaster crafts, acrylic paint, bar pins
Have you tried or at least heard of Shrinky Dinks? They were popular in the 1980's but are still available today.  

Shrinky Dinks tutorial, crafting with Shrinky Dinks, blah to TADA, handmade pins, DIY pins, Sharpie crafts, shrinking plastic crafts, toaster crafts, acrylic paint, bar pins
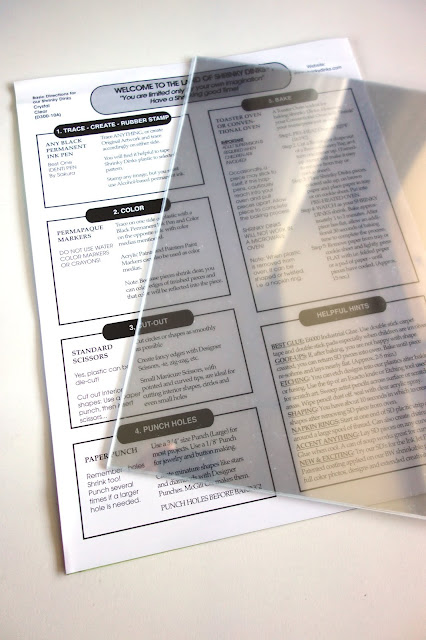
The kit includes these acetate-type sheets. 

Shrinky Dinks tutorial, crafting with Shrinky Dinks, blah to TADA, handmade pins, DIY pins, Sharpie crafts, shrinking plastic crafts, toaster crafts, acrylic paint, bar pins
Draw or trace images directly on the sheets, cut them out, and bake them in a toaster for a few minutes.

Shrinky Dinks tutorial, crafting with Shrinky Dinks, blah to TADA, handmade pins, DIY pins, Sharpie crafts, shrinking plastic crafts, toaster crafts, acrylic paint, bar pins
The heat from the toaster shrinks them to 1/3 of their original size and makes them 9 times thicker like hardened plastic...TADA! 

I've been experimenting with Shrinky Dinks so let me share this tutorial and a few tips I've learned. 

Shrinky Dinks tutorial, crafting with Shrinky Dinks, blah to TADA, handmade pins, DIY pins, Sharpie crafts, shrinking plastic crafts, toaster crafts, acrylic paint, bar pins
The first step is to create your image by drawing or tracing. Use a permanent marker to define the drawing. Try to fit as many images on the sheet to avoid waste while being mindful to leave a small cutting margin. 

Shrinky Dinks tutorial, crafting with Shrinky Dinks, blah to TADA, handmade pins, DIY pins, Sharpie crafts, shrinking plastic crafts, toaster crafts, acrylic paint, bar pins
The next step is to cut around each image. I used a bigger pair of scissors to separate the drawings from the sheet and a smaller pair of scissors to get into the grooves of each drawing.

Shrinky Dinks tutorial, crafting with Shrinky Dinks, blah to TADA, handmade pins, DIY pins, Sharpie crafts, shrinking plastic crafts, toaster crafts, acrylic paint, bar pins
Keep the cuts smooth and sharp. 

Shrinky Dinks tutorial, crafting with Shrinky Dinks, blah to TADA, handmade pins, DIY pins, Sharpie crafts, shrinking plastic crafts, toaster crafts, acrylic paint, bar pins, flowers
Notice that I cut very close to the edges of the drawing.

Shrinky Dinks tutorial, crafting with Shrinky Dinks, blah to TADA, handmade pins, DIY pins, Sharpie crafts, shrinking plastic crafts, toaster crafts, acrylic paint, bar pins, flowers, butterfly
Take the baking tray that came with your toaster oven and line it with a sheet of wax paper or parchment paper.

Lay the cutouts on the paper, making sure the inked side of the drawing is NOT touching the paper. It might be difficult to tell which is the inked side; just remember the orientation of how you drew your image (ex. wings on the left side of butterfly or smaller part of succulent plant on the right side of pot) and this side should be facing you, not the paper. Also, don't overcrowd the tray. You can bake a second and third batch later on.

The instructions on the package says to pre-heat the toaster to 325 degrees Fahrenheit (163 degrees Celsius). I wasn't sure how to do that on a toaster (compared to a regular oven that has a pre-heat setting) so I turned it on to the required temperature without putting anything inside the toaster. I set it to 5 minutes. When the timer rang, I put in the tray with the Shrinky Dinks and set the timer to 3 minutes (the baking time indicated in the instructions were 1-3 minutes). 

There was a small amount of smoke as the first batch was baking (yikes!). I lowered the temperature to 300 degrees Fahrenheit (148 degrees Celsius) in the following batches (no smoke...YAY!). 

Keep an eye on it and you'll see them shrink, as if watching a time lapse video. After the pieces lie flat, give it an additional 30 seconds before taking it out of the toaster.

Shrinky Dinks tutorial, crafting with Shrinky Dinks, blah to TADA, handmade pins, DIY pins, Sharpie crafts, shrinking plastic crafts, toaster crafts
Using a pair of oven mitts, take the tray out of the toaster and lay it on a trivet or cooling rack. Then press a sheet of paper or cardboard on top of the Shrinky Dinks and lightly press flat (I used a small book to weigh it down). Let this cool for about 15 to 20 seconds. 

Shrinky Dinks tutorial, crafting with Shrinky Dinks, blah to TADA, handmade pins, DIY pins, Sharpie crafts, shrinking plastic crafts, toaster crafts, acrylic paint, bar pins
See how they shrunk?

Let me show you some of the mistakes I made:

Shrinky Dinks tutorial, crafting with Shrinky Dinks, blah to TADA, handmade pins, DIY pins, Sharpie crafts, shrinking plastic crafts, toaster crafts, acrylic paint, bar pins, flowers
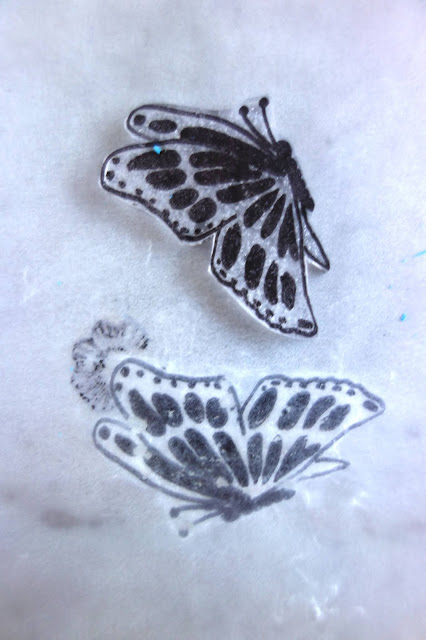
For this one, I put the ink-side down on the paper leaving some of the ink rubbing onto the wax paper. And there's some fuzziness and spots on the flower, too (blah).

Shrinky Dinks tutorial, crafting with Shrinky Dinks, blah to TADA, handmade pins, DIY pins, Sharpie crafts, shrinking plastic crafts, toaster crafts, acrylic paint, bar pins, butterfly
Same for the butterfly (blah).  So remember to position the drawing inked-side up on the tray. 

Shrinky Dinks tutorial, crafting with Shrinky Dinks, blah to TADA, handmade pins, DIY pins, Sharpie crafts, shrinking plastic crafts, toaster crafts, acrylic paint, bar pins, Shrinky Dinks what not to do
The succulent drawing curled into itself (blah)! This can happen if you leave it in the toaster for too long and not weigh it down immediately. Or it could also be the drawing where one side is more tapered? I'm not sure.

Shrinky Dinks tutorial, crafting with Shrinky Dinks, blah to TADA, handmade pins, DIY pins, Sharpie crafts, shrinking plastic crafts, toaster crafts, acrylic paint, bar pins, flower
Thankfully I positioned this flower correctly...TADA!

Shrinky Dinks tutorial, crafting with Shrinky Dinks, blah to TADA, handmade pins, DIY pins, Sharpie crafts, shrinking plastic crafts, toaster crafts, acrylic paint, bar pins
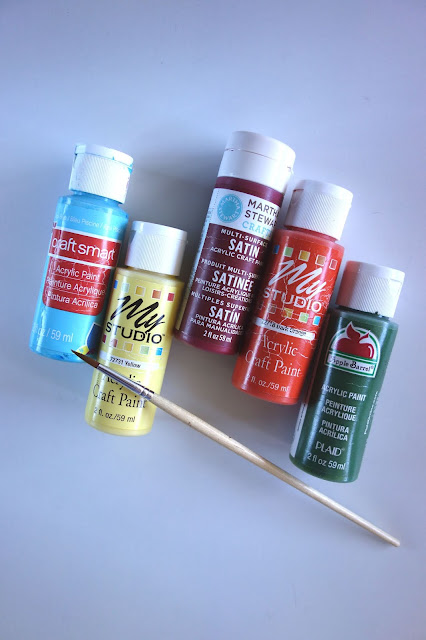
Take out your paint brush and acrylic paint and paint the back side of the Shrinky Dinks. I used three coats (hold it up to the light as you paint; there shouldn't be any clear areas).

Note: The instructions says that you can paint the Shrinky Dinks before baking them in the toaster. I tried that but the paint cracked and peeled off (blah). Not a good idea. Remember to paint after baking. 

Allow the paint to dry for at least 30 minutes.

Shrinky Dinks tutorial, crafting with Shrinky Dinks, blah to TADA, handmade pins, DIY pins, Sharpie crafts, shrinking plastic crafts, toaster crafts, acrylic paint, bar pins, flowers, butterflies
Here's what the painted flowers look like...TADA!

And the butterflies...TADA!

Shrinky Dinks tutorial, crafting with Shrinky Dinks, blah to TADA, handmade pins, DIY pins, Sharpie crafts, shrinking plastic crafts, toaster crafts, acrylic paint, bar pins, birds, butterflies
And the birds, too!

Shrinky Dinks tutorial, crafting with Shrinky Dinks, blah to TADA, handmade pins, DIY pins, Sharpie crafts, shrinking plastic crafts, toaster crafts, acrylic paint, bar pins, flower
Notice also the thickness of the plastic. 

Shrinky Dinks tutorial, crafting with Shrinky Dinks, blah to TADA, handmade pins, DIY pins, Sharpie crafts, shrinking plastic crafts, toaster crafts, acrylic paint, bar pins
To make it more functional, I'm adding a bar pin.  

Shrinky Dinks tutorial, crafting with Shrinky Dinks, blah to TADA, handmade pins, DIY pins, Sharpie crafts, shrinking plastic crafts, toaster crafts, acrylic paint, bar pins
This one's rescued from an old conference ID tag (blah to TADA!).

Attach the bar pin or pin with clutch back to the Shrinky Dinks with hot glue and allow this to dry for a few minutes.

Shrinky Dinks tutorial, crafting with Shrinky Dinks, blah to TADA, handmade pins, DIY pins, Sharpie crafts, shrinking plastic crafts, toaster crafts, acrylic paint, bar pins, denim jacket, fashion accessories, brooch
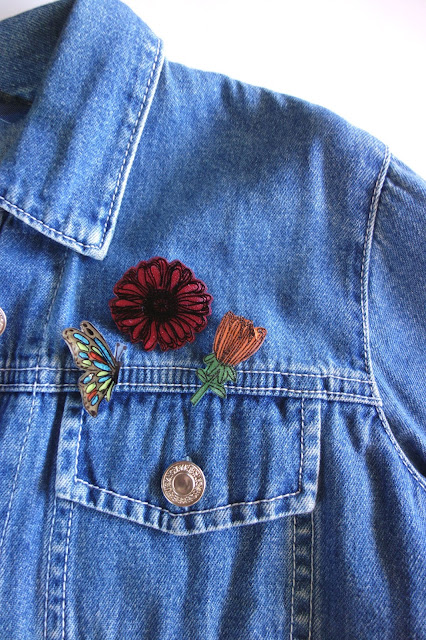
Use these pins to liven up your wardrobe.

Shrinky Dinks tutorial, crafting with Shrinky Dinks, blah to TADA, handmade pins, DIY pins, Sharpie crafts, shrinking plastic crafts, toaster crafts, acrylic paint, bar pins, denim jacket, fashion accessories, brooch
And turn your old closet staples from blah to TADA!


***An update as of August 27, 2020:

My Shrinky Dinks flower and butterfly pins were featured on the @AreteAteneo Instagram feed...TADA!

2 comments:

  1. Your new shrinky dink pins look fabulous on your jeans jacket. Love it! I've used shrinky dink in the past as a mother-daughter craft project. We made charms for notebooks and purses and stuff.

    ReplyDelete
    Replies
    1. What a nice memory with your daughter, Priscilla! I love the nostalgia of this craft. :)

      Delete

Your comments are very much appreciated!