16 May 2016

Photography Books

Hello there fellow crafters! I'd like to share a book that you might be interested in.

The Crafter's Guide to Taking Great Photos is a generous resource if you're a blogger or own a shop selling handmade goods. Most likely you are a multi-tasker with "photographer" as part of your many titles. It's always good to improve our photography skills so that our products will shine, right? Inside, there are many tips and tricks dispensed by our people -- the crafters!

This book, on the other hand, is a thrift store find. It's pretty outdated because it teaches you photography using film. I know, it's old school! I just thought it was cool to have because this is where photography began.

I hope you'll take really nice photos this week. If you have any book recommendations, send them my way!

09 May 2016

Bottle Cover Crafts

The items that we use everyday like food and beauty products come in bottles. Once empty and before sending these off to recycling, let's use them for some crafting!   

Today, we're using these bottle covers. Just detach them from their bottles and clean them well.

We'll need some paint in different colors.

Pour the paint onto paper plates and assign a bottle cover for each color.

We'll use the bottle cover like a craft stamp. Simply dip it in the paint and stamp it on a sheet of paper (I'm using white tissue).

I like that this cover's spout provides an easy grip.

I made as many circles to cover the paper.

Now for the next color.

And add another color. Once happy with the pattern, let the paint dry for a few hours.

Here's how I turned a sheet of tissue from blah to TADA!

There are many ways to use your handprinted paper. I like to use it for wrapping gifts. 

I repurposed a bottle cover and I made some plain tissue a lot prettier. That's hitting two birds with one stone. TADA!

08 May 2016

02 May 2016

Simple Storage Solutions

I hope everyone is doing great this Monday! Today I'd like to show you one of my favorite ways to store little things around the home. I use plastic boxes with built-in compartments. I have many kinds. Here, I'll show you:

I use them to keep a variety of pins -- safety pins, straight pins, hairpins. I keep this in the bathroom because that's where I'll usually need it. Like when I'm getting dressed and then realize I have a missing button or a broken hem. Or when I'm fixing my hair. And when in a hurry, what an immense time saver to have what you need right at your fingertips!

Here's another one that serves as my first aid kit. It's sturdy and spacious.

I have little ones, too, where I keep occasional necessities like rubber bands, pushpins, and paperclips.

These cases are also perfect for crafting. Remember my calligraphy kit?

I also like to use them to corral my cake decorating supplies. Sure, I can use this, but this plastic box can house more stuff, including the bigger piping tips.

These boxes can be sourced from craft stores, dollar stores, and stores specializing in home organization.

I really believe that little touches like these can turn your life from blah to TADA!

25 April 2016

Spring Cleaning Ideas

Like many of you, I read this best seller:

Written by Marie Kondo, The Life-Changing Magic of Tidying Up is a manual for putting order in your space and keeping it permanently that way. 

Also called the KonMari Method (a play on the author's name), the key lies here: Start by discarding. Then organize your space, thoroughly, completely in one go.

When discarding, ask the question: "Does it spark joy?" to decide whether or not an item should be kept. Take each item in one hand and if it sparks joy, keep it. If not, dispose of it.

When discarding, sort by category and not by room. That way you see the bigger picture. Similar items are grouped together and are designated a home. For example: books, clothing, paper, and komono (miscellaneous items like accessories and tools).

This purging process took me about two months resulting in bags and bags of stuff. I was very thoughtful in my process of discarding them.

Since a garage sale was out of the question (I live in an apartment), I chose to donate them to the Salvation Army. My items are sold at their Family Stores (thrift shops) and the proceeds go to their Adult Rehabilitation Centers. All for a good cause!

I even donated all the extra shopping bags I didn't need so that they'll be able to use them as packaging when patrons come to shop. 


I donated many of my clothes and old beddings (even the one with holes in them) to H&M. They have a program called H&M Conscious where they repurpose old garments by rewearing, reusing, and recycling, resulting in less waste. You can do the same by bringing your garments to any H&M store and with this good act, you will be rewarded with a coupon for 15% off your next purchase (effective in US stores).     


My old shoes, the really ratty ones, I dropped in these Re-Use-A-Shoe boxes located at selected Nike stores. They'll take any brand and these are remade into sport courts, bags and shoes. 

For books I longer needed, I sold them to a second hand shop where I got a few dollars in exchange. You can also check places like The Strand or Amazon

For paper, I took them to a paper shredding event in my town. They have these efficient machines that shred piles in one quick go. The same people who organize this event also have a day for electronics recycling and hazardous waste disposal. Something that I really appreciate because we should all be responsible when getting rid of our trash.  

I also had a bunch of stuff that I never used. You know, the ones I'd buy saying, "I can use this someday" or "This would make a neat gift". Well, I gathered them up and donated them to my church. I know they will be able to use them for their Tricky Tray Fundraiser. 

The book promised "the life-changing magic of tidying up" and it fulfilled it. I have so far remained neat and clutter-free. The idea of a clean space gives me a light feeling and allows me to be more productive. And because I know exactly what I have in my home, it I am able to shop smarter. Plus, I was able to donate to my favorite causes.

I think that's blah to TADA!

18 April 2016

Buttercream Cupcakes

Today, let's talk about cakes. There's a current cake trend that I am absolutely head over heels in love with. They're made of buttercream flowers. Here, take a look:

100일 케익_감동을 주는 나나케이크 여친선물!! by.나나 : 네이버 블로그:
via Nana Cake

10 Flower Cakes for Spring | including this design by Eat Cake Be Merry | on TheCakeBlog.com
via The Cake Blog

Floral Wreath Cake:
via bossacafez

Aren't these breathtaking? Who would not love to receive a cake like this? I wanted to try my hand at making these, perhaps in a smaller scale using cupcakes.

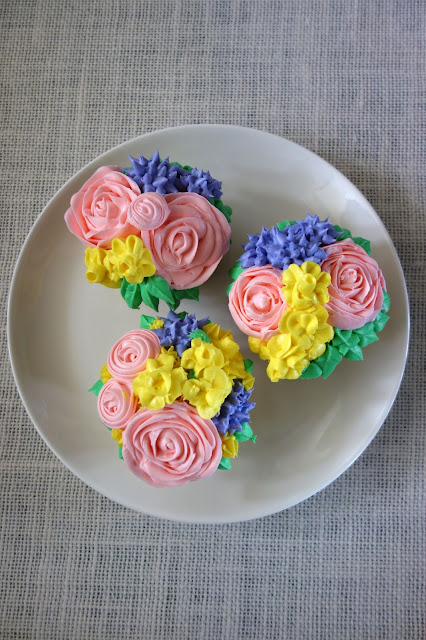
I made some frosting, tinted it with some food color, and piped different kinds of flowers (on a square of parchment paper). You'll find lots of tutorials on making buttercream flowers like here and here. Then I put the tray of flowers in the freezer to help set them up and makes them easier to handle. 

Then I put them on top of cupcakes (the cupcakes had a thin layer of white frosting). Because the flowers came from the freezer, I just peeled off the parchment square and gently placed each flower on the cupcake. I used a spatula to help me. Then I piped some leaves in the empty spaces.


It was my first attempt and I'm quite pleased with the results. It's a lot of work! But this style of frosting turns any cake or cupcake from blah to TADA!

11 April 2016

Forever Blooms

Just as the flowers are starting to bloom, I've plotted an evil way to preserve them. I apologize for the villainous thoughts, but reminders of spring are what I want to hold on to when the winter months roll around.

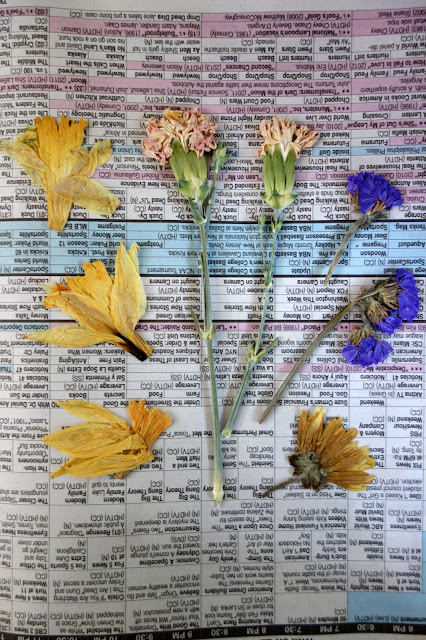
Here are some flowers, pressed in between newspaper and weighted with books. I like how the colors remain vibrant!

Adding them to trimmed cardstock allows these dried beauties to shine. Just attach them with glue and let dry for a few hours.


They make nice gift tags or a little surprise tucked inside a book or lunch box, left on a desk or computer monitor. TADA!

I hope you'll get to spread (and receive) some love this week!

04 April 2016

Treats for Sharing

I love to bake! I'll bake something whenever I have the chance or if some bananas need rescuing.

I'm always up for trying a new banana bread recipe.

And the one I made is from this book. A healthier alternative is a good option, don't you think? 

The white sugar is reduced in favor of overly ripe bananas. They give a deep, caramel flavor. Each bite was moist and the walnuts added the right crunch.

What's the use of baking if it isn't shared?

With the help of some paper bags...

And some hand-stamped labels...

Slices of banana bread became ready for gifting.

Don't forget to write what's inside.

I bet these will turn my friends' day from blah to TADA!