03 August 2020

Crafty Tool Spotlight: A Funnel Tray

Crafting is my all time favorite hobby which is why I'm always on the lookout for tools that help me do things efficiently.

Here is one that blew my mind:

This is called a bead funnel tray.

It looks like a flask with a window.

It has a hole that can be opened or sealed with a screw-on cap.

For jewelry makers, simply put the beads on the tray to keep them from rolling off your table. Whether you use needle and thread, wire, elastic cord, leather or ribbon to assemble your jewelry, the tray neatly corrals your beads.  

Once done with this set of beads, unscrew the cap...

And transfer the beads to a storage container. The flask works as a funnel...TADA!

No mess, no stress! I love that! 

For paper crafters, use the tray for glitter, embossing powder, and small confetti. 

Once you're done, the left-over glitter easily falls back into its jar...TADA! No sweeping or dusting involved!

This nifty tool is not easily available in most craft stores. There are similar ones here and here. But why buy when we can D.I.Y.?


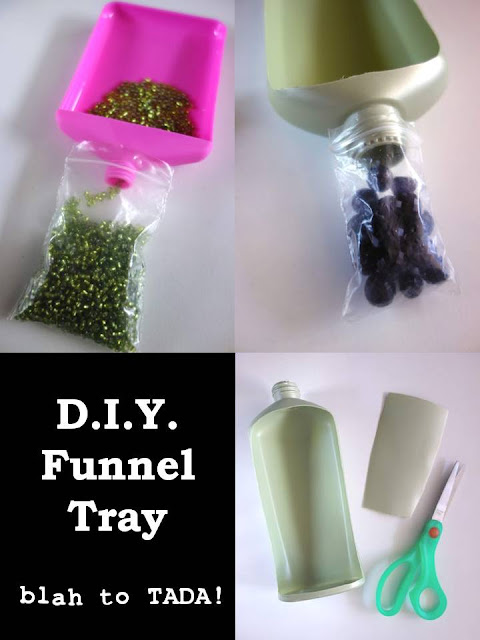
We can easily replicate a funnel tray using an empty lotion bottle. 

The best bottle to use is the one that's rectangular and can lie flat.

Rinse the inside with warm sudsy water, let it dry, and remove all the labels.


With a sharp pair of scissors, cut a window on one side of the bottle (you may need to make an initial cut with a blade especially if the plastic is thick...be very careful).

Try to make neat cuts and trim off any not-so-smooth edges. 

Detach the part of the lotion pump that looks like a straw...we no longer need this.

Screw the cap back on the bottle.

bead tray, jewelry making
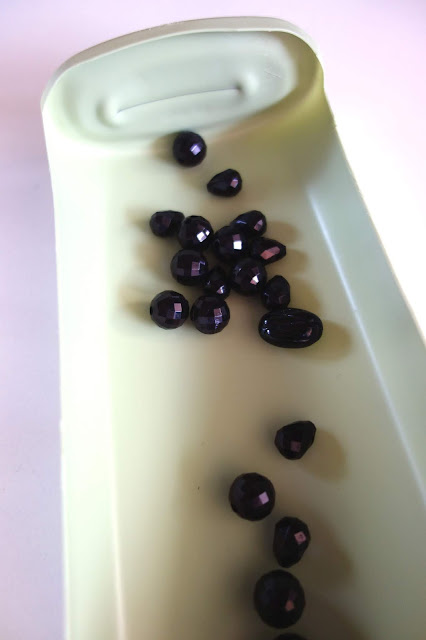
Now we can use it as a funnel tray...TADA!

bead tray, jewelry making
I like to use it for bigger beads...

bead tray, jewelry making
Because they can easily fit through the hole and back into the container...TADA!


D.I.Y. funnel tray, how to recycle a lotion bottle, turn a lotion bottle into a funnel tray, crafty recycling, tools for crafting, blah to TADA, funnel tray DIY
Isn't it wonderful that we get to do some recycling and also add a new tool to our craft arsenal? 

27 July 2020

The Basics of Shrinky Dinks

Howdy friends! It's nice to see you today!

Shrinky Dinks tutorial, crafting with Shrinky Dinks, blah to TADA, handmade pins, DIY pins, Sharpie crafts, shrinking plastic crafts, toaster crafts, acrylic paint, bar pins
Have you tried or at least heard of Shrinky Dinks? They were popular in the 1980's but are still available today.  

Shrinky Dinks tutorial, crafting with Shrinky Dinks, blah to TADA, handmade pins, DIY pins, Sharpie crafts, shrinking plastic crafts, toaster crafts, acrylic paint, bar pins
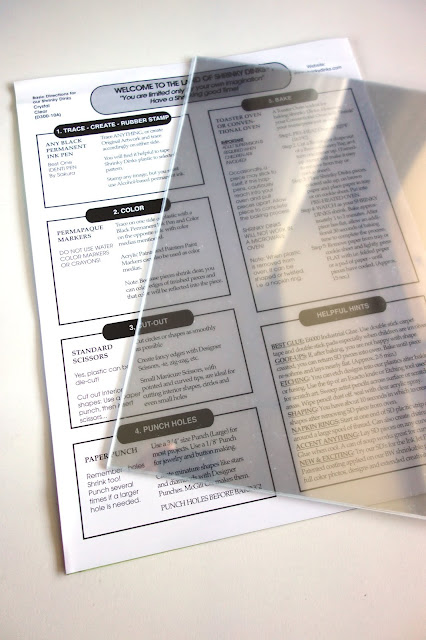
The kit includes these acetate-type sheets. 

Shrinky Dinks tutorial, crafting with Shrinky Dinks, blah to TADA, handmade pins, DIY pins, Sharpie crafts, shrinking plastic crafts, toaster crafts, acrylic paint, bar pins
Draw or trace images directly on the sheets, cut them out, and bake them in a toaster for a few minutes.

Shrinky Dinks tutorial, crafting with Shrinky Dinks, blah to TADA, handmade pins, DIY pins, Sharpie crafts, shrinking plastic crafts, toaster crafts, acrylic paint, bar pins
The heat from the toaster shrinks them to 1/3 of their original size and makes them 9 times thicker like hardened plastic...TADA! 

I've been experimenting with Shrinky Dinks so let me share this tutorial and a few tips I've learned. 

Shrinky Dinks tutorial, crafting with Shrinky Dinks, blah to TADA, handmade pins, DIY pins, Sharpie crafts, shrinking plastic crafts, toaster crafts, acrylic paint, bar pins
The first step is to create your image by drawing or tracing. Use a permanent marker to define the drawing. Try to fit as many images on the sheet to avoid waste while being mindful to leave a small cutting margin. 

Shrinky Dinks tutorial, crafting with Shrinky Dinks, blah to TADA, handmade pins, DIY pins, Sharpie crafts, shrinking plastic crafts, toaster crafts, acrylic paint, bar pins
The next step is to cut around each image. I used a bigger pair of scissors to separate the drawings from the sheet and a smaller pair of scissors to get into the grooves of each drawing.

Shrinky Dinks tutorial, crafting with Shrinky Dinks, blah to TADA, handmade pins, DIY pins, Sharpie crafts, shrinking plastic crafts, toaster crafts, acrylic paint, bar pins
Keep the cuts smooth and sharp. 

Shrinky Dinks tutorial, crafting with Shrinky Dinks, blah to TADA, handmade pins, DIY pins, Sharpie crafts, shrinking plastic crafts, toaster crafts, acrylic paint, bar pins, flowers
Notice that I cut very close to the edges of the drawing.

Shrinky Dinks tutorial, crafting with Shrinky Dinks, blah to TADA, handmade pins, DIY pins, Sharpie crafts, shrinking plastic crafts, toaster crafts, acrylic paint, bar pins, flowers, butterfly
Take the baking tray that came with your toaster oven and line it with a sheet of wax paper or parchment paper.

Lay the cutouts on the paper, making sure the inked side of the drawing is NOT touching the paper. It might be difficult to tell which is the inked side; just remember the orientation of how you drew your image (ex. wings on the left side of butterfly or smaller part of succulent plant on the right side of pot) and this side should be facing you, not the paper. Also, don't overcrowd the tray. You can bake a second and third batch later on.

The instructions on the package says to pre-heat the toaster to 325 degrees Fahrenheit (163 degrees Celsius). I wasn't sure how to do that on a toaster (compared to a regular oven that has a pre-heat setting) so I turned it on to the required temperature without putting anything inside the toaster. I set it to 5 minutes. When the timer rang, I put in the tray with the Shrinky Dinks and set the timer to 3 minutes (the baking time indicated in the instructions were 1-3 minutes). 

There was a small amount of smoke as the first batch was baking (yikes!). I lowered the temperature to 300 degrees Fahrenheit (148 degrees Celsius) in the following batches (no smoke...YAY!). 

Keep an eye on it and you'll see them shrink, as if watching a time lapse video. After the pieces lie flat, give it an additional 30 seconds before taking it out of the toaster.

Shrinky Dinks tutorial, crafting with Shrinky Dinks, blah to TADA, handmade pins, DIY pins, Sharpie crafts, shrinking plastic crafts, toaster crafts
Using a pair of oven mitts, take the tray out of the toaster and lay it on a trivet or cooling rack. Then press a sheet of paper or cardboard on top of the Shrinky Dinks and lightly press flat (I used a small book to weigh it down). Let this cool for about 15 to 20 seconds. 

Shrinky Dinks tutorial, crafting with Shrinky Dinks, blah to TADA, handmade pins, DIY pins, Sharpie crafts, shrinking plastic crafts, toaster crafts, acrylic paint, bar pins
See how they shrunk?

Let me show you some of the mistakes I made:

Shrinky Dinks tutorial, crafting with Shrinky Dinks, blah to TADA, handmade pins, DIY pins, Sharpie crafts, shrinking plastic crafts, toaster crafts, acrylic paint, bar pins, flowers
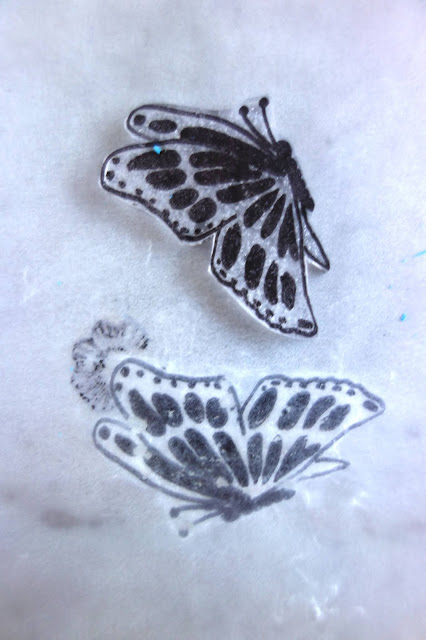
For this one, I put the ink-side down on the paper leaving some of the ink rubbing onto the wax paper. And there's some fuzziness and spots on the flower, too (blah).

Shrinky Dinks tutorial, crafting with Shrinky Dinks, blah to TADA, handmade pins, DIY pins, Sharpie crafts, shrinking plastic crafts, toaster crafts, acrylic paint, bar pins, butterfly
Same for the butterfly (blah).  So remember to position the drawing inked-side up on the tray. 

Shrinky Dinks tutorial, crafting with Shrinky Dinks, blah to TADA, handmade pins, DIY pins, Sharpie crafts, shrinking plastic crafts, toaster crafts, acrylic paint, bar pins, Shrinky Dinks what not to do
The succulent drawing curled into itself (blah)! This can happen if you leave it in the toaster for too long and not weigh it down immediately. Or it could also be the drawing where one side is more tapered? I'm not sure.

Shrinky Dinks tutorial, crafting with Shrinky Dinks, blah to TADA, handmade pins, DIY pins, Sharpie crafts, shrinking plastic crafts, toaster crafts, acrylic paint, bar pins, flower
Thankfully I positioned this flower correctly...TADA!

Shrinky Dinks tutorial, crafting with Shrinky Dinks, blah to TADA, handmade pins, DIY pins, Sharpie crafts, shrinking plastic crafts, toaster crafts, acrylic paint, bar pins
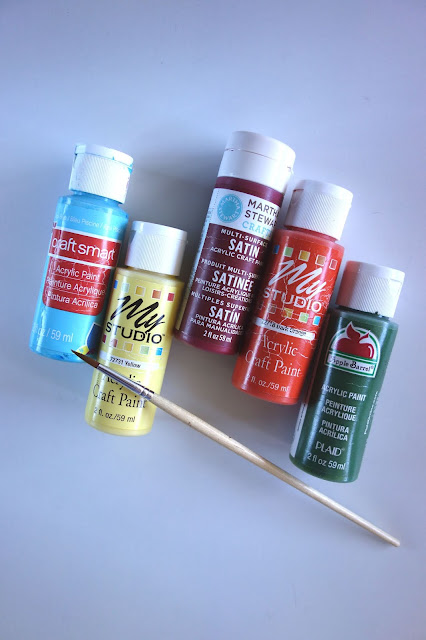
Take out your paint brush and acrylic paint and paint the back side of the Shrinky Dinks. I used three coats (hold it up to the light as you paint; there shouldn't be any clear areas).

Note: The instructions says that you can paint the Shrinky Dinks before baking them in the toaster. I tried that but the paint cracked and peeled off (blah). Not a good idea. Remember to paint after baking. 

Allow the paint to dry for at least 30 minutes.

Shrinky Dinks tutorial, crafting with Shrinky Dinks, blah to TADA, handmade pins, DIY pins, Sharpie crafts, shrinking plastic crafts, toaster crafts, acrylic paint, bar pins, flowers, butterflies
Here's what the painted flowers look like...TADA!

And the butterflies...TADA!

Shrinky Dinks tutorial, crafting with Shrinky Dinks, blah to TADA, handmade pins, DIY pins, Sharpie crafts, shrinking plastic crafts, toaster crafts, acrylic paint, bar pins, birds, butterflies
And the birds, too!

Shrinky Dinks tutorial, crafting with Shrinky Dinks, blah to TADA, handmade pins, DIY pins, Sharpie crafts, shrinking plastic crafts, toaster crafts, acrylic paint, bar pins, flower
Notice also the thickness of the plastic. 

Shrinky Dinks tutorial, crafting with Shrinky Dinks, blah to TADA, handmade pins, DIY pins, Sharpie crafts, shrinking plastic crafts, toaster crafts, acrylic paint, bar pins
To make it more functional, I'm adding a bar pin.  

Shrinky Dinks tutorial, crafting with Shrinky Dinks, blah to TADA, handmade pins, DIY pins, Sharpie crafts, shrinking plastic crafts, toaster crafts, acrylic paint, bar pins
This one's rescued from an old conference ID tag (blah to TADA!).

Attach the bar pin or pin with clutch back to the Shrinky Dinks with hot glue and allow this to dry for a few minutes.

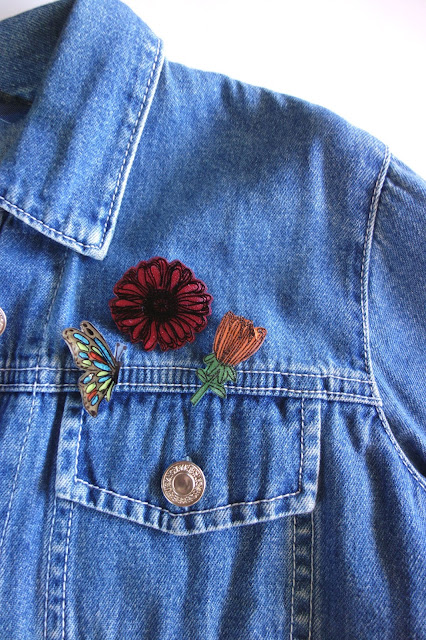
Shrinky Dinks tutorial, crafting with Shrinky Dinks, blah to TADA, handmade pins, DIY pins, Sharpie crafts, shrinking plastic crafts, toaster crafts, acrylic paint, bar pins, denim jacket, fashion accessories, brooch
Use these pins to liven up your wardrobe.

Shrinky Dinks tutorial, crafting with Shrinky Dinks, blah to TADA, handmade pins, DIY pins, Sharpie crafts, shrinking plastic crafts, toaster crafts, acrylic paint, bar pins, denim jacket, fashion accessories, brooch
And turn your old closet staples from blah to TADA!


***An update as of August 27, 2020:

My Shrinky Dinks flower and butterfly pins were featured on the @AreteAteneo Instagram feed...TADA!

20 July 2020

Perfume Projects

Thank you for visiting me today!


"The Perfume Collector" was one of the books I could not put down. Set in London in the 1950's, it tells the story of Grace Monroe who receives a mysterious letter saying she was bestowed a generous inheritance from Eva D' Orsay, a woman she has never met. Grace flies to Paris to find clues about Eva and if they are at all related. Her answers come from an abandoned perfume shop. Three specific perfumes, La Premiere, Aureole Noire, and Choses Perdus, reveal Eva's story. 

The book's author, Kathleen Tessaro, vividly takes the reader on a journey to a bygone era. Her flawed heroines are very relatable, I was cheering for them to succeed. She also describes "scents" in a manner I've not read before:


"Perfume should tell a story -- the story of who you are, who you might be, perhaps even of who you fear becoming...all of these things are possible. It's a very intimate element of a woman, just like her signature or the sound of her voice."

*****

"You can't go to school to learn the art of the perfumer. You have to possess a natural, God-given talent and then the secrets of the profession must be passed on by the master."

*****

"The effect was beyond what he could have imagined. His perfume highlighted her youthful freshness and yet blended naturally with her rich, musky undertones. It 'finished' her, gave her a polished elegance, joining the fractured sides of her together."

*****

"You see, nothing is more immediate, more complete than the sense of smell. In an instant, it has the power to transport you. Your olfactory sense connects not to the memory itself, but to the emotion you felt when that memory was made. To recreate a scent memory is one of the most challenging, eloquent pursuits possible. It's poetry, in its most immediate form."

*****

"Once upon a time, I was a perfumer. Now I'm reduced to a custodian, a collector of the past. I can't write or paint or compose...my language is scent -- the vocabulary of feeling and memory." 

*****

"Because this is the root of all perfume creation. To change to way we smell. It could be argued that all perfume is born out of shame; a self-consciousness of our natural odor. We want to hide it."

*****

"Fragrance is an aspiration. A goal. Not just a tool of seduction but of power and status. Do you realize how much the ancients used to pay for frankincense and myrrh? Whole empires were built on the trade of these commodities. You see, even then, when life was short and cruel, people wanted to smell differently. To be transported."


*****

"This is floral, earthy, and there's the clean overlay of aldehydic waxiness and soft flowers. And then, underneath, a whiff of more feral, impolite essences. Under the clean, innocent exterior there's a carnal presence. It's not without ulterior motive. This is the scent of intoxication and desire. The perfume of seduction."


After reading this book, I was inspired to mix some scents. 

This is a perfume kit that my mom-in-law's sister sent me.  She is a very thoughtful lady, sending me books and clothes that she thinks I'll like. It was soooo kind of her to find this at a church sale. She knows all too well that this is my jam. 

Inside is a book detailing the history of perfume and possible ways to mix scents. 

The kits also came with these little fragrances.  It was fun to play around with different concoctions -- a drop of the floral, two drops of the woody, a drop of the musk; or a drop of the white flowers, a drop of the floral, a drop of the fruits, and a drop of the rose accord. 

I used strips of paper, the kind that you would find when trying perfume at the beauty counter.  When I was pleased with a combination, here's what I did:


I repeated the scent combination and added them to the pendants I made last week

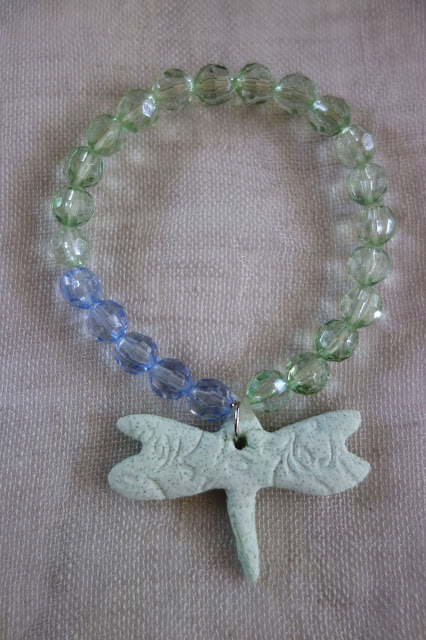
The pendant is handmade from salt dough and can absorb the fragrance oils. It's attached to beads strung on stretchy cord.

Essentially, it's a scented bracelet. You can wear perfume that's not directly applied to your skin...TADA!

The scent on the pendant lasts for several weeks and I can add new scents when the original has dissipated.

Aromatherapy oil can also be used on the pendantSo if you want to feel calm (ex. chamomile) or invigorated (ex. peppermint) you're just a whiff away...TADA!

Scented Salt Dough Pendants