22 November 2018
19 November 2018
Simple Living and Easy Napkin Ties
Kinfolk is a magazine that I've followed for many years now because of their clean, calm aesthetic and back-to-basics approach to living. I discovered that they have books, too!
One of the books is The Kinfolk Home featuring houses from all over the world that embody slow living. They define slow living as "an ethos that encourages us to reclaim our time and devote it to whatever brings us joy and meaning." It also means, "cultivating community, simplifying our lives, and reclaiming our leisure time."
The photography is beautiful and the profiles are thoughtful. It makes me want to redecorate!
These homes have a lot of natural light and are filled with meaningful objects.
They use a neutral palette and there are a lot of accents made from wood and other natural materials.
Rooms are clutter-free.
Entertaining at home is also non-fussy.
It's more about togetherness instead of "putting on a show" with fancy food and table settings.
Inspired by what I saw and read in these pages, I'd like to share this blah to TADA! idea with you.
We'll re-use these as napkin ties.
Simply roll up a napkin with the cord underneath it.
Slip the ends into the loop...
Then pull to tighten.
Now, we've got an elegant accent for a Mininimalist table setting for every day or the coming holidays...TADA!
12 November 2018
An Ode to Flea Markets
The thrill of the hunt.
That's the reason I love flea markets and thrift stores.
Sure, they can be viewed as other's people junk.
And the nostalgia...
There are also a load of useful notions for sewing and crafting.
And items that can be used for interior or graphic design.
Records...they never went away even in the age of digital downloads.
And lots of china and pottery...very, very hygge!
Because the goods are unique in each market, this sign is a good reminder (no one wants to suffer long term regret).
In every new place I visit, you know where to find me. See you there!
05 November 2018
A Needle-felted Acorn
Hi everyone! Thanks for stopping by today.
Have you ever tried needle felting? I'm quite an amateur with only this craft and this project to show for.
Because we're deep in the months of Autumn, I thought making a few acorns was appropriate:
All we need are a felting needle, wool roving, a felting block, and an acorn cap (picked up from the sidewalk).
The goal is to make the wool smaller. The stabbing motion of the needle lets the fibers "stick together".
Look! This resembles a ball now. Keep working with the needle to form an acorn shape.
Attach the wool to the acorn cap with hot glue and we've got these acorns...TADA!
Make a few of these and put them in a jar or small bowl to serve as seasonal decor for your coffee table or mantle.
Or you can make this...
An acorn pendant!
Attach jump rings/pendant findings to the top of the acorn (secure with super glue) and string this through a chain.
Who wouldn't love a fairy tale acorn necklace like this one? TADA!
29 October 2018
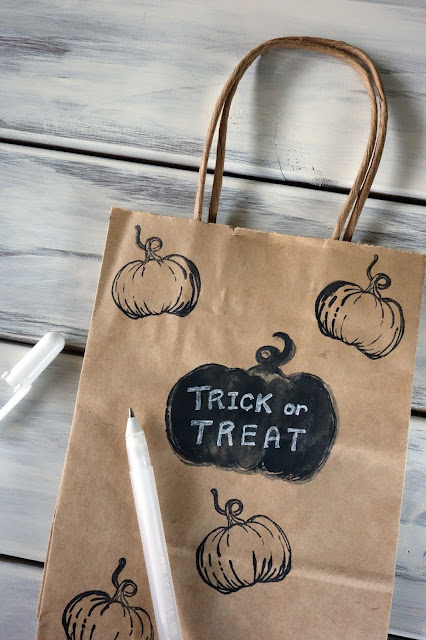
Halloween Gift Bags
Hello guys! Because it's the season of critters and candy, a Halloween craft is but appropriate.
All we need are a paper bag (saved from a shopping trip), Halloween-themed craft stamps, and a black ink pad.
Use this bag to collect candy on Halloween or fill it with treats to give away...TADA!
Happy Halloween!
22 October 2018
Crafting with Twigs
During the fall, the sidewalks are abundant with leaves and twigs. I notice these as I wait at the bus stop, and my mind races with ideas on how to possibly craft with them.
Here are a few ways I've turned twigs from blah to TADA!:
A macrame' wall hanging. It's traditionally made with rope but yarn was what I had on hand.
Here's another idea:
We'll need a twig.
And some fabric remnants...no sewing necessary. The frayed edges add rustic personality.
And fabric markers. It's a clever application for brush calligraphy or bounce lettering.
With hand stitching, sew a pocket for the twig.
A few meters of thread makes for an instant hanging device.
A simple decoration that can be personalized for the home or dorm room...TADA!
15 October 2018
How to Make a Pin Cushion
Do you like to sew? Or maybe you know a few friends who enjoy sewing. Well, a pin cushion is an essential tool to have on hand.
Today, let me show you how to make one.
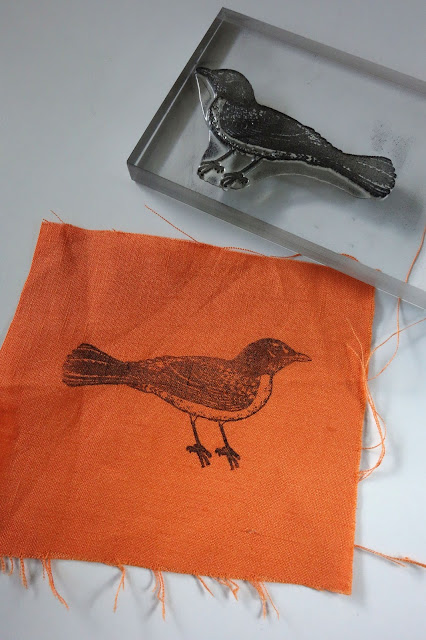
This project is a smart way to use fabric remnants. This orange linen was left over from an embroidered botanical wall art. I just cut two rectangles out of it.
This simple design adds some character already.
And stitch around it by hand or with a sewing machine but make sure to leave a half-an-inch opening.
Turn the fabric inside out and push the corners out with a pencil. Stuff this with fiberfill through the opening and close the hole with handstitching.
And here is our pretty pin cushion...TADA!
Subscribe to:
Comments (Atom)


