25 May 2020

Let's Make Some Stamps

Thank you so much for stopping by today! Several years ago, I learned how to make my own rubber stamps. My skills have become rusty, it's about time I freshen up my technique. Would you like to carve some stamps with me?

I'm getting inspiration from this book that I borrowed from the library. It's "Making An Impression" by Geninne Zlatkis.  Ever since I stumbled upon her work, I fell in love with her artistic style.

Geninne starts with a primer on where to get ideas -- hers are from nature, collected while walking outdoors with her dog.

She gives a list of necessary tools.

As well as many, many carving techniques.

At the back of the book, she has some sample illustrations that she used for her stamping applications like stationery, totes, t-shirts, and flower pots.

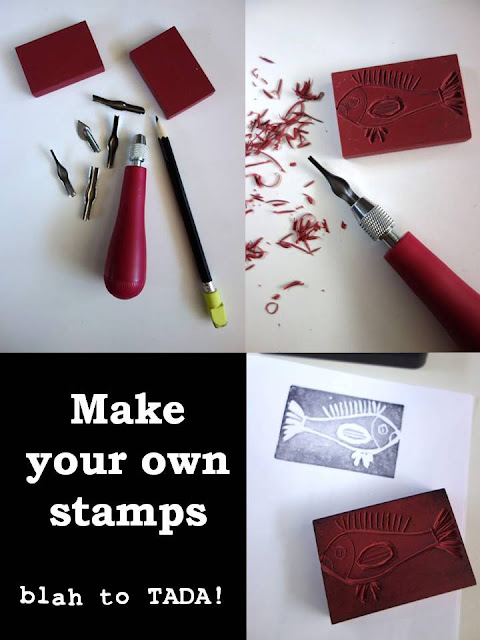
Here are the tools we will need: a pencil, a lino cutter with assorted blades, and carve blocks or rubber erasers (from the office supply store or dollar store). 

Decide on an image and trace this with a pencil and a sheet of tracing paper.

Position the image for transfer: the pencil-side should face the carve block or rubber eraser.

Rub the image onto the carve block or rubber eraser using a spoon. Use even pressure to allow the image to adhere.

Gently remove the paper to reveal the transferred image.

If there are lines that are too light, go ahead and define those areas with a pencil.

Using the smallest blade of the lino cutter, carve out the lines as neatly and as straight possible. 

Rinse the stamp with warm, soapy water to get out the "rubber crumbs" in the crevices.  Dry with an absorbent towel.

Test your new stamp by adding some ink.

Use scrap paper to see your image. It will tell you if your carving needs more definition or cleaning up. But once satisfied, it's ready to use the stamp! 

I made an envelope out of an old book.

crafts from old books, envelope, envelope made from book pages
Then I added the image...TADA!

envelope, envelope from book pages, crafts from old books
I also made this version -- it looks like a Polaroid photo.

envelope, envelope made from book pages, crafts from old books, gift wrapping
Now I've got these little envelopes that I can use for letter writing or gift wrapping featuring my very own stamp...TADA!

Make your own stamp, Make your own stamp using erasers

18 May 2020

My Coloring Book

Do you like coloring books? It took me a while to warm up to them. I started with coloring postcards and was initially intimidated by the skinny lines (aren't we supposed to color within the lines?).

But in my attempt to "Do something creative everyday", I got this one four years ago. It's all about flowers (and I do love anything floral). 

It's the size of a paperback novel...very easy to carry around.  

I like to color with the seasons and experience what happens outdoors: daffodils in the spring, hydrangeas in the summer, mums in the fall, and poinsettias in the winter. 

I like to use watercolors and freshly sharpened colored pencils.

I usually try to finish a page in one sitting. But sometimes, I start the page and complete it on another day.

Here are a few samples of my work:


It's a quiet and relaxing activity. It makes me mindful but allows my mind to wander, too.

Once I've colored all the pages, I plan to turn it into a journal where I can write reflections on the blank back pages...TADA!

11 May 2020

Crochet Flowers

I'm so happy you stopped by today!

Crochet is one of the crafts I'm currently learning and trying to improve on. The materials are simple to find and it's not an expensive hobby. My grandaunt used to crochet. She made doilies, runners, and bedspreads that looked like fine lace. I also have nieces who love to crochet. They make beanies, headbands, and baby blankets! 

There are many resources like You Tube and Pinterest that will teach you how. The library is also a good place to find well-written books on the subject. 

crochet, tools for crochet, blah to TADA, scissors, crochet hooks, crafts
This book by Caitlin Sainio was right up my alley because I wanted to crochet some flowers.

The book has a lot of pictures and easy to follow instructions. Here are some of my first attempts:

A four leaf clover 

Phlox 

 Oxalis

 Flax

 Jasmine


They are pretty as is but let me show you how I like to use these crochet flowers:

I sewed on a button at the center.

Then I sewed on a hair elastic at the back.

Now I've got a unique hair tie...TADA!

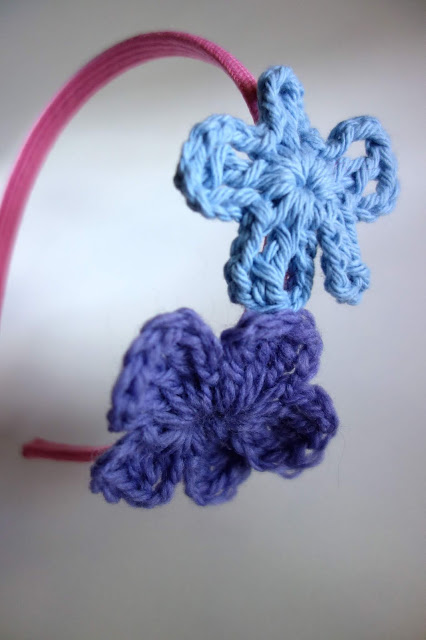
I sewed two different flowers on a headband.

These flowers add a personalized touch and turn plain hair accessories from blah to TADA!

How about you, do you like to crochet?

10 May 2020

High Five, Mommies!

Celebrating all you wonderful moms! If you still have a mom, tell her you love her today. If you're a mom, take the day off and enjoy!