26 April 2021

Block Printing Basics

Today, let me tell you about Indian Block Printing, a craft that I learned recently.

block printing basics, Indian block printing, block printing kit, blah to TADA, crafts, handmade, wood block printing, Potli a bag of wonders
Block Printing is like stamping, but instead of rubber stamps and an ink pad, wood blocks and paint are used. It's an ancient handicraft that finds its origins in India and the skill is not learned in school but passed on from generation to generation. 

block printing basics, Indian block printing, block printing kit, blah to TADA, crafts, handmade, wood block printing, Potli a bag of wonders
I learned the basics from a class at our local library. 

block printing basics, Indian block printing, block printing kit, blah to TADA, crafts, handmade, wood block printing, Potli a bag of wonders
Each participant was given this Block Printing kit.

block printing basics, Indian block printing, block printing kit, blah to TADA, crafts, handmade, wood block printing, Potli a bag of wonders
Here are the contents. Notice the little stamps (bird, tree, border)? These are the wood blocks. They are hand-carved using teakwood or rosewood and treated with linseed oil. I'm in love and impressed with the intricate details! 

block printing basics, Indian block printing, block printing kit, blah to TADA, crafts, handmade, wood block printing, Potli a bag of wonders
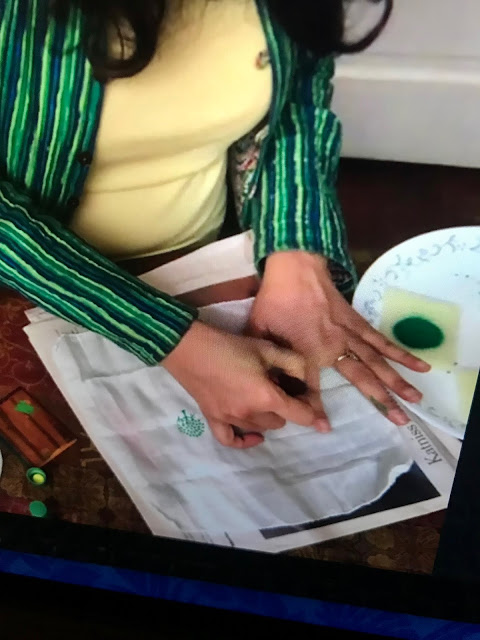
Due to the current pandemic, the class was done virtually. Our teacher Seema enthusiastically showed us all we needed to know. 

paint, block printing basics, Indian block printing, block printing kit, blah to TADA, crafts, handmade, wood block printing, Potli a bag of wonders
The first step is to cover your work surface with a few layers of newspaper. This will protect your table and functions as a cushion when stamping.

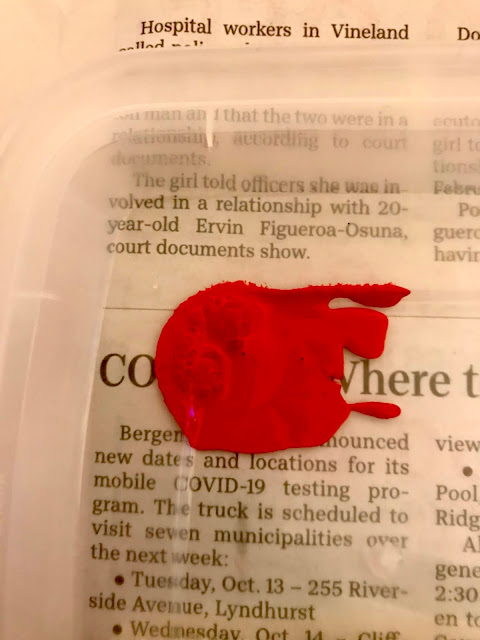
The next step is to prepare the paint (water-based like watercolor or poster paint). Put a small amount of paint on a plate or plastic food container. If the paint is too thick, you can add a tiny amount of salt to make the paint runny. Don't use water because it will only water down the color. 

block printing basics, Indian block printing, block printing kit, blah to TADA, crafts, handmade, wood block printing, Potli a bag of wonders
On top of the paint, position a small piece of the printing pad (sponge). Using one of the wood blocks (design facing downwards), tap the sponge gently all around so that the paint lifts to the surface of the sponge.

This will be our ink pad.

block printing basics, Indian block printing, block printing kit, blah to TADA, crafts, handmade, wood block printing, Potli a bag of wonders
Keep tapping the wood block on the sponge until the design is saturated with color.

block printing basics, Indian block printing, block printing kit, blah to TADA, crafts, handmade, wood block printing, Potli a bag of wonders
Test the print on a piece of paper. This will tell you where you need to apply more paint.

Do the same process for all paint colors you intend to use.

block printing basics, Indian block printing, block printing kit, blah to TADA, crafts, handmade, wood block printing, Potli a bag of wonders
Once satisfied with how the print registers on paper (ex. color is even and details are visible), we're ready to print on fabric.

handkerchief, fabric, block printing basics, Indian block printing, block printing kit, blah to TADA, crafts, handmade, wood block printing, Potli a bag of wonders
This handkerchief was also part of the kit. Seema says cotton is the ideal fabric to use. Now is a good time to plan your design. Will you have a pattern (ex. linear or alternating) or will it be a repetition of a single print?

block printing basics, Indian block printing, block printing kit, blah to TADA, crafts, handmade, wood block printing, Potli a bag of wonders
When you're ready, find the center of the fabric and start from there. Apply the freshly-inked block print, press down a few seconds, gently roll to the side and lift up. Keep repeating the design, making sure to ink the wood block before making a new print on the fabric.

block printing basics, Indian block printing, block printing kit, blah to TADA, crafts, handmade, wood block printing, Potli a bag of wonders
With the first print as reference, stamp alternately from left to right so that we end up with an even number from the center.

No need to use a ruler, just eyeball it. The imperfections add charm. 

block printing basics, Indian block printing, block printing kit, blah to TADA, crafts, handmade, wood block printing, Potli a bag of wonders
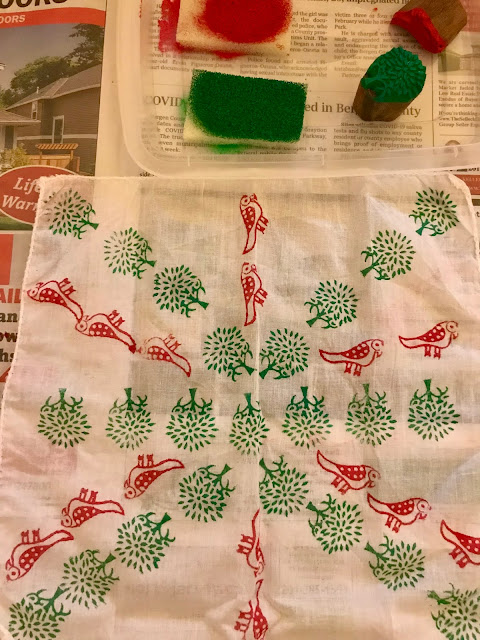
This is how my design came to life. 

block printing basics, Indian block printing, block printing kit, blah to TADA, crafts, handmade, wood block printing, Potli a bag of wonders
With the art of block printing, I turned a plain piece of cloth from blah to TADA! 

block printing basics, Indian block printing, block printing kit, blah to TADA, crafts, handmade, wood block printing, Potli a bag of wonders
It's my first try and I can't wait to keep practicing. Thank you for hanging out with me today!

4 comments:

  1. That is so pretty, thank you for taking us through the process. That would make a nice tray cloth or a special serviette ...

    ReplyDelete
  2. This looks so fun! Thanks for sharing.:-)

    ReplyDelete
    Replies
    1. It was so much fun, Priscilla! Thanks for ALWAYS leaving a comment!

      Delete

Your comments are very much appreciated!