10 May 2021

A Do-It-Yourself Recipe Box

Hey guys, I'm happy you were able to stop by! This is today's crafty inspiration:

It's a recipe box made by Rifle Paper Co. and they've got other designs like this and this. Aren't they beautiful? Designer and owner Anna Bond really does a great job with her floral and botanical gouache paintings. 

I'm using this idea to turn blah to TADA!

Tea Tin transformation, tea tin crafts, how to repurpose a tea tin
I'm a big tea drinker and a recent acquaintance had recommended this British brand to me. 

Tea Tin transformation, tea tin crafts, how to repurpose a tea tin
I bought it and I liked that this special edition came in a reusable tin.  

Tea Tin transformation, tea tin crafts, how to repurpose a tea tin
The tin provided an air-tight seal and kept my tea fresh until I consumed every single bag. 

Tea Tin transformation, tea tin crafts, how to repurpose a tea tin
Now that it's empty, I would love to reuse it as storage.

Here's what I did:

Tea Tin transformation, tea tin crafts, how to repurpose a tea tin
I cleaned the tin inside and out with a dry cloth (moisture will cause it to rust). Then I painted the outside with acrylic paint.


Tea Tin transformation, tea tin crafts, how to repurpose a tea tin
I painted on several coats, allowing the paint to dry in between coats.

Tea Tin transformation, tea tin crafts, how to repurpose a tea tin
This is my painted tin...TADA!

Tea Tin transformation, tea tin crafts, how to repurpose a tea tin
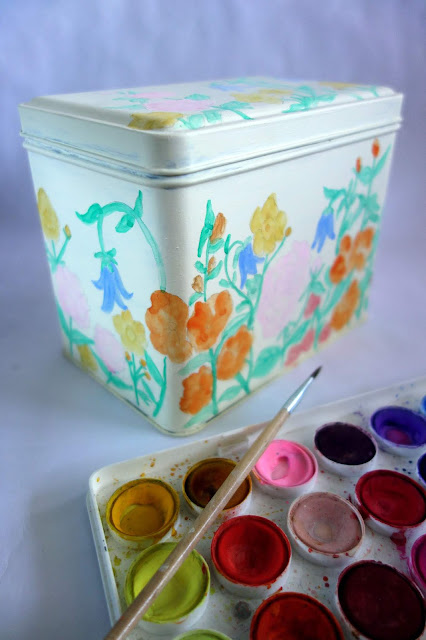
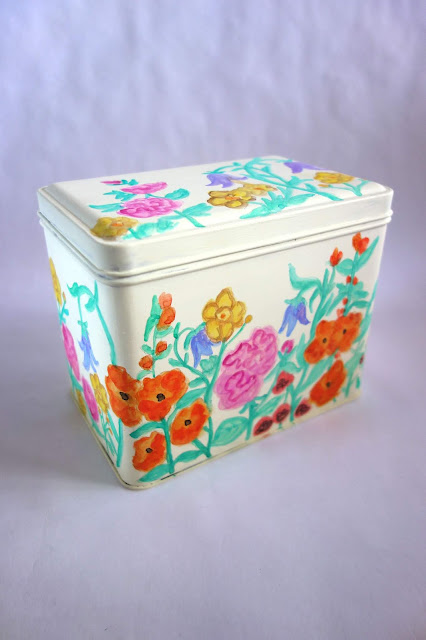
Because I love flowers, I drew some, too. 


Tea Tin transformation, tea tin crafts, how to repurpose a tea tin
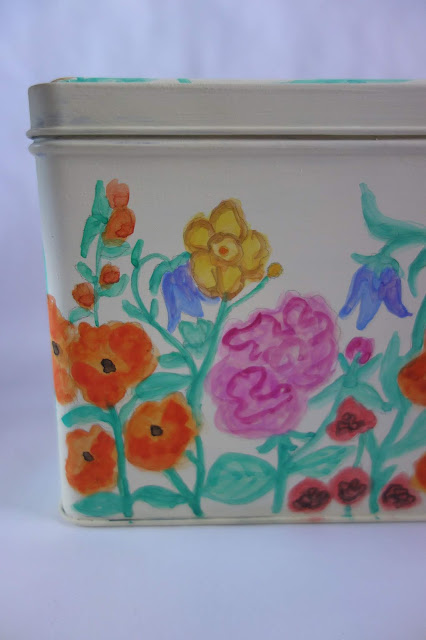
I opted for flowers that traditionally grow in an English garden: roses, peonies, Japanese anemone, hollyhocks, and bell flowers.

Tea Tin transformation, tea tin crafts, how to repurpose a tea tin

Tea Tin transformation, tea tin crafts, how to repurpose a tea tin
To make it my own, I used watercolor (instead of acrylic or gouache).

Tea Tin transformation, tea tin crafts, how to repurpose a tea tin
 I let the paint dry for a few minutes...


Tea Tin transformation, tea tin crafts, how to repurpose a tea tin
...before putting more layers, definition, and details.

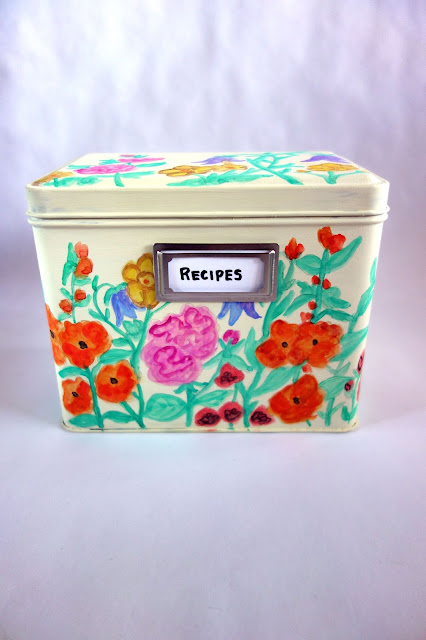
Then I added this adhesive metal bookplate that I got at an office supply store many years ago. If you can't find it, a sticker label can be a good replacement.


By the way, I got to practice my hand lettering to make the label...TADA!

Here are just a few ways I can use my spruced-up tin box as storage:

Tea Tin transformation, tea tin crafts, how to repurpose a tea tin
As a recipe box -- though most of the recipes I use are stored on Pinterest.

Tea Tin transformation, tea tin crafts, how to repurpose a tea tin, how to store food mixes, pantry storage ideas
To store packets of food mixes like gravy, dips and sauces...that way they stay neat inside the pantry or cupboard.

Tea Tin transformation, tea tin crafts, how to repurpose a tea tin, how to store receipts, receipt storage ideas
As a box to store receipts for a small business. Inside, you can add monthly/quarterly dividers made from card stock.

Tea Tin transformation, tea tin crafts, how to repurpose a tea tin
I hope you liked this tea tin transformation. Have a good week ahead!

03 May 2021

A Gift for Mom

Mother's Day is this Sunday!
Thinking of a handmade gift for your beloved mom? I've got this craft just for you.

The idea came from a coloring book.

As I rifled though the pages, I found these fun flowers.

I painted the page using watercolors. Have you tried your hand at coloring books? It's very relaxing and brings you back to your childhood.
 
I detached the page from the coloring book.

And cut out the flowers.

I fashioned a few stems and leaves. I made them using white cardboard that I painted green.

I assembled the flower-stem-leaf combo and attached everything with glue.

Now I have a handful of paper blooms...TADA!

I used a glass jar as my vase and arranged my flowers.

And with a some calligraphy, I wrote a few messages:


A bouquet that mom, grandma, sister, cousin or best friend can enjoy for years to come...TADA!

If you don't have a coloring book, draw a few flowers instead and cut them out like what I did here.


And that is how I turned a coloring book page (and a glass jar) from blah to TADA!

26 April 2021

Block Printing Basics

Today, let me tell you about Indian Block Printing, a craft that I learned recently.

block printing basics, Indian block printing, block printing kit, blah to TADA, crafts, handmade, wood block printing, Potli a bag of wonders
Block Printing is like stamping, but instead of rubber stamps and an ink pad, wood blocks and paint are used. It's an ancient handicraft that finds its origins in India and the skill is not learned in school but passed on from generation to generation. 

block printing basics, Indian block printing, block printing kit, blah to TADA, crafts, handmade, wood block printing, Potli a bag of wonders
I learned the basics from a class at our local library. 

block printing basics, Indian block printing, block printing kit, blah to TADA, crafts, handmade, wood block printing, Potli a bag of wonders
Each participant was given this Block Printing kit.

block printing basics, Indian block printing, block printing kit, blah to TADA, crafts, handmade, wood block printing, Potli a bag of wonders
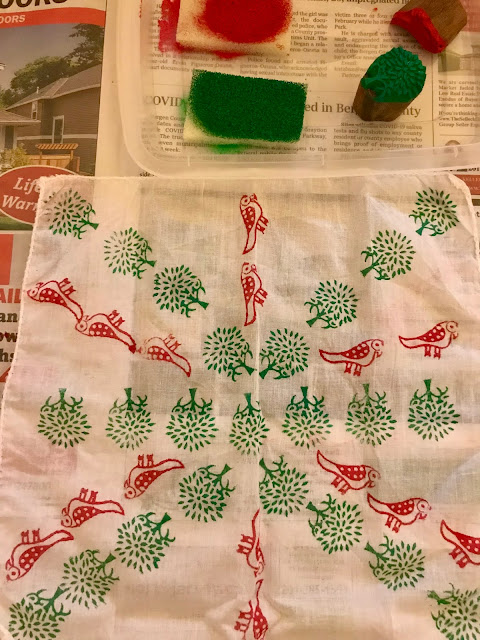
Here are the contents. Notice the little stamps (bird, tree, border)? These are the wood blocks. They are hand-carved using teakwood or rosewood and treated with linseed oil. I'm in love and impressed with the intricate details! 

block printing basics, Indian block printing, block printing kit, blah to TADA, crafts, handmade, wood block printing, Potli a bag of wonders
Due to the current pandemic, the class was done virtually. Our teacher Seema enthusiastically showed us all we needed to know. 

paint, block printing basics, Indian block printing, block printing kit, blah to TADA, crafts, handmade, wood block printing, Potli a bag of wonders
The first step is to cover your work surface with a few layers of newspaper. This will protect your table and functions as a cushion when stamping.

The next step is to prepare the paint (water-based like watercolor or poster paint). Put a small amount of paint on a plate or plastic food container. If the paint is too thick, you can add a tiny amount of salt to make the paint runny. Don't use water because it will only water down the color. 

block printing basics, Indian block printing, block printing kit, blah to TADA, crafts, handmade, wood block printing, Potli a bag of wonders
On top of the paint, position a small piece of the printing pad (sponge). Using one of the wood blocks (design facing downwards), tap the sponge gently all around so that the paint lifts to the surface of the sponge.

This will be our ink pad.

block printing basics, Indian block printing, block printing kit, blah to TADA, crafts, handmade, wood block printing, Potli a bag of wonders
Keep tapping the wood block on the sponge until the design is saturated with color.

block printing basics, Indian block printing, block printing kit, blah to TADA, crafts, handmade, wood block printing, Potli a bag of wonders
Test the print on a piece of paper. This will tell you where you need to apply more paint.

Do the same process for all paint colors you intend to use.

block printing basics, Indian block printing, block printing kit, blah to TADA, crafts, handmade, wood block printing, Potli a bag of wonders
Once satisfied with how the print registers on paper (ex. color is even and details are visible), we're ready to print on fabric.

handkerchief, fabric, block printing basics, Indian block printing, block printing kit, blah to TADA, crafts, handmade, wood block printing, Potli a bag of wonders
This handkerchief was also part of the kit. Seema says cotton is the ideal fabric to use. Now is a good time to plan your design. Will you have a pattern (ex. linear or alternating) or will it be a repetition of a single print?

block printing basics, Indian block printing, block printing kit, blah to TADA, crafts, handmade, wood block printing, Potli a bag of wonders
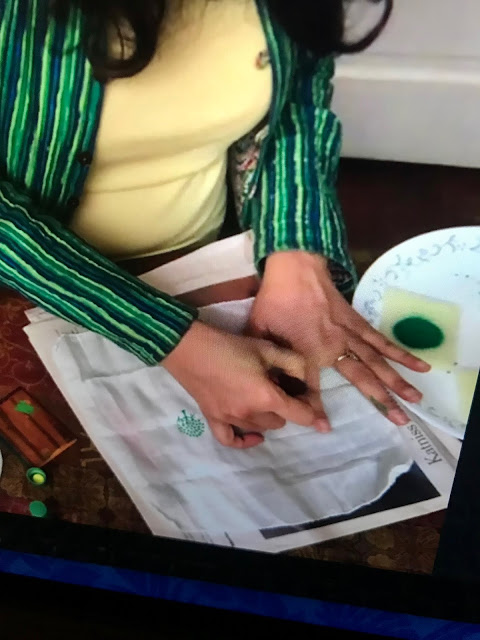
When you're ready, find the center of the fabric and start from there. Apply the freshly-inked block print, press down a few seconds, gently roll to the side and lift up. Keep repeating the design, making sure to ink the wood block before making a new print on the fabric.

block printing basics, Indian block printing, block printing kit, blah to TADA, crafts, handmade, wood block printing, Potli a bag of wonders
With the first print as reference, stamp alternately from left to right so that we end up with an even number from the center.

No need to use a ruler, just eyeball it. The imperfections add charm. 

block printing basics, Indian block printing, block printing kit, blah to TADA, crafts, handmade, wood block printing, Potli a bag of wonders
This is how my design came to life. 

block printing basics, Indian block printing, block printing kit, blah to TADA, crafts, handmade, wood block printing, Potli a bag of wonders
With the art of block printing, I turned a plain piece of cloth from blah to TADA! 

block printing basics, Indian block printing, block printing kit, blah to TADA, crafts, handmade, wood block printing, Potli a bag of wonders
It's my first try and I can't wait to keep practicing. Thank you for hanging out with me today!

19 April 2021

Reusable Snack Bags

I'm so happy to see you today!

This Thursday is Earth Day. But why limit this occasion to just one day when we can make every day "Earth Day"? All we have to do is be mindful of our responsibilities to the environment. We can do our share in preventing pollution and the destruction of wildlife in small acts.

One way is to minimize or entirely stop the use of plastic.

I found these reusable snack sacks at a home store (this isn't a sponsored post!). They are made from thick but food safe material and they have adorable designs. I wash them, by hand or on the top rack of the dishwasher, after every use.

I pack my snacks in them -- sandwiches, cookies, fruit. I even keep one in my bag for non-liquid leftovers from a restaurant (no need for a Styrofoam or foil box AND a plastic bag). I also like giving this away as gifts and everyone who has received it appreciates it...TADA!

Here's another version. It's smaller and the mason jar design is just irresistible!

I like to fill them with salt, pepper and cooking spices. I take them to picnics, camping trips or vacations in rental properties where there's an opportunity to cook. Label appropriately with washi tape and a marker...TADA!

Let's do our share to protect the one planet that we have!

12 April 2021

Pop-Up Cards

Around the same time last year, the whole world was just in the thick of a Coronavirus pandemic. Everyone was required to stay home and practice social distancing to avoid getting or spreading the virus that had no vaccine nor cure yet.

Stay. At. Home. 

That was the most basic requirement from all of us. And while we had all the comforts of home and being able to work from home, I felt helpless. And anxious.  

So I made these cards:

I tuned-out the news and made time for crafting for an entire afternoon. Doing so lowered my anxiety levels and I felt very purposeful. Because these cards were for a good cause.  

Children Cheering Seniors
My neighbor Tara sent out a request on our neighborhood Facebook Group. She was thinking of all the seniors living alone or in senior homes who might feel afraid and isolated. Maybe the kids can make some drawings for these seniors to cheer them up? 

"Count me in, Tara!"

Even if I hardly qualified as a kid, this was a worthy endeavor. I made some cards and dropped them off at the designated collection site.

Can I show you what I made?

I used card stock so they're sturdy even without envelopes. I decided not to put any ribbon or tape to seal the cards. I wanted them to open easily, considering that some seniors may have arthritis.

When we open the card, there's a surprise.

It pops-up! Each one is decorated with cardboard cut-outs, coloring book pages, paint, and positive wishes written in brush lettering...TADA!

Here are the other designs that I created:


I hope I was able to bring smiles to some seniors. I also hope to continue making more cards that I can take to senior homes, turning their day (and mine) from blah to TADA!

While we already have vaccines and many have been vaccinated, let's not let our guard down. Let's be safe and continue to take care of each other.