21 June 2015
15 June 2015
Gearing Up for Dad's Day
It's Father's Day this coming Sunday. Are you preparing something special for your dad?
I used paper, paint, punches and rubber stamps. TADA!
Inside, I wrote down the reasons why I'm grateful for him in my life.
To all the dads out there, may you feel loved everyday, especially on Sunday!
08 June 2015
A Pink Carpet
And just like that, it's June. How did that happen? Summer officially starts in three weeks but before the season turns, I want to give an ode to spring.
Enjoying the cherry blossoms has always been a springtime ritual. I've used cherry blossoms as a muse for watercolor, card making, wreath assemblage, and gift wrapping.
This time, I'm inspired by the pink carpet formed when the petals are blown away from the tree.
It's art by nature!
I'll try to capture this beauty with watercolor and collage.
A few shades of gray for the background.
A new sheet, this time in shades of pink.
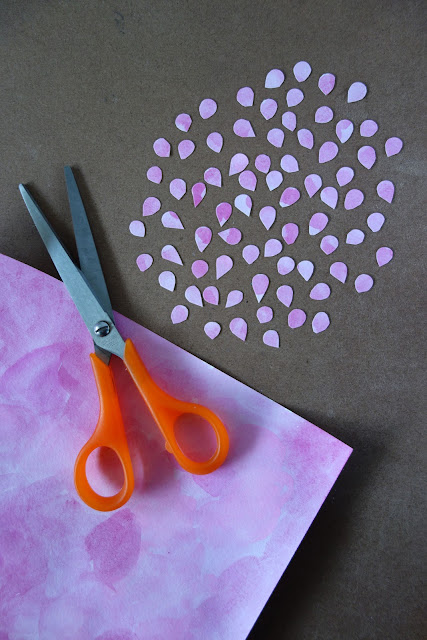
When the paint dries, I cut out tiny petals.
Then I glue these on the paper that I painted gray.
I made sure to form some full cherry blossoms as a hint on what the artwork is about.
TADA! My take on nature's pink carpet.
I wish you all a wonderful week ahead!
01 June 2015
Coloring for Grown-ups
Hello everyone! Did you like coloring books as a child? Thick coloring books with a big box of crayons were one of my favorite things as a little girl.
Did you know that there are coloring books made especially for grown-ups? You can read about them right here and here. It's a pretty recent trend and there are even coloring book parties where adults can socialize and get in touch with their artsy side.
Who wouldn't want to do this activity that's both therapeutic and nostalgic?
I chose an art nouveau theme.
Instead of crayons, I'm using ink.
The marker's fine tip helps fill in the thin details.
I like the repetitive pattern of this postcard.
I used a combination of marker tips to add color.
The bold hues really stand out.
This garden scene felt more calm so I used colored pencils in pastel shades.
Yes, the leaves of my plants are blue! No rules here.
Blank pages that I transformed from blah to TADA!
25 May 2015
Pouches, Part Two
Hello guys! I hope you had a fabulous weekend. Today, I have a few more crafty pouch ideas to share.
This is a pouch I bought already made. I turned it from blah to TADA! by adding my own felt apple. I use it to store my face painting supplies that I use for children's birthday parties. It contains face paint, brushes, sponges, stencils and a small mirror.
Here is a recent purchase from my favorite craft store. I like the message on it and love how big and roomy it is. I've been using it to carry around bulky craft materials like yarn for crochet or knitting.
Now this one...
This one is an airline amenity kit which was filled with travel essentials like socks, ear plugs, an eye mask, and hygiene products. It's plain and made of water-repellent fabric.
Time for some blah to TADA!
I'm using a sponge brush, acrylic paint in different colors, and some sticky stencils.
Let's line our work space with sheets of scrap paper. Then stuff the pouch with paper or recycled packing material. Close the zipper.
Apply the stencils on the pouch in a random manner. I'm using letters on one side.
Using the foam brush, add the paint in a pouncing manner. Allow to dry in between coats. I recommend to use at least 5 coats of paint.
Once dry, gingerly peel off each stencil. And this is what it looks like -- TADA!
I admit, it's a little flawed because the paint seeped through some of the stencils leaving a little shadow. I don't know how to clean it up so I'll leave it be.
This is a cute little pouch to use for kid's toys and activities. It's small enough to fit mommy's bag. Whip it out on the airplane or at a restaurant to keep restless children entertained. TADA!
19 May 2015
Pouches, personalized
Many blog posts ago, I decorated a linen pouch with iron-on patches. I thought I would make more to give away as presents.
I'm using these monograms to dress up the pouches.
First, I marked the center of the pouch with a ruler. That's where I'm positioning the patch.
I removed the backing from the patch and centered it onto the pouch.
I ironed up and under for a secure hold.
This one is for my goddaughter who just turned 12. She can fill it with her pens and pencils for school.
And this one is for a dear friend who lives far away. She can use it for her make-up.
A project that's simple, useful and personal. TADA!
18 May 2015
Pouches Galore
With photo fabric paper, I can add an inspiring photo on a pouch, similar to No. 3. And possibly transform some vintage fabric into something useful like No. 4.
Tomorrow, I have a tutorial for an easy to make pouch, so please stop by.
See you then!
See you then!
Subscribe to:
Comments (Atom)


