Showing posts sorted by date for query handkerchief. Sort by relevance Show all posts

26 April 2021

Block Printing Basics

Today, let me tell you about Indian Block Printing, a craft that I learned recently.

block printing basics, Indian block printing, block printing kit, blah to TADA, crafts, handmade, wood block printing, Potli a bag of wonders
Block Printing is like stamping, but instead of rubber stamps and an ink pad, wood blocks and paint are used. It's an ancient handicraft that finds its origins in India and the skill is not learned in school but passed on from generation to generation. 

block printing basics, Indian block printing, block printing kit, blah to TADA, crafts, handmade, wood block printing, Potli a bag of wonders
I learned the basics from a class at our local library. 

block printing basics, Indian block printing, block printing kit, blah to TADA, crafts, handmade, wood block printing, Potli a bag of wonders
Each participant was given this Block Printing kit.

block printing basics, Indian block printing, block printing kit, blah to TADA, crafts, handmade, wood block printing, Potli a bag of wonders
Here are the contents. Notice the little stamps (bird, tree, border)? These are the wood blocks. They are hand-carved using teakwood or rosewood and treated with linseed oil. I'm in love and impressed with the intricate details! 

block printing basics, Indian block printing, block printing kit, blah to TADA, crafts, handmade, wood block printing, Potli a bag of wonders
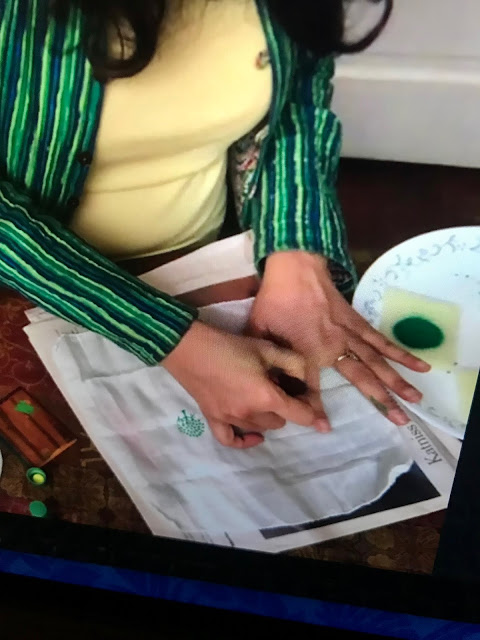
Due to the current pandemic, the class was done virtually. Our teacher Seema enthusiastically showed us all we needed to know. 

paint, block printing basics, Indian block printing, block printing kit, blah to TADA, crafts, handmade, wood block printing, Potli a bag of wonders
The first step is to cover your work surface with a few layers of newspaper. This will protect your table and functions as a cushion when stamping.

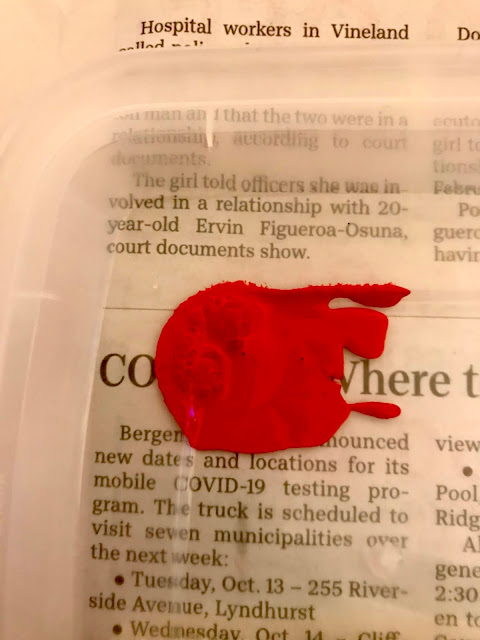
The next step is to prepare the paint (water-based like watercolor or poster paint). Put a small amount of paint on a plate or plastic food container. If the paint is too thick, you can add a tiny amount of salt to make the paint runny. Don't use water because it will only water down the color. 

block printing basics, Indian block printing, block printing kit, blah to TADA, crafts, handmade, wood block printing, Potli a bag of wonders
On top of the paint, position a small piece of the printing pad (sponge). Using one of the wood blocks (design facing downwards), tap the sponge gently all around so that the paint lifts to the surface of the sponge.

This will be our ink pad.

block printing basics, Indian block printing, block printing kit, blah to TADA, crafts, handmade, wood block printing, Potli a bag of wonders
Keep tapping the wood block on the sponge until the design is saturated with color.

block printing basics, Indian block printing, block printing kit, blah to TADA, crafts, handmade, wood block printing, Potli a bag of wonders
Test the print on a piece of paper. This will tell you where you need to apply more paint.

Do the same process for all paint colors you intend to use.

block printing basics, Indian block printing, block printing kit, blah to TADA, crafts, handmade, wood block printing, Potli a bag of wonders
Once satisfied with how the print registers on paper (ex. color is even and details are visible), we're ready to print on fabric.

handkerchief, fabric, block printing basics, Indian block printing, block printing kit, blah to TADA, crafts, handmade, wood block printing, Potli a bag of wonders
This handkerchief was also part of the kit. Seema says cotton is the ideal fabric to use. Now is a good time to plan your design. Will you have a pattern (ex. linear or alternating) or will it be a repetition of a single print?

block printing basics, Indian block printing, block printing kit, blah to TADA, crafts, handmade, wood block printing, Potli a bag of wonders
When you're ready, find the center of the fabric and start from there. Apply the freshly-inked block print, press down a few seconds, gently roll to the side and lift up. Keep repeating the design, making sure to ink the wood block before making a new print on the fabric.

block printing basics, Indian block printing, block printing kit, blah to TADA, crafts, handmade, wood block printing, Potli a bag of wonders
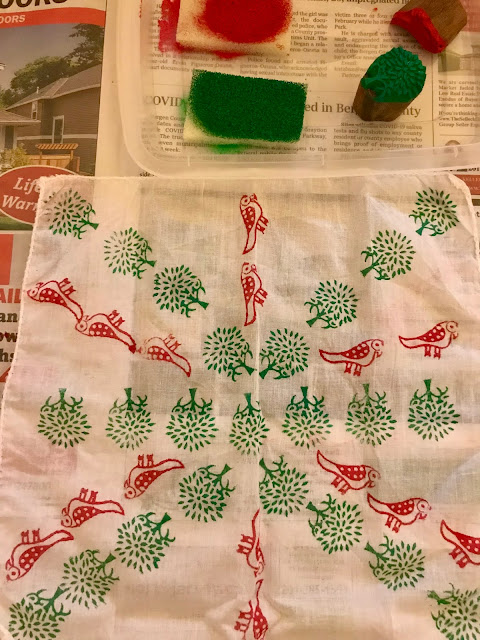
With the first print as reference, stamp alternately from left to right so that we end up with an even number from the center.

No need to use a ruler, just eyeball it. The imperfections add charm. 

block printing basics, Indian block printing, block printing kit, blah to TADA, crafts, handmade, wood block printing, Potli a bag of wonders
This is how my design came to life. 

block printing basics, Indian block printing, block printing kit, blah to TADA, crafts, handmade, wood block printing, Potli a bag of wonders
With the art of block printing, I turned a plain piece of cloth from blah to TADA! 

block printing basics, Indian block printing, block printing kit, blah to TADA, crafts, handmade, wood block printing, Potli a bag of wonders
It's my first try and I can't wait to keep practicing. Thank you for hanging out with me today!

20 August 2018

A Bundle of Fun

Hey guys! Today's craft is inspired by these little bundles:

They're filled with all sorts of fragrant and luxurious bath products. Perfect for gifts because they're already wrapped!

TADA! Here is my version. 


I used the Japanese art of furoshiki using a bandana. A vintage handkerchief is another option, too.

When it's unwrapped, here's what you'll see inside.

I followed a Japanese theme. There's a face mask, a very useful book that I want to pass along, green tea, some panda-shaped biscuits and a chocolate bar. TADA!

I hope my friend who receives this will agree that it is a bundle of fun!

30 May 2016

Furoshiki Fun

Furoshiki is the Japanese art of gift wrapping using a piece of cloth. Let's take a look:


via Ecoshiki

via One Million Women

via Ecoshiki

via Ecoshiki


via Omiyage Blogs
Aren't they beautiful? There's no need for scissors, tape or paper. You just need a piece of fabric like a vintage scarf, antique handkerchief, or fabric scraps that can be used over and over again. An impressive craft that turns blah to TADA!

02 July 2009

Present Perfect


I hope you'll agree with me that handkerchiefs are lovely vintage treasures. You may have some hiding in your closet and there are many waiting to be purchased at flea markets and thrift stores. In the past two weeks, I've shown you how you can play around with these hankies and today I've got another idea for you.

We'll use these to package a few presents!

Put your gift in the center of the hankie.

Wrap the gift by neatly folding the edges and making a tight knot.
No need for scissors, tape or ribbon!

Embellish as you please!
Here, I added a rose-print button.

Or put on some bling like this brooch that compliments
the color of the handkerchief.

Complete the present with a gift enclosure and
some cheerful wishes.
Now you've got a pretty present inside & out!

Plus gift wrap that can be used all over again.

29 June 2009

More Hanky Panky

Happy Monday Everyone! I hope you had a nice & sunny weekend.

Last week, we played around with some vintage handkerchiefs that any blushing bride can use at her wedding. I hope you gals who aren't brides-to-be didn't feel left out. Good news! This week on blah to Tada!, we'll get into some more hanky panky...the wholesome kind of course!

I have this stack of floral handkerchiefs sitting inside my sock drawer. In a not so distant past, every lady carried one and I bet, if these hankies could talk, they'd be muttering, "Bring us back in style!"

Part of that stack is this handkerchief I got from a pink & green swap. Isn't it pretty? The pink rose really grabs your attention.

I love it so much, I think it's worthy to be framed.
It brightens up my desk, giving me the feeling
of having
a vase of flowers!

26 June 2009

Heirloom Hankies


Horay it's Friday! Let me cap wedding week with a final blah to Tada! transformation dedicated to the bride and all her best friends.

Here's the blah...an old handkerchief.

Here's the Tada!...an old handkerchief, but one that's personal & sentimental.

It's meant for best friends to share and pass on.

Each lady's name and wedding date are written (or embroidered) on the handkerchief.

It marks that special day when she was a bride.

Then it's passed on to the next bride!

This has all the elements a bride needs for her wedding day:

Something OLD: the handkerchief
Something NEW: the NEW bride's name & wedding date
Something BORROWED: the handkerchief that's passed on
among friends
Something BLUE: the embroidery thread

The current bride keeps it in her care until a new engagement is announced. It can be presented to the bride-to-be at the engagement party or bridal shower.

This handkerchief can also be a wonderful heirloom piece from mother to daughter or shared among sisters.

Who says new wedding traditions can't be created?

Have a Tada! weekend everyone!

25 June 2009

A Bride's Buddy


Planning a wedding can be one of the most stressful things a woman can go through. Too many lists to make & cross out, so many details to think about. So to all the brides out there, I'm offering to you this vintage handkerchief...

Not to wipe those tears away, though!
We're turning it from blah...

...to Tada! -- it's now a bridal pouch!
Just fold the handkerchief in half, then in thirds.
Sew the edges and add a button with an elastic loop to the flap.

The blushing bride can use this to carry the important things
she will need for her big day like
tissues & blotting paper (
no shiny faces!).


Add a small bottle of cologne, a compact, lipstick and a sewing kit.
Let the maid of honor hang on to this -- she'll be there with you
for touch ups and small emergencies.


Here's wishing you a wedding that's truly Tada!


23 June 2009

Judge the Book by its Cover


We're celebrating brides this week and I've got some ideas lined up to transform an old handkerchief from blah to Tada!

A vintage handkerchief, whether received as a gift or found in a flea market, is a perfect accessory for a wedding. Weddings are also a good time to break tradition...

Don't use the handkerchief the way it's supposed to be used (use tissues instead). Use it to cover a book (ex. Bible) that you want to be part of the ceremony. Another alternative is to cover a handmade booklet that holds your vows. This way, something simple turns into something special!

22 June 2009

This One's for the Bride


Happy Monday Everyone!

As the month of June comes to an end, I'd like to give a shout out to all the brides out there. I'm dedicating this entire week to you with a bouquet-full of blah to Tada! ideas you can use to personalize your special day.


This week's blah is an old handkerchief.
Well, it's not exactly a blah when it's a special gift from an aunt or grandmother.Turn it into a Tada! by incorporating it into the wedding!


Make the handkerchief part of the bouquet.
Wrap it around the flowers & secure with a ribbon.

Tada! Something old & something new for the blushing bride!