12 April 2012

A Wallet Make-Over

Happy Thursday Everyone!

 If you've been tuning in, I've been turning these 
plastic food containers from blah to TADA!

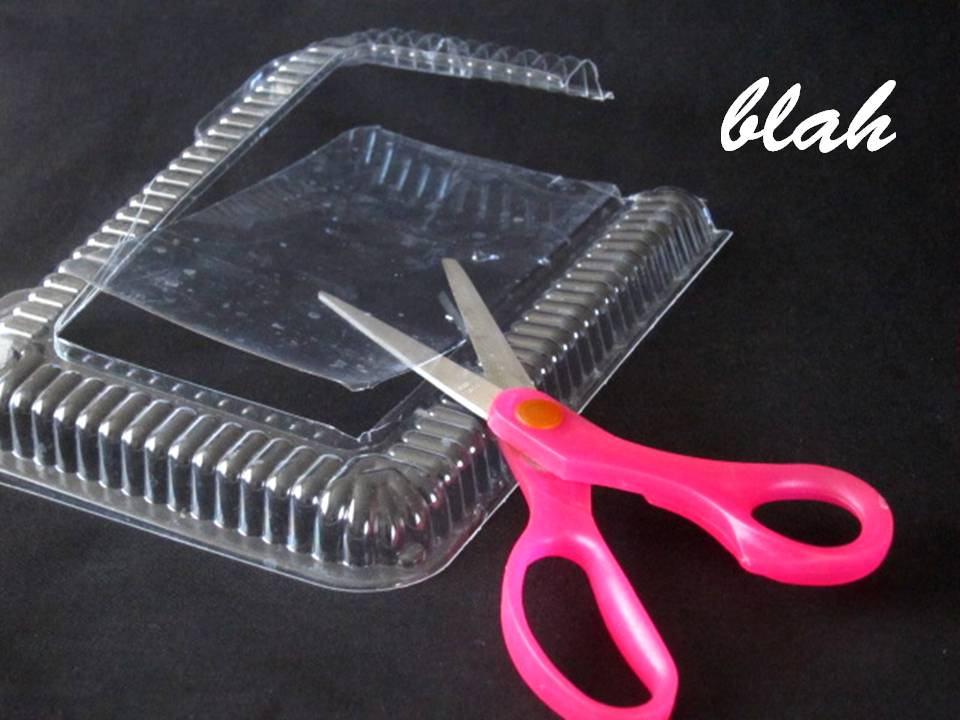
 Clean it and cut around it so we end up with a flat sheet.
Create a stencil design with a craft punch or 
by drawing on it.

Another option is to trace a pattern. 
The clear material makes this task easy. 

 These images are from a newspaper.
 I used a permanent marker to trace these birds.

Make the stencil by cutting inside the lines, getting every
detail as possible with a pair of precision scissors. 

I'll use the stencil to brighten up this old, blah wallet. 
It's in a charcoal shade.

The inside has many pockets and a logo revealing 
that the wallet's a freebie. 

Position the stencil and hold this in place with tape. 

 Fill in with color using a marker or paint.
{You may have to define/clean-up the edges 
with marker once the stencil is removed.}

 Add a few patterns inside the wallet.

 TADA! Doesn't it have more character now?

A once blah wallet is now TADA!, thanks to some stencils!

11 April 2012

Draw and Wrap

Well hello there!

I found this empty box, and while it's in a happy
yellow shade, I feel it's a little blah.  

I'll spruce it up with TADA! stencils made from a 
blah plastic container and a craft punch. 

I positioned the stencils on the box and secured 
them with masking tape. 

 Since I've got an autumn theme going on, I chose
markers in earthy shades.

Lookie! The box looks different now. 

Put the present inside and finish with a bow...
TADA!a cute and quick gift box!

10 April 2012

Fluttery Cupcakes

Thanks for stopping by today!

 This week, I'm turning blah plastic food containers 
into TADA! stencils.

 After cutting out a flat square, I'm making a pattern 
using my butterfly craft punch. 

Here's what it looks like. 

I'll use it to decorate a few cupcakes. Making sure the stencil is clean, I'll lay it directly on the cupcake {the plastic sheet should cover the whole cupcake}.

I put a few tablespoons of confectioner's sugar
in a shaker {a small strainer can be used}.

 Sugar shower!

 Gently lift the stencil and this is what you'll get.

It may not have your favorite icing, but it's an easy way (with less calories) to decorate desserts like brownies and cakes. TADA!

09 April 2012

Plastic to Fantastic!

Hello Friends! I hope you had a lovely Easter.

Do you have any of these in your house? These are some of my plastic food containers that once kept salad greens, nuts, dried fruit and pie. I can't seem to avoid them whether I buy food at the grocery or at the farmer's market.   

Add to that, I also have an overflow of deli container lids. While these are useful for stashing leftovers, I don't have any more room in my cupboard for them. What a blah. But I've got a TADA! idea.

I'm turning these plastic containers into stencils!

Rescue the flat part of the container with a 
pair of scissors.

Take off any ridges. We want it flat. This will be
helpful when adding the design. 

Use craft punches {this will work well if the plastic
isn't too thick}. 

Draw freehand, trace a pattern from a book, or
use cookie cutters.

Sharp precision scissors are a useful tool especially 
if the design contains a lot of detail.

Please stop by every day this week to see
the stencils I made and how I use them.
Have a great Monday!

06 April 2012

Confetti, Confetti

I made a couple of Easter baskets using stuff I found at home, like yogurt containers and plastic bags. A blah to TADA! transformation indeed. 

But I was left with these plastic bag remnants. Putting them to waste would be a total blah. Here's how they became TADA!:

A pair of scissors turned them into thin strips, and now they found new life as confetti! Use these to line an Easter basket or as cushion for everyday packages that need to be mailed.

I would also use them to add color to 
plastic Easter eggs. 

 They'll protect the candy inside.

They're the perfect substitute for Easter grass
that you buy at the store.

I wish you all a fun weekend and a Happy Easter!

05 April 2012

Fairy Tails

I hope you are having an awesome Thursday!
Today, I've got another Easter basket idea.

Excuse me if I'm using another yogurt container. I'm fond of yogurt and collected a few buckets over time. As an alternative, you can use empty ice cream tubs, deli containers or old boxes. They're all blah...

 But with a little lovin', they become TADA!

Just several blah elements used in this project.

I like how the bottom resembles a fairy's skirt.

This basket's ready for some Easter eggs!

04 April 2012

Rainbow Ruffles

This week on the blogI'm puttering around the house to turn blah items into TADA! Easter baskets.

Yogurt or ice cream containers like this are perfect for the task. It just needs a new outfit. 

Colorful plastic bags act as "fabric".

Cut them into strips. 

Run a threaded needle at the center of the plastic strip. Gently pull the thread so that a ruffle is created. The ruffled strip should approximate the height of the yogurt container. Finish by knotting the end of the thread.

Make a bunch of ruffled strips, enough to cover the face of the yogurt container.

Here's what it looks like now after attaching the strips with double sided tape or hot glue.  It's dressed up for a fiesta! 

 Add a ribbon handle with hot glue.

Then fill it with Easter treats that are as 
colorful as the bucket! TADA!