07 August 2012

Sexy Sack

"It looks like she's wearing a sack," isn't exactly the best of compliments. Except for today.

via Kole Imports
A Project Runway contestant once used this plaid laundry bag as the main material for a dress. It was called the "unconventional challenge", where the contestants shopped at a New York City dollar store.

If you're not familiar with this bag, it's used to schlep all sorts of things like produce sold at the farmer's market. They are sturdy, water repellent, light and easy to fold when it's time to store them.  

Who would ever guess its potential as a dress:

via nymag.com
The fringe was made out of Halloween tinsel.

via nymag.com
 Here's a full view -- isn't it so chic and well-tailored?

via realitytvmagazinesheknows.com
Rami Kashou, an expert at draping, created this dress.  I think it's one of the most memorable dresses made on the show. Have a nice day!

06 August 2012

Alternative Fashion

Do you watch reality TV shows? I like them a lot! 

via mylifetime.com
I prefer the exhibit-your-ability types like Project Runway because it gives you a peek at how the fashion industry works. It's focused on design, but lately, they've infused hints of its business side like production and pricing, making you say, "I never knew that."

via mylifetime.com
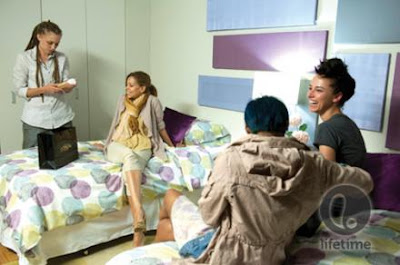
The season starts with a bunch of unknown fashion designers {some are established, while some are just starting out}. 

via mylifetime.com
It's set in New York City where the contestants gather inspiration, shop for materials, sew their garments, show off their designs, and yes, they all live together in an apartment. 

via mylifetime.com
In every episode, they are presented a challenge {ex. make a red carpet look} and end with a fashion show. The winner gets immunity from elimination in the next challenge, and the loser gets kicked off. The cast gets whittled down to the top three designers who show a collection at Fashion Week {every fashion designer's dream!}. The winner, aside from bragging rights, gets prize money to start their own line, plus a few more goodies to help their fashionista dreams come true.

One of my favorite challenges is the "unconventional challenge". Instead of buying their materials at a fabric store, they are brought to places like the supermarket where they must shop for items that they have to transform into a dress. Totally, blah to TADA!

All this week, I'll show you the weird places where the contestants have shopped, and the creative looks that were produced.

Okay, let's start with the supermarket. One designer bought a gazillion ears of corn to make this:

via second city style
 blah: corn husks
TADA!: cocktail dress

via queen city crafts
 On the runway, it's an eye-catching frock.

via darling darling files
The mastermind behind the dress, Austin Scarlett.

See you back tomorrow!

03 August 2012

Tinted Bubbles

Hooray and Happy Friday!
Today's idea is something I picked up from Pinterest.
I found it so cool, I had to try it myself.

 We'll use bubble liquid and food color 
to make a patterned page.

Put a small amount of water into a blah, recycled cup and add several drops of food color. Add some bubble liquid and stir well.

Use this solution plus a bubble wand to blow some bubbles. The bubbles should land on the sheet of paper you've placed in front of you.  

When the bubbles pop, they'll make patterns on the paper. It's okay if the bubble-paint solution drips on the page.

Let me warn you that this craft can be messy. We really can't control where the bubbles go.  Some bubbles landed on my white wall -- but nothing that a water-filled spray bottle can't fix.

Once dry, this is what happens. TADA!

Next time, I'll try using a bubble gun and be less stingy with the food color for darker and more defined bubbles.

I wish you all a fabulous weekend!

02 August 2012

Kissable Art

We're all about painting with non-traditional materials.
Today is no exception...we're experimenting 
with lipstick!

blah: lipstick that's almost empty or has expired 

 blah: blank mini canvas panels

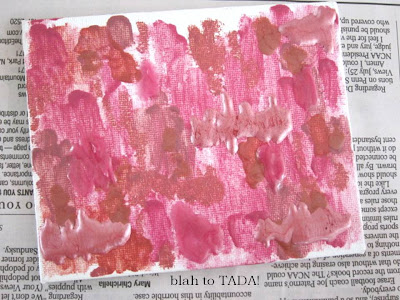
Use the accompanying wand or a small paintbrush to apply the pigment onto the canvas {make sure to surround your work area with newspaper}. When you're done, allow this to dry in a sunny spot for several days.

TADA! A fiercely feminine piece of art!

01 August 2012

A Watercolor Evening

As I've mentioned before, I associate summer with learning something new. When I was little, I'd go to art or dance class during my months off from school. It kept me active, involved, and social. I don't see why we have to stop learning a new skill even if we're all grown up, right?

So one evening, I attended a watercolor class. 

via Paris Breakfast
I've always wished I could create watercolor pieces just like this one. I guess with anything, I'll get there with lots of practice. But I've got to begin with baby steps.

We were a class of 6 women. Our teacher, Tina, established a relaxed vibe as she showed us step-by-step what to do.

First the materials:

via dickblick
She recommends using good quality watercolor paper like Arches. The paper one uses highly affects the outcome.

via dickblick
I used these watercolors that I've had for many years. Maybe I'll upgrade to watercolor tubes and a nicer paintbrush.

The first step is to wet the page using a damp foam brush {notice that we used blah yogurt containers to hold our water}.

Then add a generous amount of your chosen color {I was in the mood for reds and oranges}. I let the paint bleed and drip, following Tina's instructions to, "Let the paint tell you what it wants to do."

Then she encouraged us to add texture to the paint by using salt, colored tissue paper, bubble wrap, tulle, string or other blah materials that are available. Apply these in different stages as the paint dries.

Here's what I did:

It may remind you of a tie-dye t-shirt because of the color gradients and the white spots created by the salt {a technique I find really fascinating}.

It's my piece of abstract art -- a TADA! souvenir from a relaxing evening, and a reminder of the many things I can create with watercolor.

If you've got other TADA! tips for a watercolor novice like me, please share!


31 July 2012

Art with Bubble Wrap

We're still painting and today's craft is something you're familiar with -- bubble wrap.

via alisa burke
 Did you know that it can produce pretty polkadots?

via preschool theme ideas
Just apply paint with a brush or dip a piece in a container of paint.

via i heart crafty things
Lay painted side on a sheet of paper. 
Repeat if necessary {to fill the page}, 
and allow paint to dry.

via i heart crafty things
Decorate with drawings, stickers, and other fun cutouts
to create a scene.

via skip to my lou
Or use the technique to add some patterns on
a brown paper bag...

via family fun
...or even an Easter Egg.

via parents.com
You can also use the paper as gift wrap!

30 July 2012

Paint Projects

Did you have a beautiful weekend? I hope your answer is yes. Painting has been on my mind lately. I think it's because of the gorgeous days of summer we've been having. This has led to a desire to collect all the colors I see and preserve them in some form of artwork. Or could I be feeling some envy?

I saw this set-up along the High Line. The master behind the brush captured versions of the New York skyline and sells them to visitors. Now, my painting skills aren't up to par, but that's what we're doing this week. Let's paint!

Everyday this week, we'll explore different ways to play with paint, beginning with this craft I ear-marked from the Martha Stewart Living Magazine {July 2012}:

via Martha Stewart
It teaches us how to make our own fabrics using a technique called block printing. Traditionally, block printing makes use of wooden blocks with carved patterns at the bottom. Imagine a giant stamp that's dipped in paint and then printed on cloth repeatedly. 

via  Martha Stewart
But this project caught my attention because instead of block prints, it makes use of everyday objects like a potato masher, a trivet, buttons or numbers glued to a piece of wood! Door knobs, mini tart tins, and yarn wrapped around a block are just some of the other options. Very blah to TADA!, right? 

via Martha Stewart
Lookie here! They're using a berry basket -- who knew that it would make for a graphic print? I'm still gathering my fabric, paints and objects before I can begin, but if you're ready with yours, you can find the instructions here. Once dry, you can turn your very own printed fabrics into hand towels, pillow cases or tote bags!