25 October 2012

An Easy-to-Make Gift Box

Happy Thursday!

This gift to self has proven to be a smart purchase. I've used it to make different kinds of stationery. Let's see how we can use it to embellish a plain box.

First, we'll need to make the box. We'll need two sheets of paper, ideally card stock. Trim both sheets to make an 8 inch by 8 inch square.

Position a ruler on top of the page. At the 2 inch mark, mark the paper from top to bottom by scoring {use a bone folder, popsicle stick or a pen with no ink, with the aid of another ruler}. Do the same at the 6 inch mark. Rotate the paper 90 degrees. Score again at the 2 inch and 6 inch mark. You'll have what appears to be a tic-tac-toe pattern.  

Make slits {with scissors}  at the four edges and fold. 

 Glue the edges together and TADA! -- the box bottom is made!

Do the same for the other sheet but don't assemble it yet. 

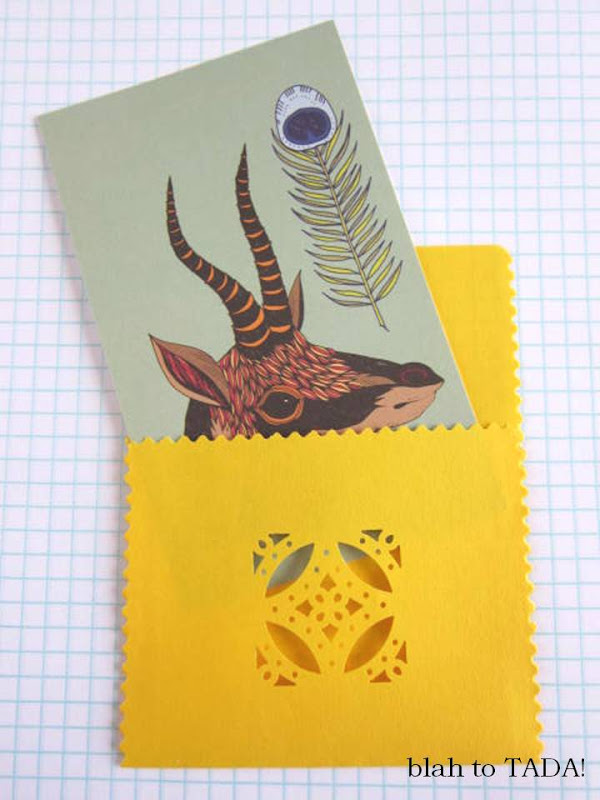
This is the top of the box that we'll decorate using the craft punch. Position the paper in between the top and bottom parts of the craft punch, let the magnets click, and press down {works best on a hard surface}.

 Once the design is made, link the edges together to form the box. Seal with glue.

 A gift box that's easy to make...TADA!

Tuck the gift in colored tissue paper for an element of surprise,
and to keep it from moving around inside the box.

Use the gift tag we made on Monday to add a sweet message.
How's that for blah to TADA!?

24 October 2012

Lattice Work

So lovely to see you today!  

Take a look at these note cards. They're a set by Vera Wang. I found them at a sample sale and I have no intention of using them. Is that evil of me? They're too pretty to part with. The delicate laser-cut details make me weak in the knees. Sigh. They're the ones you tack on your mood board to be used as a muse for a dress, a bag, a cake...the list is endless!

So that I don't appear too selfish, I made a version of this card {that I can give away} in my own blah to TADA! manner:

 Here's my little masterpiece...TADA!

I made this out of blah scrap paper and a TADA! tool:

...the Martha Stewart  "punch around the page" 
craft punch!

It's easy to use and has sharp "teeth".

Because the top part of the craft punch can be separated
from the bottom part {they attach with magnets}, 
it's easy to play around with it on a sheet of paper.  

Here's the lattice detail that I achieved using the craft punch.

I trimmed the edges with a pair of scissors and
made a triple fold to produce a 
cute DIY note card!

23 October 2012

Lacey Envelope

When I feel I deserve a little treat, I like to buy crafting supplies. Why, it's an excuse to go to the craft store! Crafting supplies are gifts that keep on giving. I buy it for me but I make things to give away. 

Here's one of my most recent purchases -- a Martha Stewart "punch all over the page" craft punch. 

It's made of two pieces. All you have to do is put the paper in between the pieces and punch away. 

Unlike other craft punches that limit the punches to the edges, this one can be positioned anywhere on the paper.  

I'm turning this blah yellow sheet into an envelope.

I finished the sides with scallop scissors
and glued two edges together.

Now, this postcard I got from Little Otsu
has a pretty home.

TADA!

This is what the same card looks like
on the flip side.

I'm ready to write a heartfelt note
and give it to a dear friend.

Have a nice day!

22 October 2012

Creative Craft Punch

Happy Monday! Apologies for the lack of crafting here in my blog. This week, I will remedy that. First, let me show off my new toy:

It's a Martha Stewart craft punch

 It's heftier than the smaller craft punches I own.

And this one comes in two pieces. Magnets hold them
together to make the cut-out design.

Here's a little demo:

Position a sheet of paper on top of the base.

Allow the top of the punch to hover over the base
until the top and bottom magnets attract each other, 
locking the craft punch into position.

Another trick is to match the angled edges of
top and bottom pieces {the other three sides 
of the top and bottom are curved}, then
press down the punch on a hard surface.

Here's what the design looks like. TADA!

Since the punch comes in two separate pieces, it's
easier to add the design anywhere on the page.

In fact this craft punch is called
"punch all over the page".

Today, I'll cut out around the cut-out with scissors.
As an added detail, I curved the edges with 
a corner craft punch.

I folded some blah scrap paper in half and
curved the sides as well. 

I attached the cut-outs to the cover with a glue stick.

Instantly, I have all-occasion gift tags.
TADA!

19 October 2012

Family Style Meals

Yesterday, I assembled a place setting for a solo meal. It was a bit mismatched but as they say, "If you want to be happy, surround yourself with things you love."  

Today, I'm dreaming up a meal for friends. Maybe a weekend brunch at home? My husband and I like to entertain every now and then, and for our next gathering, this is the look I'm going for:

Family Style Meals

1/2/3/4/5

Wood, white, glass and gold...I think these are timeless, match the existing serve ware we have, and can be both casual or dressy when the occasion calls for it. They don't have to be expensive -- these can be department store or thrift shop finds.

The sugar and creamer set (1) can double as a serving device for sauces {example: soy sauce and wasabi for sushi night}. The wooden plates (2) can hold anything from appetizers to dessert. The glass tumbler (3) can be used for cold or hot drinks, as well as soup or veggie sticks with dip at the bottom. Silver is the color for silverware, but why not gold utensils(4)? I found this toast rack (5) super cute! I think they'll still work for flat bread or rectangle crackers  {with a bowl of spinach dip on the side}. Maybe chocolate bars for an evening of chocolate tasting? Graham crackers for make-your-own S'mores? Or you can flip it over and serve a selection of cheeses or hors d' oeuvres on the flat side.

Dining pieces that do double-duty is always blah to TADA! And just for some crafty DIY, why not fold a cloth napkin to hold dinner rolls for an extra TADA!?

18 October 2012

A Meal for One

Dining alone can be blah, but because I can't avoid it, here's my idea of turning a solo meal into TADA!:

A Meal for One

1/2/3/4/5
   
   It's a mismatched affair! But hey, my meal, my style, right? The merry mix-up has 
   shades of blue, and a floral theme as the common thread. The pretty plate (1) 
   brightens up any home-cooked lunch or dinner. A cute cup and saucer (2) perfect
   for coffee or tea. A fancy rack (3) for freshly-toasted whole grain bread, while the 
   bowl (4) is just the right size for my morning oatmeal or yogurt with fruit and 
   granola. I'm getting giddy over the flowers on the beverage glass (5) for something
   simple like water or just-pressed juice. Put these together on a tray, maybe with
   a bud vase and a pink peony, and eating by myself won't be so bad.

   And because the weather is extra cold outside as I write this post, I might just
   make this satisfying dish. How about you, how do you put the TADA! when eating
   without company?

17 October 2012

A Baker's Dream

It's a week of wishes! I'm making a few vision boards to keep me focused on the things I need to learn/improve/pursue. I feel that pictures that match my "To Do"  list helps me aim for the prize. 

Today's theme is "baking". I'm fond of baking and I like to decorate and package these homemade goodies. I think this is an act of affection and any expression of thoughtfulness is TADA! 

It's been months since I last baked anything. Life just seems to take over. But since friends' birthdays and the holidays are fast approaching, it's time to take out the flour and sugar, plus a few items to get me excited:

Kitchen Wish List

1/2/3/4/5


These cookbooks (1,2) are filled with old-fashioned recipes for comforting cakes. I already know they taste as wonderful as they look. The KitchenAid stand mixer is one of the best wedding presents anyone can ever receive. Adding a paddle attachment with a built-in scraper (3) will help make mixing extra easier {no need to scrape the bottom of the bowl with a spatula}. If you're into decorating cakes, cookies or cupcakes with different colors of frosting, this icing bag stand (4) keeps everything organized. And finally, if you are a fan of brownies, especially the crisp, fudge-y edges, this baking pan (5) was made for you! 

If you want your cakes to go from blah to TADA!, you'll find a few cake decorating ideas here.