17 October 2013

Chalkboard DIY

Growing up, I had a mini chalkboard where I would practice my penmanship and draw silly doodles on. I also used it when I pretended to be a teacher with my stuffed animals as my students. Somehow, it felt powerful that I was yielding the chalk and I had everyone's attention {even if they were all inanimate}.

I'm happy that chalkboards never really went away, that's why I'm making some chalkboard-inspired crafts all this week.

But today, I'm keeping it old school.  

I'm recycling this wood backing from a damaged frame. I think it deserves a second life.

 A quick appointment with the sanding block for paint to easily adhere.

After cleaning the newly-sanded wood with a rag, apply several coats of chalkboard paint. Let this dry overnight.

 Before we can christen it a "chalkboard", a few more steps:

Apply a layer of chalk to condition the surface.

Wipe away the chalk layer with a damp cloth.

Add a hanging device -- I'm using some twine and hot glue. And now, I present to you our chalkboard:

I'd use it to make mundane chore lists more fun...just erase the completed task and move on to the next.

It's also great for making signs for any occasion. TADA!

16 October 2013

Take Your Seats

Hi there! Our chalkboard crafts continue today. Let's begin with the blah:

I found these small wood pieces in my stash. I have no idea what they're for but they make for good craft materials.

A bunch of wooden clothespins only add to the fun.

Chalkboard paint and a paint brush, too.

Ready for how it becomes a TADA!?

I put all the elements together, after painting and attaching with hot glue, to make these casual seating cards. 

I wrote the names of my guests in chalk. They tell the guests where they should sit on the table. They add a little accent to the napkin as well.

These seating cards can be used over and over again...if the guests don't take them home, that is. TADA!

15 October 2013

Chalk Board Inspiration

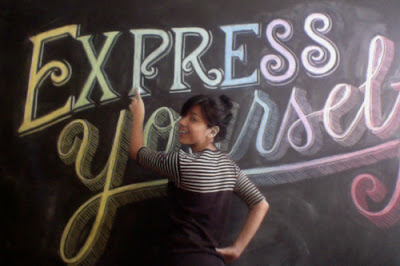
Yesterday, we gave some props to chalk artist Dana Tanamachi. I'm in awe with what she can do with just chalk and a chalkboard! With that said, chalkboard crafts are on the agenda this week. I hope you're as excited as I am.

I'll be using this chalkboard paint and a foam brush for my blah to TADA! transformations. I got this at my local craft store but there are many kinds available now.

I'm giving this napkin holder a face lift. We've had this since my husband's bachelor days. It's time to freshen it up.

I gave it a good sanding with a handy sanding block. Then I cleaned off the dust with a rag.

I applied several coats of the chalkboard paint. The package suggests two coats: one applied horizontally, and another vertically, with a one hour drying time in between. For good measure, I did about 10 coats and left it to dry overnight.

To condition it, I rubbed chalk all over the surface {both sides}.

Then, clean chalk layer with a damp cloth or dry eraser.

Now I can write little notes with chalk to add whimsy to our dining table.

Or to make a family member's birthday extra special.

And to make guests feel right at home. TADA!

14 October 2013

The Chalk Artist

Happy new week, everyone! Steve Jobs once said that, "The only way to do great work is to love what you do" and I couldn't agree more. I've always admired people who pursue their passion and in doing so, found success and happiness.

via greylikesnesting 
One such person is Dana Tanamachi, a graphic designer and letterer.

via ellauniverse
She has made a name for herself with her chalk art, dressing up interior spaces, as well as pages of magazines.

via happinessis
She's even met Oprah {she designed one of the covers of The Oprah Magazine}!

A few years back, she created these alphabet paper weights for West Elm

via juxtapost
She's also made covers, rendered in chalk of course, for some classic books.

And just recently, she collaborated with Target for a limited edition line of home decor:


Above, a short write-up about her at the back of the products. Turning a blank chalkboard into an inspiring piece of art...I think that's blah to TADA!

You can read more about Miss Tanamachi and her work here, here and here.

11 October 2013

Attempting to Knit

Hey, hey, Happy Friday! Have any of you, my dear readers, tried your hand at a knitting dolly?

You see, on a trip to England last year, I bought myself this knitting doll at their equivalent of a dollar store, Poundland! I couldn't resist how cute she was and I've always wanted to develop some knitting skills.

The package included the dolly, some yarn, and a crochet hook/pin.

It came with instructions, too, but I've been watching some tutorials on YouTube to help me along.

Instead of yarn, I'll experiment with crochet thread.

Here's what the knitted pattern will look like. TADA!

Allow me to get the hang of it as I carry it around my project pouch. I'll keep practicing and let's see what things I'll be able to make. And if you're an expert, please throw some tips my way. I would gladly appreciate it.

Have a fantastic weekend everyone!

10 October 2013

A Stitched Anniversary Gift

Have you been to Paper Source? It's a sweet shop known for their stationery and gifts. 

I love their motto: "Do something creative everyday". I've since borrowed this mantra because making something with your hands truly nourishes the spirit. Don't you agree?

That's why I came out with a project pouch. It's just a simple pouch that contains the materials for the craft project I'm currently working on. Use any kind or any size pouch; it happens that I like turning blah to TADA!, so I made this one. Having a project pouch allows me to "do something creative everyday", wherever I may be.

I've been enamored with embroidery the past couple of weeks. 

Here are the contents of my pouch: fabric mounted on a embroidery hoop {the design comes from a Martha Stewart book; I just added the heart}, a pair of scissors, embroidery floss and a needle notebook.

I keep a few needles and pins in my needle notebook because a pin cushion is a little bulky. I only carry the colors of embroidery floss I need for my project. These are organized using cardboard spools.

It may take me days, weeks even, to complete a project.

But I know my project is safely hanging out in the pouch until I'm ready to work on it again.

Here are the stitched lovebirds, ready to be given away to a couple celebrating their anniversary. TADA!

09 October 2013

Crafty Tags

Hello! Yesterday, I  turned a blah canvas pouch into TADA! by decorating it with iron-on patches:

This pouch's mission is to house my current craft project. That way, I can easily take it anywhere. Right now, the holidays are on my mind. To avoid being overwhelmed, I spread out my holiday errands throughout the year such as buying presents, assembling handmade gifts, and preparing tags: 

Here's what I put inside my project pouch: a "Made with Love" rubber stamp, an ink pad, and blank sticker labels. 

Moving on to gift labels, here are Christmas-themed rubber stamps and bigger adhesive tags. 

Sometime in the day, when I have a few minutes on hand, I can do a little stamping {it doesn't even require a lot of time} and TADA!, I'll be able to cross off an item on my "To Do" list.

To protect the surface I'm working on, I'd bring a sheet of recycled paper {ex. newspaper or packaging paper}. For quick clean-up, I would tuck in some paper towels and a plastic zip-top bag to keep any ink from getting to my pouch.

I hope this has inspired you to make a project pouch, too.