11 June 2014

Fiery Orange Flower

Thanks for visiting my blog today!

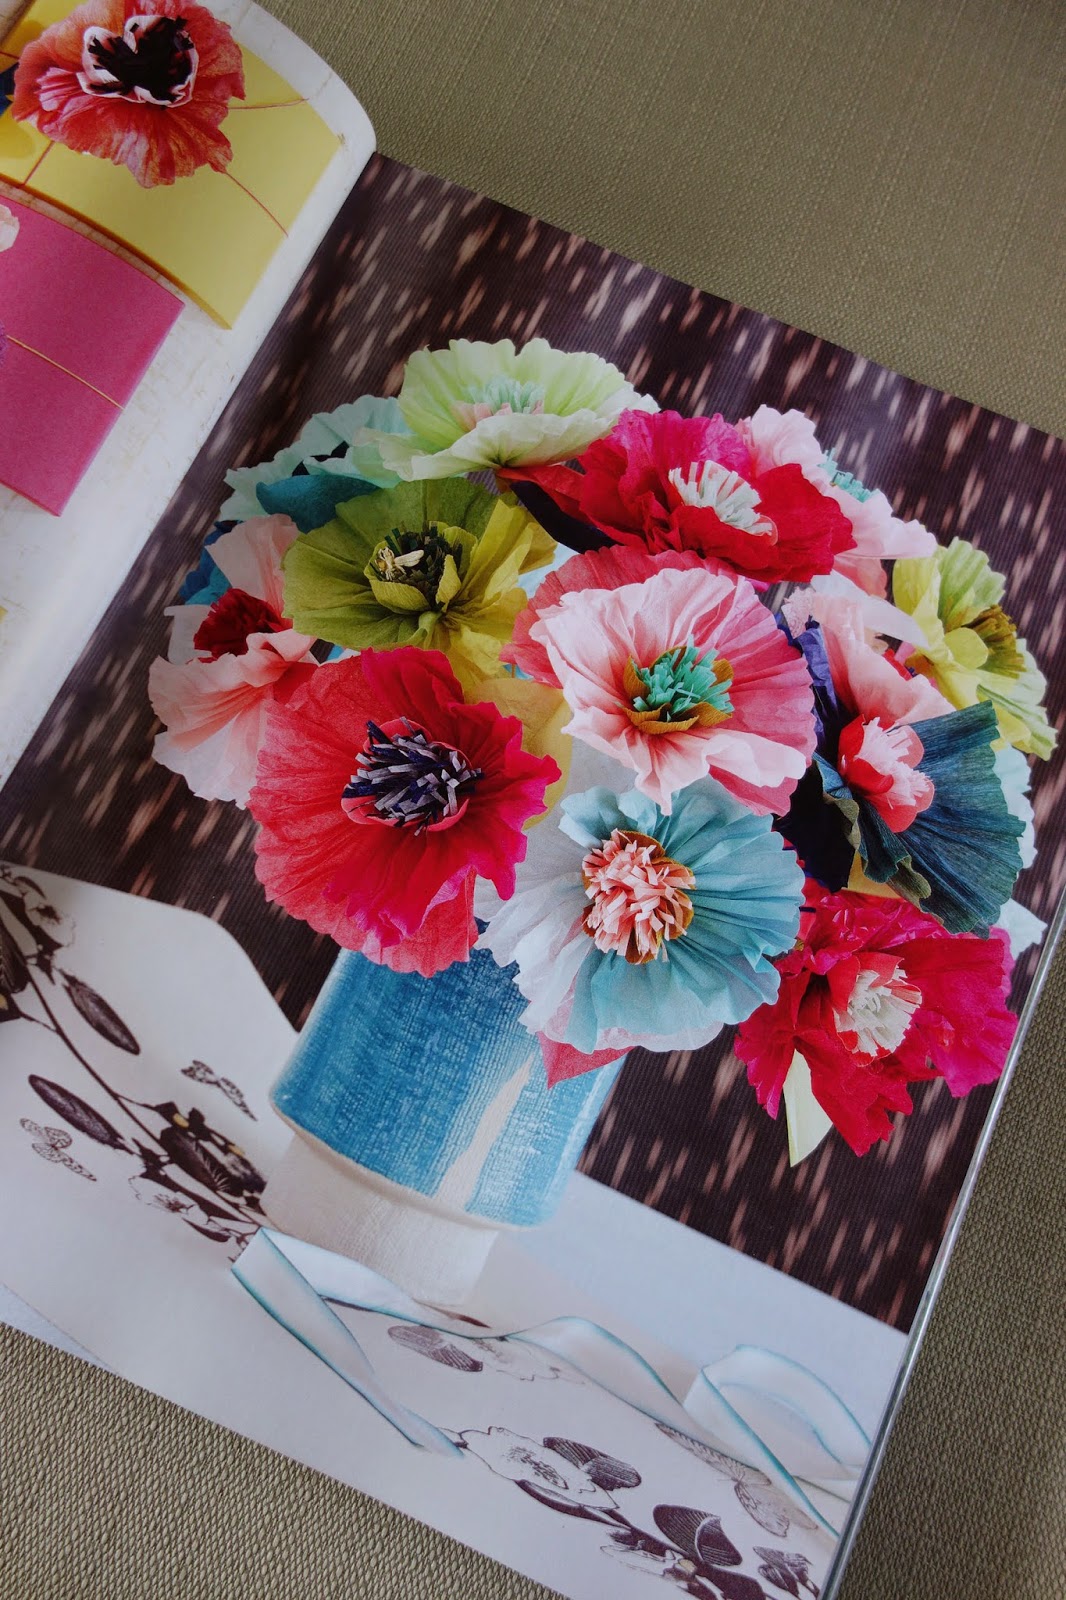
Here's another flower that I crafted. I've made paper flowers before like this one and this one, but I couldn't help making more after reading this book:

It's written, styled, and photographed by Rebecca Thuss {who used to work for Martha Stewart's magazine empire} and her husband Patrick Farrell. And let me tell you, it will open your mind to new possibilities for paper flowers!

I'll show you how I made my orange bloom:

To make the flowers, crepe paper is the recommended material. I happen to love recycling so I used old packaging paper instead {the ones used for wrapping breakables at the department store}. In fact, you can use any paper you have on hand -- tissue, gift wrap, construction paper. Then, I used one of the petal templates from the book {also on-line}.

However, my white packaging paper was looking blah. 

But not anymore! With a little bit of paint {applied randomly with a dry paintbrush}, a cinch at the tip, a curl using a pencil, these are now looking more like petals.

I made a stamen out of fringed paper then attached this to a piece of floral wire with glue.

Then I added the petals, securing the ends to the wire with more glue.

I finished off with a layer of floral wire.

A closer look.

I even reused this empty white wine vinegar bottle as a vase. TADA!

More tomorrow.

10 June 2014

Paper to Petal

So I borrowed this visually-inspiring book from the library:

It's called Paper to Petal authored by husband-wife team Patrick Farrell and Rebecca Thuss. I've renewed it so many times because I can't get enough of all the handmade beauty! Here, let me show you...

They're based on real flowers but with a whimsical spin. Stripes, baby!

And pastel speckles!

Vibrant arrangements to keep or give away. Sigh.

The tutorials are easy to follow, it contains many templates and a generous directory of supply sources. 

I just had to try out some of the projects, in my blah to TADA! twist -- I'm re-purposing tissue and packaging paper. 

I started by tracing a petal from the one of the templates.

I cut these out and painted on a darker shade of pink.

Having no green paper, I made leaves with watercolor.

I did the same to make yellow paper that I fringed. 

Floral tape, floral wire and a wire cutter are a few other essentials.

Here's how I made the flower:

The center is made of a cotton ball attached to one end of the floral wire. Then wrap the cotton ball with a square piece of paper.

Secure the loose ends to the wire with floral tape.

I'm using the yellow fringe as the stamen, adding more floral tape as I go along.

I pinched the ends of the petals and added them to the base with glue and more floral tape.

Here's what it looks like.

Add a calyx to make it more lifelike.

And then some leaves.

Here's what it looks like now. 

Just the right size to add color to a desk or shelf. TADA!

Please stop by tomorrow for another idea from the book.

09 June 2014

Summer Lovin'

Hi there! Can I share a photo from my weekend?

It was taken at a Barbecue Block Party in Madison Square Park. There was food, music, and lots of lounging around. Summer has finally arrived and I can't wait to do more of these!

I discovered a new book and we'll be crafting from it beginning tomorrow. See you then!

02 June 2014

Painted Jars

Hello Everyone! A day of spring sprucing in the kitchen has yielded these:

Empty glass jars that I cleaned with hot, soapy water. I also soaked the labels in water and peeled them off. If there is still some residue left, a product like this can make the task quick and easy. 

I love crafting with jars as seen here, here and here. And it doesn't stop there. Here's a project I spotted on Pinterest, I just had to try it myself.

A glass jar and paint are all we need.

Pour some paint into the jar and swirl it around.

The goal is to coat the sides of the jar. Keep pouring more paint in small amounts as necessary. If it helps, adding a tiny spritz of water will make the paint more runny, making the color spread faster.

Once the walls of the jar are tinted, invert the jar onto a paper plate or an old foam tray and allow the excess paint to drip out. Let the jar dry overnight.

And here's what the finished jar looks like...TADA! 

I experimented with other colors. I think they're adorable!

They make beautiful vases for these paper flowers.


I wish you all a colorful week! 

26 May 2014

Pressed Flowers

Good day dear friends! Where I live, the barren trees of a long, hard winter now sport bright green leaves.  Warmer temperatures have arrived and flowers abound. Spring is in full swing!

While photographs and watercolor can somehow preserve these blooming beauties, there's another alternative: pressing flowers.

 These are cherry blossoms.

Here are some carnations.

And these, daffodils.

Pressing flowers is quite easy to do. A kit like this would come in handy {and you can take it whenever you travel}.

But pressing flowers and leaves in between old phone books or heavy boxes is widely acceptable. Just make sure to sandwich the blooms in newspaper. Also, allot a few days to several weeks to get the perfect press.

I've selected these pressed flowers as a memento of this year's spring.

I mounted them on card stock using Mod Podge {any all purpose glue will work, too}. 

I'm ready to tack this onto my bulletin board or framing it in a shadow box is another fun option. This way, I have flowers in my work space all year round. TADA! 

23 May 2014

Printed Parcel

Hi there! Early this week, we had a little washi tape fest. From small crafting projects to decorating the home, this printed masking tape has proven its versatility.

It's no surprise that it brings out one's hoarding tendencies. Two or three are never enough!

Before the week ends, let me share another idea to use washi tape:

I recycled a blah brown paper bag to make these small paper bags.

With this as a blank slate, it's tape time!

To add a new dimension, a few designs using some rubber stamps and an ink pad. Plus pinking shears to add detail to the edge.

A floral embellishment won't hurt, right?

Here's another version using a red theme.

Add a stamped image.

And a silk flower for good measure! Just add a gift and seal with more washi tape. Isn't that blah to TADA!?

Have a delightful weekend and a Happy Memorial Day {the unofficial start of summer, woohoo!}.