22 August 2021

An Origami Crane

Hey everyone, how nice to see you today!

I'm a big fan of packaging design. Many times, I've bought the item just because it came in a beautifully designed box or bottle. I'm also partial to the ones that can be recycled and reused.

A friend of mine vacationed in Tokyo and gave me a few bags of Kitkat. Unlike the chocolate or white chocolate varieties popular in the U.S., Japan has an excellent assortment of flavors! 

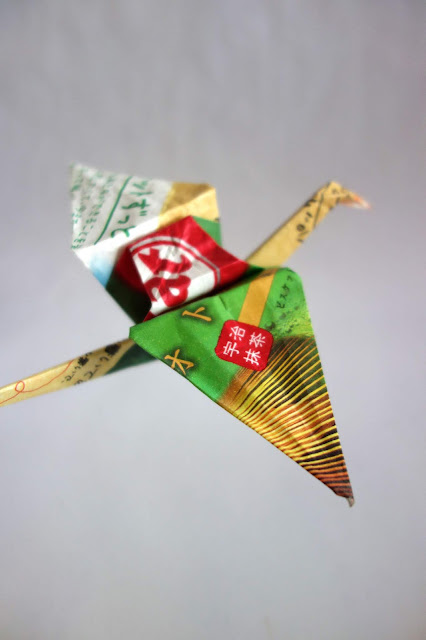
This is the Matcha or Green Tea flavor. I happen to love Matcha so this was right up my alley. It might, however, be an acquired taste for some who haven't had Matcha flavored drinks or desserts. 

Anyway, back to the packaging. I can't read Japanese but I loved this little detail: we can repurpose the package as Origami paper. 

Origami is the Japanese art of folding paper into decorative shapes like boxes, flowers, and hearts.

The use of photos really help convey a message. Plus, if we hover our phones over the QR code...  

...we're immediately taken to their website.

And we're given instructions on how to fold an Origami crane. Really fun and interactive!

I opened up the package by cutting the sides.

Then I trimmed it into an 8 inch x 8 inch square.

Using the instructions, I began folding, folding, folding...

Until I made a crane...TADA!

Legend has it that if one folds one thousand cranes, his/her wish will come true. This is just a baby step in that direction.

But I'm quite pleased that this package meant for the trash, I was able to turn from blah to TADA!

Make an Origami Crane using recycled paper
If you'd like to make your own Origami crane using paper you have on hand, check this and this out.

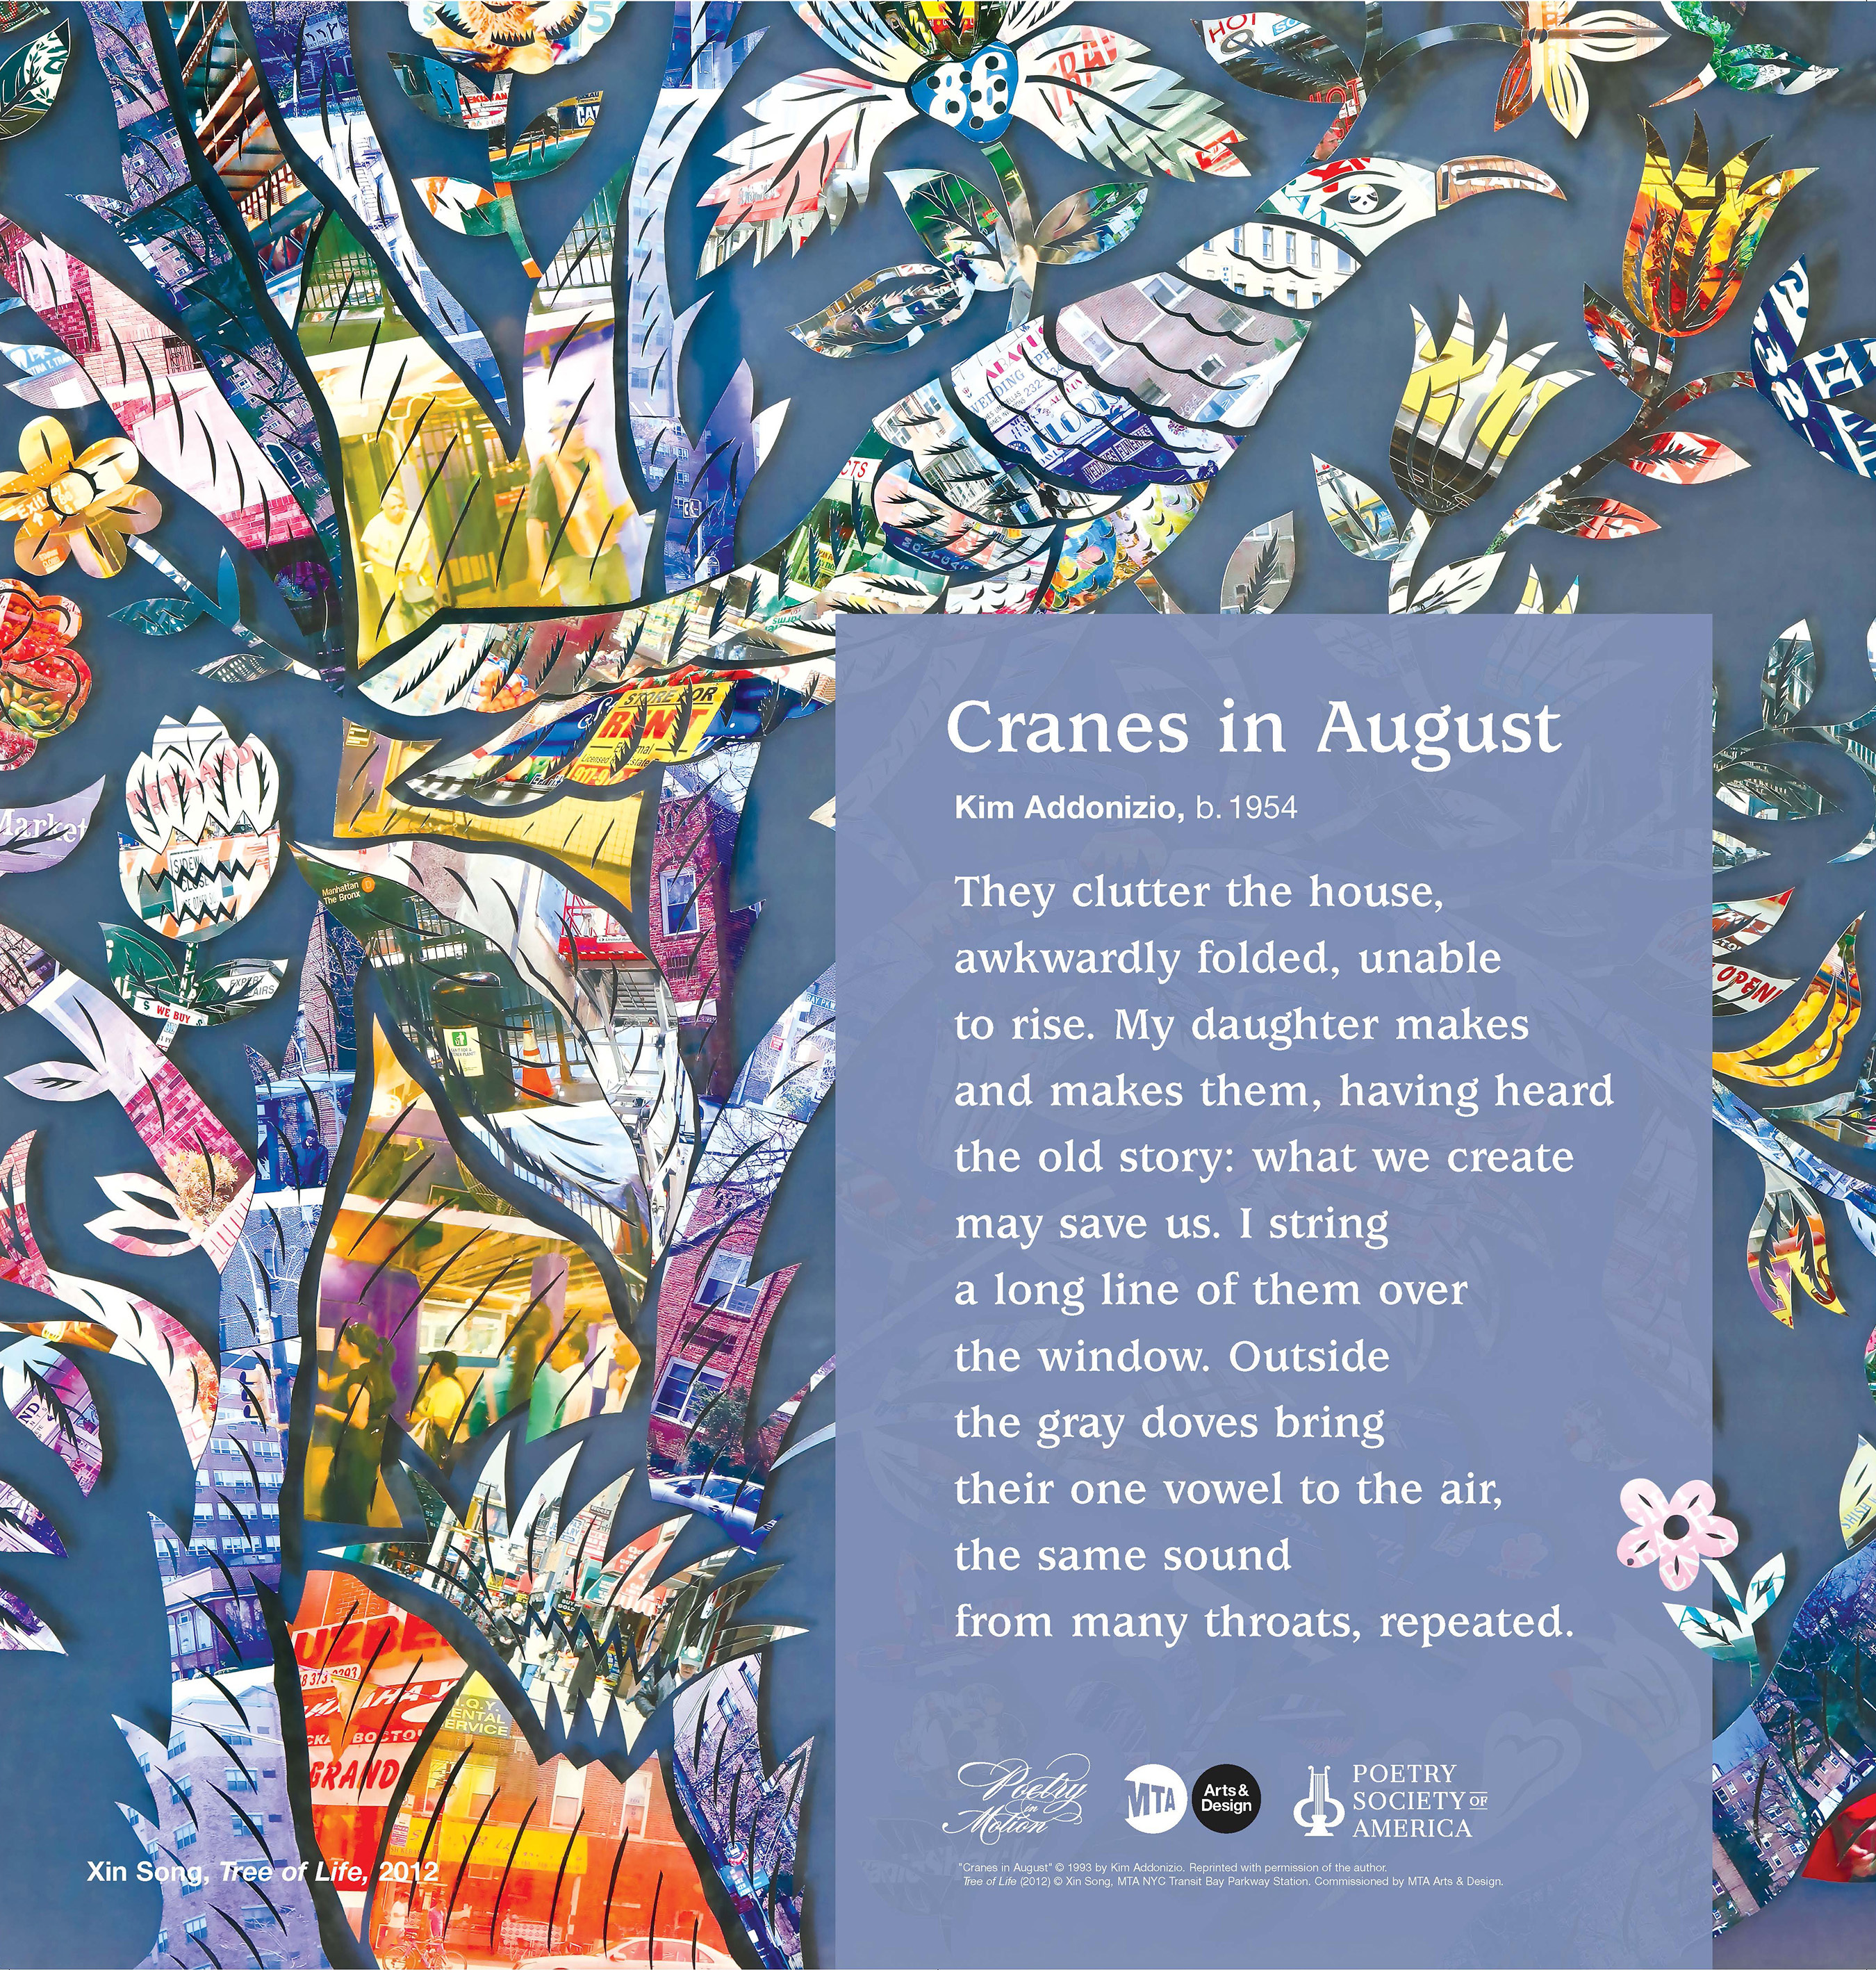
via Poetry Society of America
And because we're on the topic of origami cranes, I'm sharing this poem that I spotted on the New York subway in 2019. I love the line, "What we create may save us."

Have a good week!

15 August 2021

Adventures in Book Binding

Hi guys! How are you today?

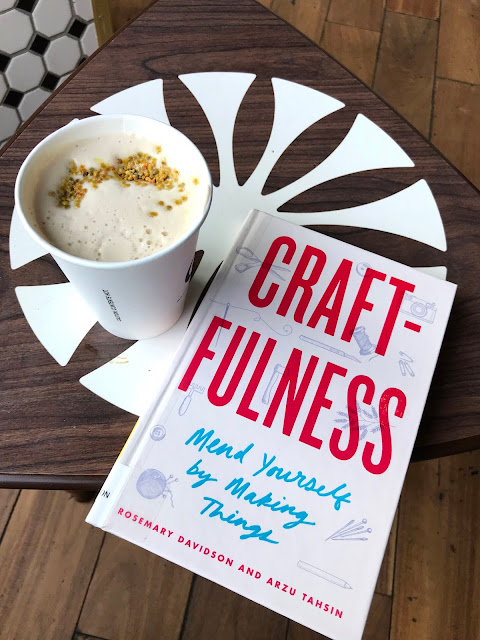
I was at the library and this book presented itself to me:

chai latte, Modcup, Modcup Coffee
It's called "Craftfulness" and I absolutely agree with the subtitle, "Mend Yourself by Making Things." Crafting has been a constant anchor for me especially in the lowest points of life. It has helped distract me from loneliness after loss and kept me focused during periods of anxiousness. Even as a child recuperating at home from a long sickness (like the measles), I would turn to crafting and it helped me get better.

"Craftfulness" gives scientific proof that crafting is beneficial to one's emotional well being. It's a form of therapy and the process is as rewarding as the results:

"Process, not product, is the soul of a craft practice. Whether you knit, crochet, sculpt, weave, quilt, tat, draw, or bind books—working toward small, attainable goals gives us a sense of purpose, accomplishment, and control that is proven to positively impact our mental health and happiness."

The book also has a bunch of crafty tutorials like this one for a Stitched Pamphlet Book.

Let me show you how I made it.

I selected some pretty scrapbook paper for the cover. 

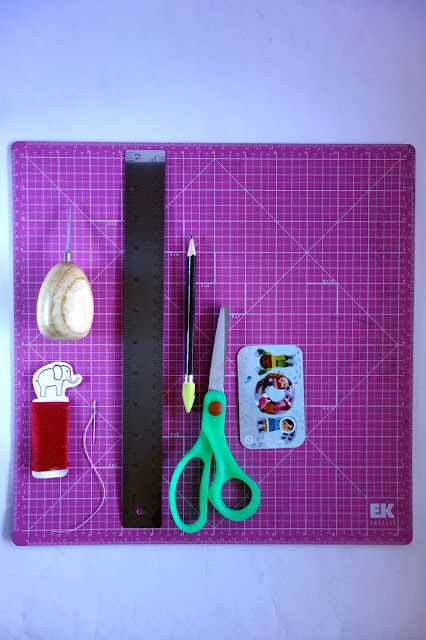
awl, needle and thread, self-healing mat, ruler, scissors, pencil, bone folder, craft materials
Here are the other tools I used: a self-healing mat, awl (a bookbinding tool used to make holes in paper and leather; a thick needle can do the job, too), thread and needle, ruler, pencil, scissors and a bone folder (this helps reinforce the creases when folding pages; an expired  gift card works just as well).

self-healing mat, card stock
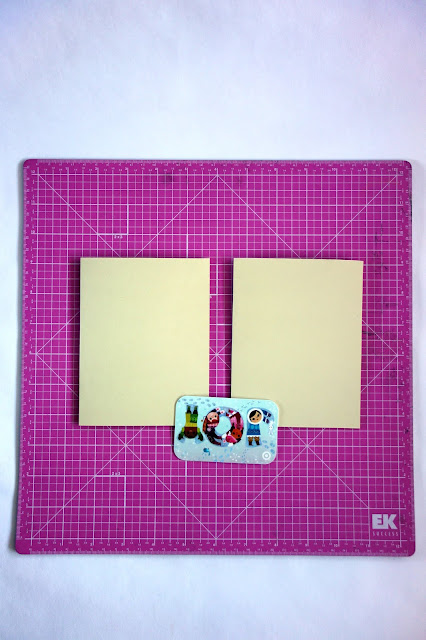
For the inner pages, I chose card stock (this is 8.5 inches by 11 inches).

self-healing mat, card stock, bone folder, how to repurpose an expired gift card
I folded the card stock in half and ran the bone folder/plastic gift card tightly along the fold to make a good crease.

self-healing mat, scissors, card stock
I cut the paper in half, using the crease as my guide.

self-healing mat, card stock, bone folder, how to repurpose an empty gift card
Then I folded each one in the middle, and reinforced the crease with a bone folder/plastic gift card.  

self-healing mat, scissors, card stock, bone folder, how to repurpose an empty gift card, craft materials
I kept repeating the process until I had the number of pages I needed (8 pages made from 4 sets of card stock).  

self-healing mat, scissors, card stock, scrapbook paper, craft materials
I trimmed the scrapbook paper to make the cover. It's about the size of the inner pages with a quarter inch added to each side so that it covers the pages when the book is eventually folded.  

self-healing mat, card stock, scrapbook paper, craft materials
Stack the pages on top of each other and end with the cover, neatly lining up the edges together.

card stock, self-healing mat, craft materials
Open the book to the centerfold.

pencil, ruler, self-healing mat, card stock, craft materials
Using a pencil and ruler, mark the center and add two more dots on each end, about half-an-inch from the edge.

self-healing mat, awl, card stock, craft materials
With the awl or a thick needle, make a hole on each mark, making sure the needle goes all the way through the cover page.

self-healing mat, scrapbook paper, needle, thread
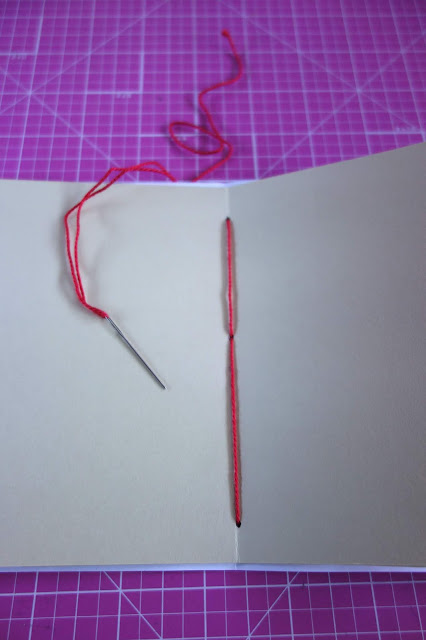
Bind the pages together with a needle and thick thread. Start from the outside (cover page) leaving a long tail on one of the corner holes.

self-healing mat, needle and thread, card stock, craft materials
Then bring the needle inside, connecting the dots together with the thread.

Bring the needle back outside, ending in the corner hole opposite where the initial tail can be found. Make a few knots and finish with a bow.  

And here is our handmade book...TADA!

This is another version made from blue card stock.

In the book Craftfulness, filmmaker Lisa Gornick chooses drawing as her craft. She says:

 "Advice to people who want to start drawing? Buy a lovely sketchbook, ink pen. This will be your secret place, your special gift to yourself. Perfectionism is not required, make any mark, fill up that book, keep it a secret to yourself. Don't stop 'til you finish that book. Whatever is in your head. Nothing is wrong, no judgement. At the end of the book then ask yourself again what you think about drawing." 

I think I'll do just that with my new notebooks -- playfully draw in them!

sewing, bookbinding, security envelopes, how to recycle paper, blue notebooks
Here are a few more booklets I made using the paper scraps. I also used empty security envelopes for the covers and played around with the binding patterns. 

graph paper, notebook paper, how to recycle paper into small notebooks
For the inner pages, I used the leftover empty pages from my notebooks and turned them from blah to TADA!

scissors, thread, pencil, awl, paper, craft materials, security envelopes, sewing, bookbinding
How about you, have you ever tried your hand at bookbinding? And do you agree that crafting can be healing?

Don't miss my future blog posts! Please subscribe here

08 August 2021

Personalization Using Alphabet Beads

Don't you love it when you receive a gift and your name is printed on it? Like a mug, a pendant, a pouch? It feels special -- the gift was really made for you!

Today, we're going to make this kind of gift.   

We'll spell out names using alphabet beads. They're easy to find at craft stores or dollar stores.

We'll also need these key rings. I'm recycling them from ID lanyards (those you wear at seminars and conventions) and souvenir key chains that I no longer use.

Let's also add colorful beads and cord to our list of materials. If you have twine or thin ribbon, that works, too.

Trim the cord. The length will depend on the number of beads you'll use to spell out a name. This one is about 8 to 10 inches for a six-letter name. 

Fold the cord in half and loop it through itself on the key ring.

Now the fun part! Select the letters to form your name.


Spell out the names of your sisters, your best friends, your crew, your gang, your posse.

Slide the beads onto the cord.

Add a decorative bead or two.

Make a few knots to keep the beads in place.

And knot the dangling ends to prevent them from fraying.

Presenting our handmade key chains (drum roll please)...


We made something personal with very simple materials. Definitely blah to TADA!

They make really cute gifts and can be an engaging activity for a kiddie party or crafty afternoon with the girls...TADA!


Thanks so much for stopping by! If you like, you can subscribe here so that you never miss a blog post.

01 August 2021

Snail Mail Envelopes

A handwritten letter in the mail.

I consider this to be one of life's greatest pleasures. It takes time and effort. It's very manual: expressing one's thoughts through script and going to the post office to mail it. It also carries lots of hope, "I hope it arrives" or "I hope she likes it". 

When I write letters, I go all out. I even dress up the envelope because it's the first thing people see -- people at the post office, the mail carriers, and the recipient. The letter has to be dressed appropriately! 

Let me show you a few examples:


I used rubber stamps and washi tape...TADA!


I made my own envelope using an old map...TADA! If you look at the bottom, there's a town called Jollyville (I love that!).


This envelope is looking blah.


It's because I saved all the embellishments for the inside! It's a card and envelope in one...TADA!

card and envelope in one

An old envelope was used as a template and I decorated with stickers, washi tape, chipboard letters, and printed card stock.


The next time you send snail mail, why not add an extra special touch to your envelopes? And if you'd like these blog posts delivered via e-mail, you can subscribe here

25 July 2021

Washi Tape -- Never Travel Without It

Hi there! 

Are you traveling anytime soon? May I recommend a little travel tip? 


Bring a roll of washi tape!


Here are five ways where washi tape will come in handy:


Number 1: Have an additional layer of privacy by covering the peep holes on hotel doors with washi tape (you'll want to make sure your hotel rooms or vacation rentals have not been outfitted with hidden cameras.) It's always good to be safe and aware. 


Number 2: Use washi tape to re-seal a bag of snacks to keep them fresh and crunchy. 


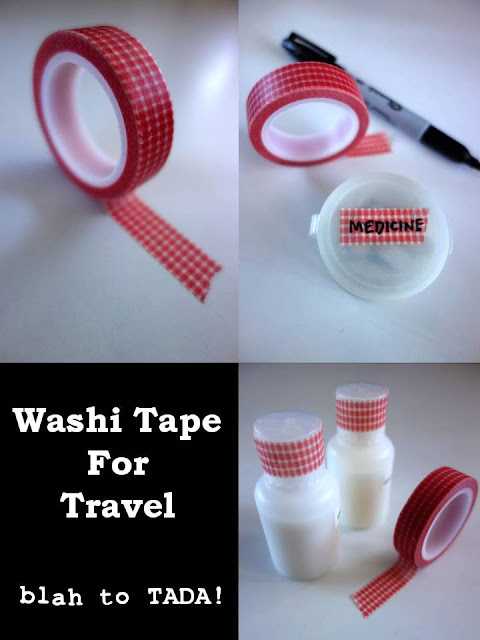
Number 3: Use washi tape to seal toiletries and keep them from spilling.


Number 4: If you like to buy tokens for family and friends while you travel, use washi tape to label your gifts.


Number 5: Washi tape is very useful for making labels. You can write on it with a permanent marker (doesn't smudge) and the tape easily peels off without damaging surfaces.


I hope these ideas will turn your travels from "blah to TADA!"

And if you'd like more "blah to TADA!" ideas like this delivered to your inbox every week, you can sign up here.

18 July 2021

Painting on Leather

She painted on a $10,000 leather bag!

Hand painted Hermes Birkin by artist love Marie aka heart evangelista Escudero ❤️
via Pinterest
This is an Hermes bag that costs at least US$10,000. The price can go higher depending on the size and the leather used. It's a beautiful bag, no doubt, but I can't see myself buying something for such an expensive amount. And let's just say I did, I would take very good care of it, wiping it down after each use and reserving a chair just to lay it on. And I would hold it tightly under my arm because the bag alone is enough to bail me out of a ransom situation. 

But this artist painted on it! 

She PAINTED on it! 

I applaud her audacity.
  
이정진 Jung Jin Lee(@artjin1214) • Instagram 사진 및 동영상
via Jung Jin Lee
How about this artist who paints on a Louis Vuitton wallet?

Apparently, a lot of people are having their designer bags custom-painted. The paintings add personality to the bag and makes it stand out from others who own the same kind. But do these paintings add or diminish the value of the bag? 

Anyway, while spring cleaning, I found this passport case. It was an airline freebie.

Here's what it looks like inside.

It's plain and simple on the back.

I was contemplating on how to turn it from "blah" to "TADA!" and I decided to paint on it. But no fear here because if I mess it up, it really didn't cost me a thing.

I decided to paint a portrait of an adventurer. I used white acrylic paint to make my outline.

Then I added details using a pencil. 

I took out more acrylic paint and a small, flat-tipped paintbrush.

Then I added the corresponding colors.

This cool girl is ready for adventure!

I don't know if you can see from here -- her sunglasses are metallic. And the leather-stamped branding is no longer obvious...TADA!

Simply add a passport, IDs, and a pen for the adventure to begin now that the world is starting to open its doors to tourists after months of lockdown.

This is my first attempt to paint on leather and I enjoyed it a lot. 

Thanks for stopping by today!

If you like this "blah to TADA!" idea, you can sign up for my newsletter here. New blog posts delivered to your inbox every week.