31 October 2012

Happy Halloween

Hello there everyone!

I want to wish you a HAPPY HALLOWEEN! What are your plans today? I was planning to be at the Village Halloween Parade in New York City volunteering as a puppeteer. I did it last year and I had a really TADA! time! But due to Hurricane Sandy's effects, the parade has been cancelled.

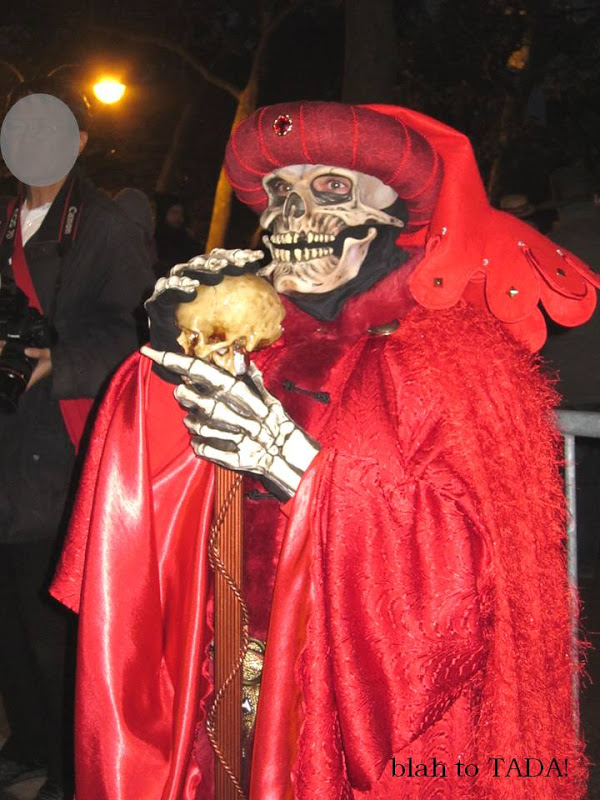
Here are a few Halloween costumes from last year's parade:


Have a fabulous Halloween, filled with tricks and treats! 


30 October 2012

Jar-ry, Jar-ry Night

Eeeep! It's Halloween tomorrow! If you celebrate it, are you ready? I have the treats but no decorations. Time to turn some blah into TADA!

If you have jars and vases gathering dust in the cupboard under the sink, now's a good time to take them out.

via Country Living
Add some black crow cut-outs inside the vase and
line these up on a mantle or shelf.

via Country Living
Make a Halloween terrarium using twigs, moss and frightening toys.

Sequined Mask Candy Jar Decoration
via Better Homes and Gardens
Dress up a glass bowl with a mask and fake eyes.
Fill it up with candy.

Bewitching Treat
via Better Homes and Gardens
Add a faux face to a vase, add scoops of candy, and cover with a handmade witch's hat. Encourage guests to help themselves to what's inside.

Mummy Lantern
via Better Homes and Gardens
Cover a jam jar with masking tape {jagged edges encouraged}, draw on a scary face, and add a votive {battery operated for safety} for a ghoulish glow on fright night.

29 October 2012

Halloween Decorations

Happy Monday! I've been taking a lot of quiet walks lately. I'm liking the comfortable chill, and I'm loving that the colors of the leaves are slowly changing into their autumn best.


Orange against a blue sky...breathtakingly TADA! I hope the leaves hang-out on the trees as long as possible because I think barren trees are blah.

I come across lots of twigs during my walks. I think they make wonderful crafting materials for Halloween. Here are some ideas from magazines that I put together to show you how twigs can turn from blah to TADA!:
Bat Mobile
via Martha Stewart
via Good Housekeeping
Whether you use these twigs to display Halloween characters like bats and birds, or use them to display Halloween treats, they are sure to add a spooky surprise in your home. Have a nice day!

To those in the US East Coast, wishing you warmth and safety as Hurricane Sandy approaches.

26 October 2012

Wrapped in Lace

Hey, hey, it's already Friday! Woohoo!

Today, let's give this blank sheet of paper
a mini make-over. 

Using this genius crafty device, blah will become TADA!:

The blank sheet is now looking fancy with a lace pattern.
All because the craft punch can be placed anywhere 
around the page {less wasted space}!

Together with some tissue paper and baker's twine, we
can use this to wrap presents!

The white over-lay reminds me of eyelet dresses
I used to wear as a child.

Graceful texture and peek-a-boo color 
{go ahead, choose another shade or 
something with print + pattern} 

A TADA! idea for holiday gift wrap!

Have a delightful weekend, everyone.


25 October 2012

An Easy-to-Make Gift Box

Happy Thursday!

This gift to self has proven to be a smart purchase. I've used it to make different kinds of stationery. Let's see how we can use it to embellish a plain box.

First, we'll need to make the box. We'll need two sheets of paper, ideally card stock. Trim both sheets to make an 8 inch by 8 inch square.

Position a ruler on top of the page. At the 2 inch mark, mark the paper from top to bottom by scoring {use a bone folder, popsicle stick or a pen with no ink, with the aid of another ruler}. Do the same at the 6 inch mark. Rotate the paper 90 degrees. Score again at the 2 inch and 6 inch mark. You'll have what appears to be a tic-tac-toe pattern.  

Make slits {with scissors}  at the four edges and fold. 

 Glue the edges together and TADA! -- the box bottom is made!

Do the same for the other sheet but don't assemble it yet. 

This is the top of the box that we'll decorate using the craft punch. Position the paper in between the top and bottom parts of the craft punch, let the magnets click, and press down {works best on a hard surface}.

 Once the design is made, link the edges together to form the box. Seal with glue.

 A gift box that's easy to make...TADA!

Tuck the gift in colored tissue paper for an element of surprise,
and to keep it from moving around inside the box.

Use the gift tag we made on Monday to add a sweet message.
How's that for blah to TADA!?

24 October 2012

Lattice Work

So lovely to see you today!  

Take a look at these note cards. They're a set by Vera Wang. I found them at a sample sale and I have no intention of using them. Is that evil of me? They're too pretty to part with. The delicate laser-cut details make me weak in the knees. Sigh. They're the ones you tack on your mood board to be used as a muse for a dress, a bag, a cake...the list is endless!

So that I don't appear too selfish, I made a version of this card {that I can give away} in my own blah to TADA! manner:

 Here's my little masterpiece...TADA!

I made this out of blah scrap paper and a TADA! tool:

...the Martha Stewart  "punch around the page" 
craft punch!

It's easy to use and has sharp "teeth".

Because the top part of the craft punch can be separated
from the bottom part {they attach with magnets}, 
it's easy to play around with it on a sheet of paper.  

Here's the lattice detail that I achieved using the craft punch.

I trimmed the edges with a pair of scissors and
made a triple fold to produce a 
cute DIY note card!