07 July 2024
A Very Sweet Handmade Envelope
30 June 2024
Five Things for July

23 June 2024
Sketchbook Practice: Drawing Manhattan's Oldest Tree
Hi there! Let me tell you about a drawing session that I attended last Sunday.
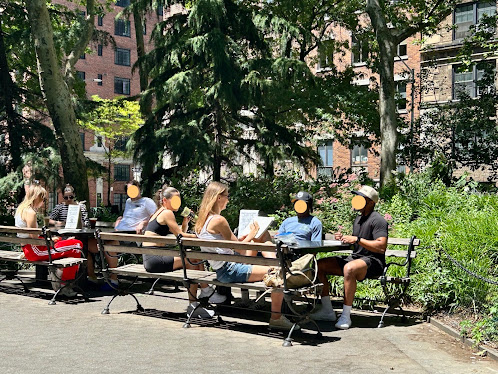
The venue was New York City's Washington Square Park. Here, you'll find the oldest tree in Manhattan (more than 300 years old). It's an English Elm and it's known as the "Hangman's Elm." Legend has it that traitors we hung from its branches around the time of the American Revolution.
I know, it sounds a little morbid, but I can only imagine all the stories this towering tree has seen. She's a real beauty! I frequent this park a lot but wasn't even aware of the history of this tree.
The group Washington Square Park Eco Projects and artist Kristin Jones of Behold lead strangers like me who are willing to stop, observe, and draw Manhattan's oldest tree.
The session was absolutely free! Sketchpads and pencils were provided, but you are welcome to bring your favorite art materials.
We sat on the park benches that surround Hangman's Elm and just began to draw.
Different artists are invited to provide tips, techniques, and encouragement. This class was led by Jennifer Orkin Lewis (@augustwren on Instagram). I've been a fan of her use of color and whimsical style. Meeting her turned my day from blah to TADA!
I sketched several versions of the tree using different media:
 |
| My warm up exercise: a pencil sketch |
 |
| My second attempt: sketching more details using green pencil |
 |
| My third sketch using an ink pen |
 |
| Another version: what if I painted a blue tree? I used blue watercolor directly on the paper; I didn't do a pencil sketch beforehand. |
 |
| And still another version using watercolor and colored pencils. |
 |
| For the final one, I went wild with the watercolor. |
Let's keep practicing, stay creative, and transform ordinary days from blah to TADA!
16 June 2024
More Ephemera Envelopes
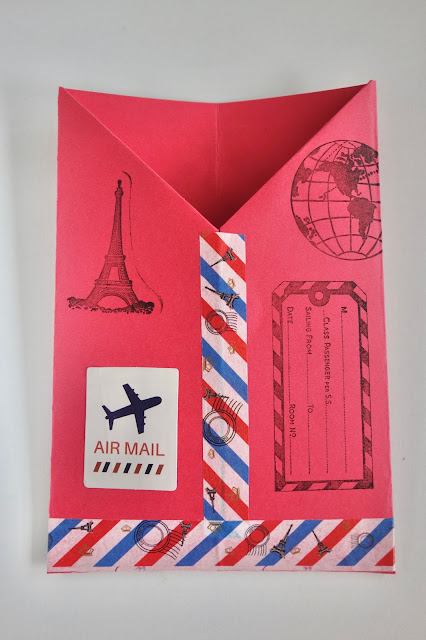
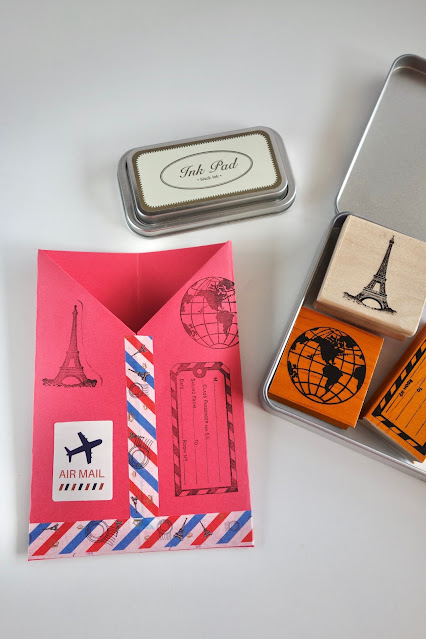
It's a handmade envelope from the book "The Art of the Travel Journal" by Abbey Sy. It is folded in an origami style where the seams are sealed and embellished with washi tape. It's called an ephemera envelope because it's where we can safely store paper souvenirs like tickets and maps that we've collected during our travels. It's also meant to be included in our travel journal, as an analog way of memory keeping.
When I started making one, I just couldn't stop! Here are new versions using different sizes and kinds of paper:
These are made from hand-painted paper.
These are made from brown packaging paper and decorated with fodder and collage.
These are upcycled from a mailing envelope and decorated with stamps.
Make the ephemera envelope part of your travel journal spread.
Find other purposes for it, too: as an envelope for handmade cards or as a flat bag to wrap presents.
This is just one of the ways I transform paper scraps from "blah to TADA!"
Have a good week ahead and if you want more crafty ideas delivered to your inbox, please subscribe here.
09 June 2024
How to Make an Ephemera Envelope
I got the idea from the book 'The Art of the Travel Journal" by Abbey Sy. She defines ephemera as "any form of printed matter produced for a specific short-term use. The word ephemera comes from the Greek work ephemeros, meaning short-lived." Examples of ephemera include tickets, maps, brochures, postcards, clothing tags, packaging material, coasters, paper napkins and the like.
Collecting ephemera and including these in a travel journal extends their life and are powerful reminders of the trips we've taken.
We can store these ephemera in an ephemera envelope that we can make out of our paper scraps. Here's how:
We will need rectangular shaped paper (ex. A5 or A6 size paper).
2. Unfold it, then fold each side into the middle fold, resulting in four even segments.
3. Fold the top outer edges towards the nearest fold, creating two triangles at the top left and top right sides of the paper.
4. Fold each side toward the middle.
5. Fold the bottom up about 1/2" (1.3 cm) to create a pocket.
6. Seal the center and bottom seams with washi tape.
7. Decorate the pocket envelope using stickers and rubber stamps.
I hope this has inspired you to turn your own paper scraps from "blah to TADA!"
If you'd like more crafty ideas delivered to your inbox, please subscribe here.


