
Howdy Friends!

This week on blah to TADA!,
there's a parade of pompoms.
It's been ages since I made pompoms
and I'm reviving this craft
because of these:

I have a bunch of empty ribbon spools.
They're perfect tools to make
pompoms.

First, gently detach the cardboard circles from the center. Then attach both circles together with hot glue to make a sturdy ring. Cut a slit on one end that goes all the way through the center hole.

Get some yarn and tightly wind it through the slit and around the ring. Just make a single row/layer so that the length of the yarn will be uniform all around the finished pompom. Once you have enough yarn {a little over half the size of the ring}, cut off the source of the yarn and tuck in the loose end.

Introduce a new piece of yarn. I'm using red yarn for demonstration purposes only; use the same color as the pompom you're making. Insert the new piece through the yarn on the ring.

The new piece of yarn should end up on the other end of the ring, parallel to the slit. Make a knot with the two ends, as tight as you can.
 With a sharp pair of scissors, cut against the yarn on the outer end of the ring. Cut all the way through.
Remember the knot you made? Make it tighter.
Then make a second knot.
Trim any excess yarn.
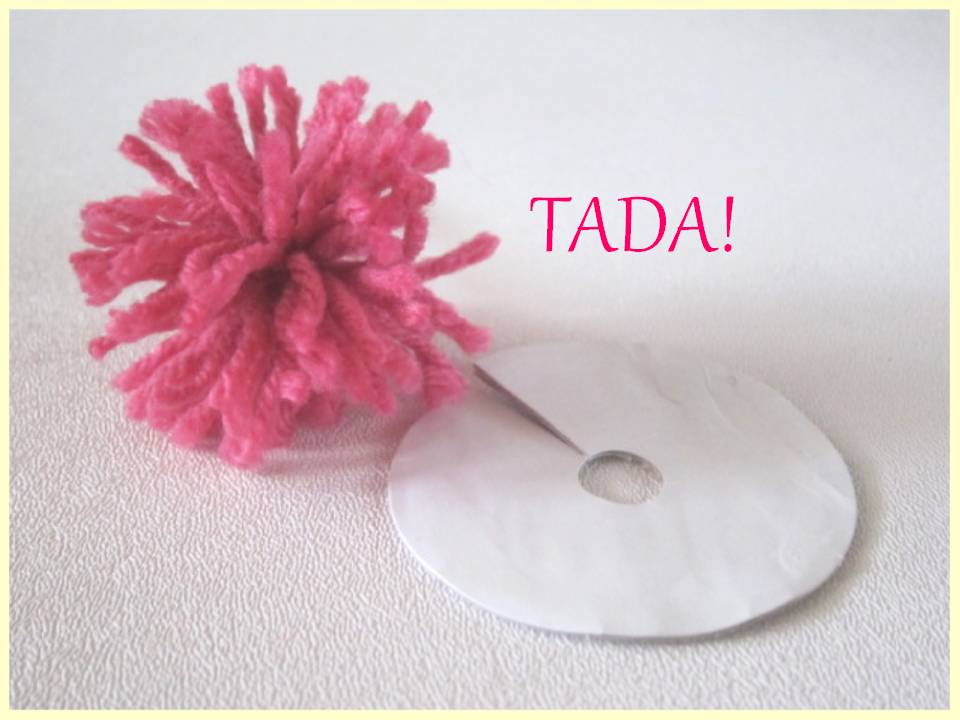
Release the pompom from the ring and fluff it up.

TADA! You made a pompom!

Attach it to a chain & now you have
an adorable keyring!
TADA!
Pom poms..haven't made those in years, Claire. Now I'm thinking of ways I could use them just so I can make them again:)
ReplyDeleteMy Mom used to knit slippers and each one had a pretty pom pom on it.
Good Monday morning Betty! I can only imagine how gorgeous your Mom's knit slippers are...wow! :)
ReplyDeleteYey! I love pompoms!
ReplyDeleteThanks Sooz! I think pompoms are making a come-back...just saw a few projects at Sweet Paul magazine :)
ReplyDeleteOh, this rocks!! And you rock for sharing it!
ReplyDeleteThank you!!!
Awww, thanks Maryann! :)
ReplyDeleteI love pom poms and all the projects you showcased this week. I think I might need to get a pom maker now.
ReplyDeleteThanks Melanie! I've seen many fancy pompom makers at craft shops but it's an easy DIY with cardboard :) Happy crafting!
ReplyDelete